(function(w,d,s,l,i){w[l]=w[l]||[];w[l].push({'gtm.start':new Date().getTime(),event:'gtm.js'});var f=d.getElementsByTagName(s)[0],j=d.createElement(s),dl=l!='dataLayer'?'&l='+l:'';j.async=!0;j.src='https://www.googletagmanager.com/gtm.js?id='+i+dl;f.parentNode.insertBefore(j,f)})(window,document,'script','dataLayer','GTM-WWBG94S') Photography Archives | Page 2 Of 11 | Graphics Cycle

Rule of Thirds | A Complete Guide for Beginners

Do you also want to create mind-blowing compositions? The rule of thirds allows you to achieve that goal with minimal effort. However, the rule of thirds is more like a guideline than a rule. It doesn’t mean that you can not break it.

Yes, you can think beyond the rule of thirds in some situations. And that is the most amazing thing about photography. You experiment with new ideas and settings to create authentic compositions.

Yet, the rule of thirds or the golden grid rule helps to get a perfect composition in most situations. That’s why beginner photographers must start with this guideline. It works as a foundation that allows you to build your skills in the field of photography.

However, the main secret of photography is how much bonding you have with your camera. That means how much practice you do to get the best result. You may not get the results at the first attempt. You have to build your relationship with the camera and have patience to capture the desired shots. This is how great photographers were born.

Let’s learn how you make the best of the golden grid rule in your photographs. 

What is the Rule of Thirds?

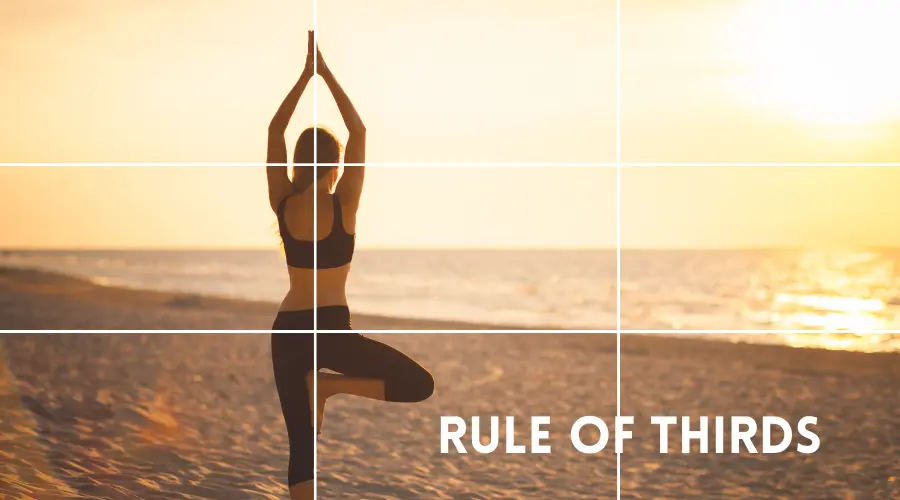
Rule of Thirds in Photography, Rule of Thirds

The rule of thirds in photography is also known as the golden grid rule. It is the most widely used and accepted compositional technique. Now only in photography, this technique is also famous in the other disciplines of visual arts.

The rule of thirds works as a guideline, using that you can arrange the elements in your photo. The purpose of using this tool is to create eye-pleasing compositions.

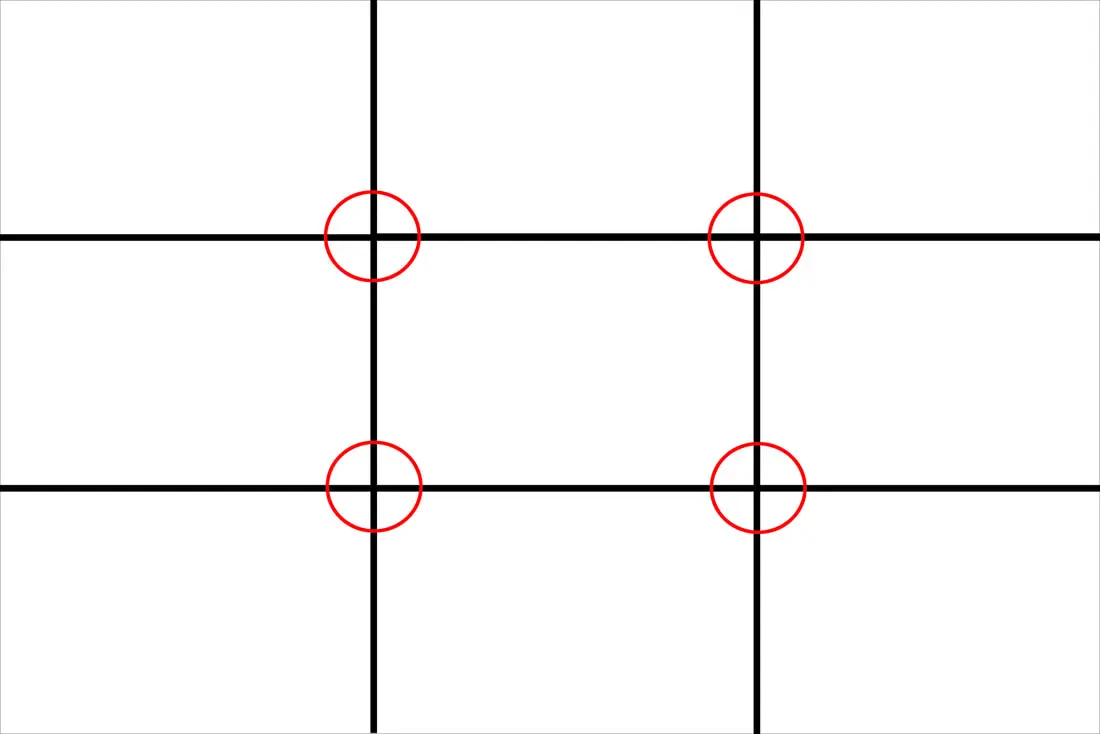
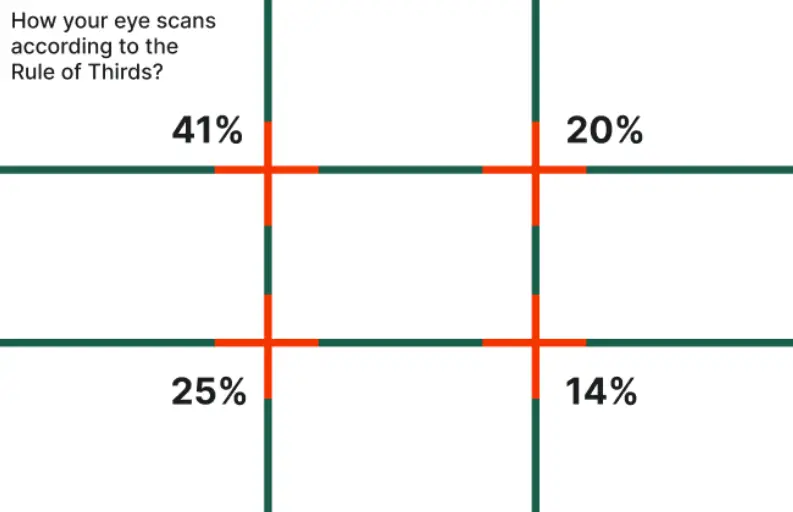
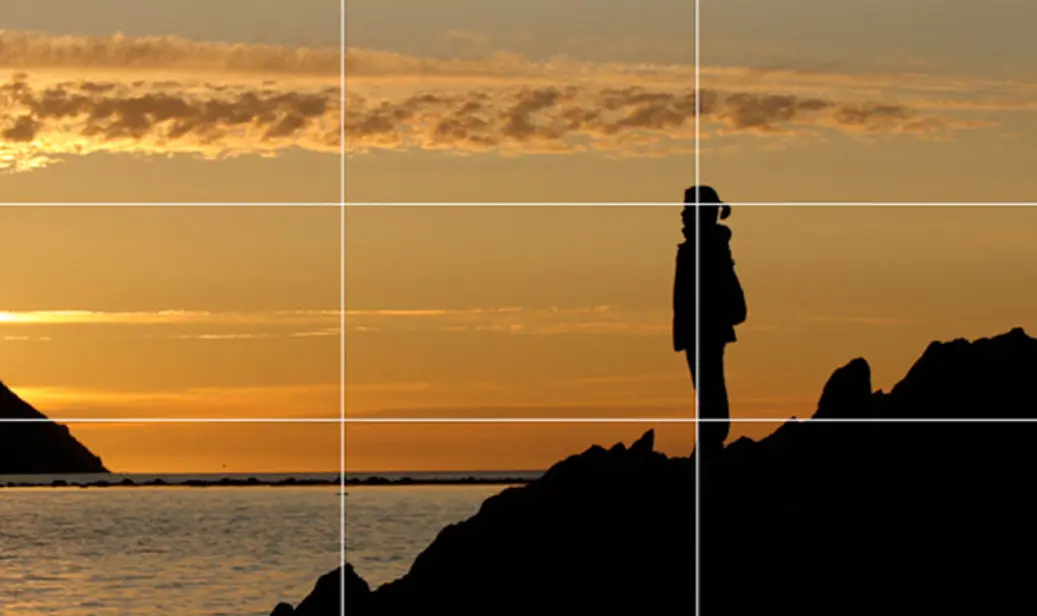
There are two horizontal lines. They get intersected by the two vertical lines. As a result, we get a grid of nine equal squares. The key spots are the four intersection points.

Usually, we place our subject right in the center of the frame. But the rule of thirds suggests placing your main subject on one of these four points. Placing the subject off-center may seem an odd idea. But it creates a more natural and engaging composition. The negative space in the photo complements your subject.

Why Is It Important?

Learning the rule of thirds grids is important for several reasons. The first one is creating balance in the photo. Placing your subject off-center creates a more natural tension. Thus it helps avoid a static composition and create a dynamic and engaging composition.

This method is also important in leading the eye. It helps to guide the viewer’s eye around the photo. So, place the leading lines like roads or fences along the gridlines or intersections. It draws attention to your subject.

Again the rules of thirds create a negative space. It is the space around the subject. This negative space works as a breathing space for the subject making the photo more balanced and harmonic.

Meanwhile, a centered focused subject can often feel cluttered by background elements. So, placing it off-center allows us to get rid of that issue.

Finally, this technique is easier to grasp by beginners. It offers a clear and simple guideline to follow. Thus you can think about composition and avoid placing your subject in boring positions.

Understanding the Rule of Thirds Grid

Let’s dive deep into this topic. Here we are going to learn about the rules of thirds in detail. 

A. The Grid

Rule of Thirds Grid

First, we have to understand the girds that appear on the camera screen. Most modern cameras and smartphones have a built-in grid overlay. All you need is to enable it from your camera settings

However, you can use your imagination if your camera doesn’t have a grid overlay. Also, you can create your overlay using transparent film and markers.

I have already told you that there are 9 squares in the golden grid rules. These squares are made of two horizontal and two vertical lines.  

B. The Intersection Points

The Intersection Points, Rule of Thirds

Then comes the intersection points of the horizontal and vertical lines. There the key areas of the grid lie. You will get 4 intersection points in the 8 squares. You have to place your main subject or a point of interest, on one of these four intersection points. 

C. Beyond the Intersections

Though the intersections are the main point of interest, you can place your subject on one of the horizontal or vertical lines. Positioning subjects or elements along these lines also helps create a balanced composition. For example, placing a person walking down a path along the bottom horizontal line creates a sense of movement and journey.

D. Remember, it’s a Visualization Tool

The grids are just a visual aid to help you arrange the elements in your frame. Once you understand the concept, you can use the rule of thirds to compose your shots even without the grid overlay.

Applying the Rule of Thirds

Now it is time to apply the rule of thirds accurately to capture authentic compositions. 

First, we have to start with positioning the Subject. This is the main application. Your main subject has to be placed within the frame. 

Now, you have put the subject on one of the four intersection points of the rule of thirds grid. This is the secret of creating a more engaging composition. If you are taking the portraits, consider placing the subject’s eyes on the top intersection point. Thus you can draw the viewer’s attention to their gaze.

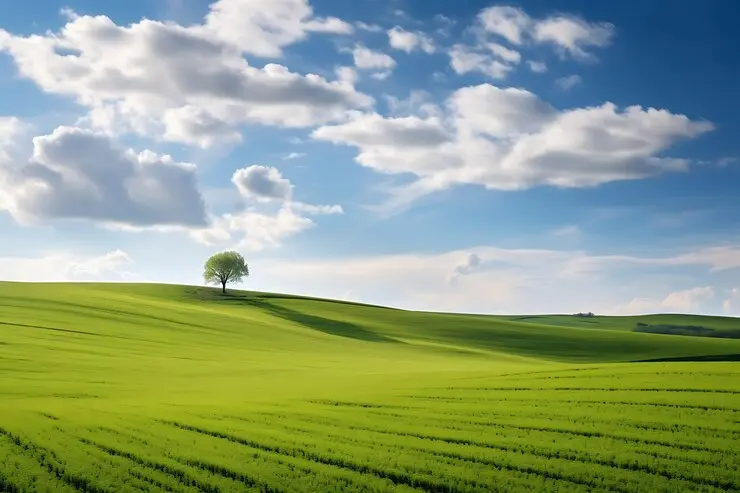
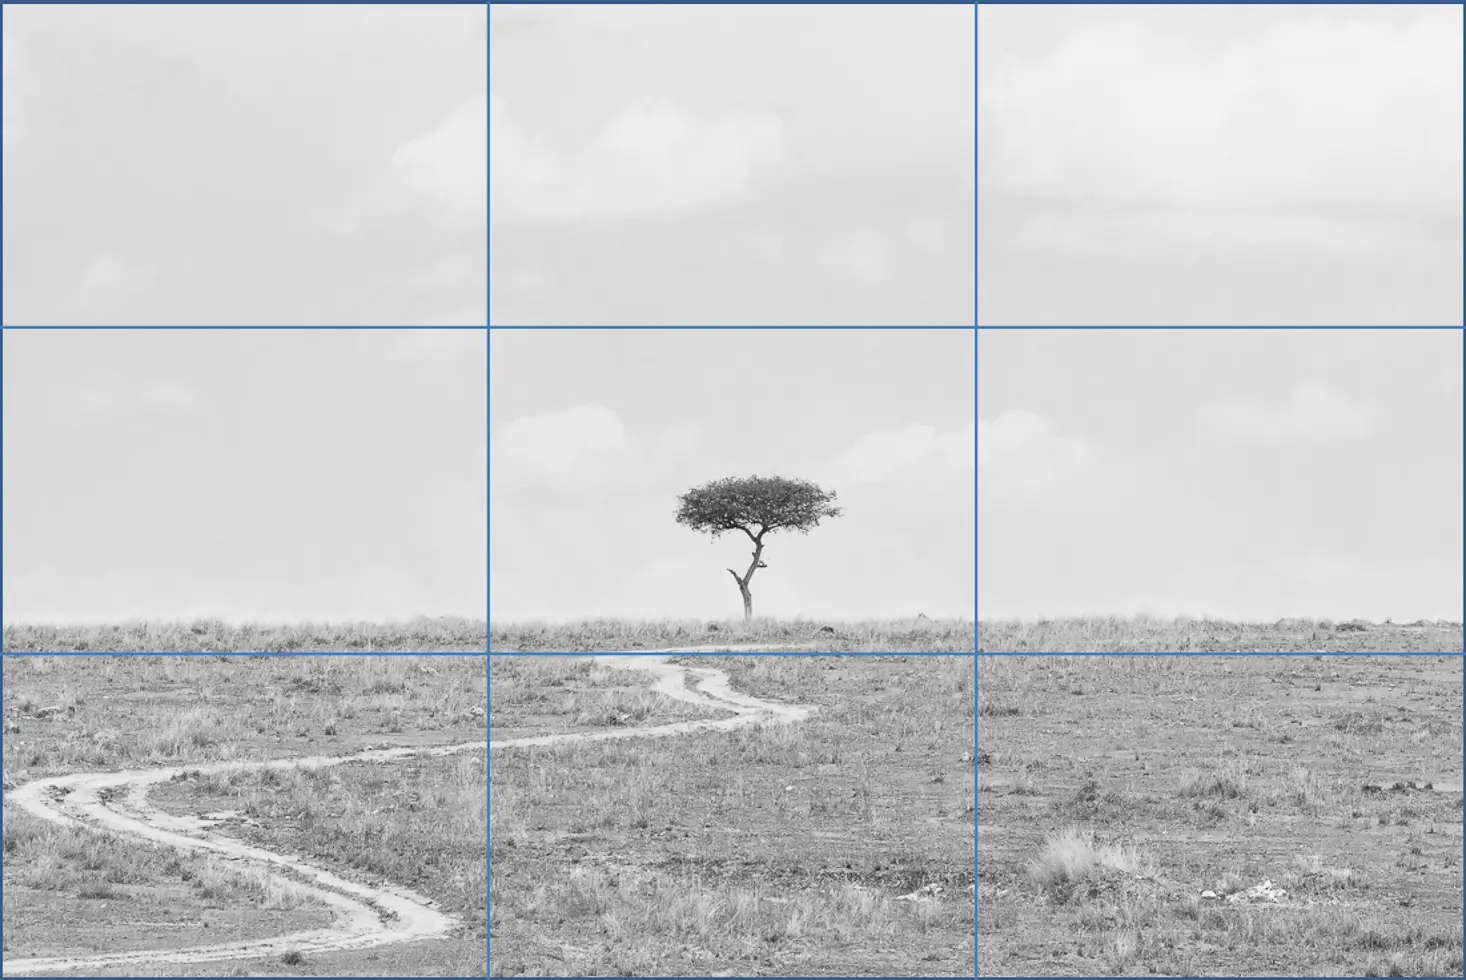
The second application of this rule is capturing the Horizons and Landscapes. Don’t just place the horizon line directly in the middle of the frame. Instead, use the top or bottom third of the grid to position the horizon.

In this way, you can create a more dynamic composition, It focuses on the foreground or sky depending on your choice. If there is a vast sky, you can place the horizon line on the bottom third. It allows us to showcase the sky’s drama. 

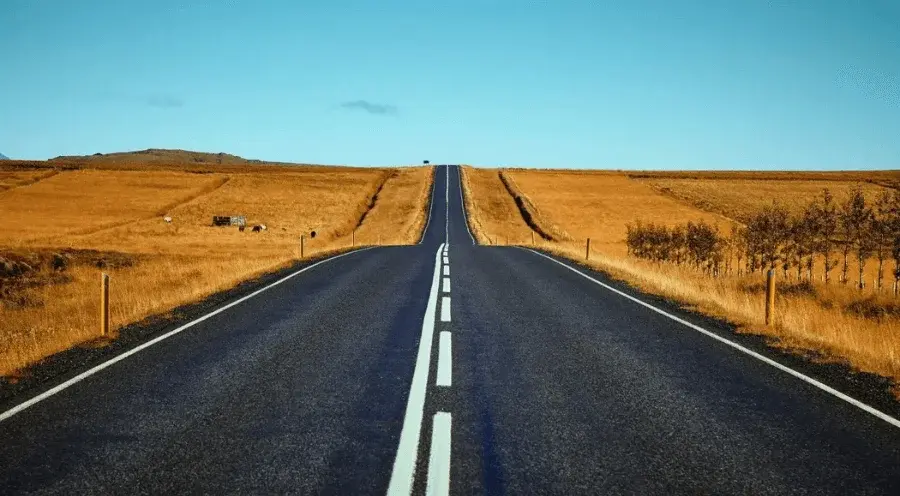
Now it is time to place the leading lines in the right position. Leading lines draw the viewer’s eye into the photo. These can be roads, fences, rivers, or any element with a strong linear direction. Position leading lines along the grid lines. Thus you can naturally guide the viewer’s eye towards your main subject placed on another intersection point.

Advanced Techniques of Rule of Thirds

Let’s learn about the advanced technique of using the golden grid rules.

The golden grid rules work for creating eye-soothing composts by applying minimal effort. Now you know the basics of these methods so we are going to dive into the advanced techniques to take your compositions to the next level. 

Golden grid rules

Off-Center Placement with Tension

The rule of thirds suggests placing your subject on the intersections. However, you can create a mystery by placing it slightly off-center. Position your subject just outside an intersection point. It will help create a feeling that it’s about to enter or leave the frame.

Diagonals for Dynamism

Diagonals for Dynamism

Straight lines create a balance in the photo. But diagonals can introduce dynamism and movement into your composition. So, place your subject along a diagonal line. You can also use the leading lines that run diagonally across the frame. It will create a more dynamic and engaging image. 

Negative Space as a Tool

Negative space is crucial in the rule of thirds

The negative space plays an important role in the rule of thirds. You can use this space more creatively to create advanced compositions. Moreover, the negative space makes your subject isolated from the surroundings. As a result, it creates a minimalist look. 

Combining Rule of Thirds with Other Rules

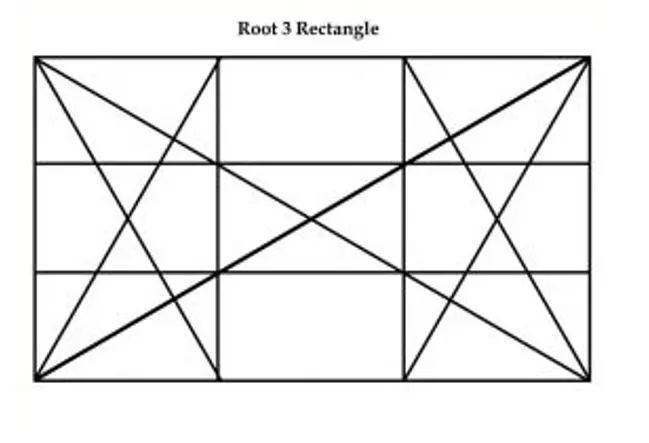
Well, this is not the only compositional guideline in the world of photography. Experiment by combining it with other rules like leading lines, the golden ratio, or the use of foreground, midground, and background. Thus you can bring more depth making it more interesting. 
When to Break the Rule

Yes, the rules of third are a fantastic guide for composing well-balanced photos. But it’s not a strict rule. It is a guideline that you have to follow to create an interesting composition. Photography is about experimenting. Some situations demand breaking the rules to create more impactful images. 

Centered Subjects

Centered Subjects

Some subjects require to be placed in the center of the frame. Especially for the symmetrical subjects. We need to place them in the centering position to create a balanced photo. A perfectly centered reflection in water or a building with symmetrical architecture might benefit from a centered placement.

Moreover, we have to center a subject to give it the most importance in the frame. A single flower in a minimalist composition can gain impact by being centered. Additionally, centering a subject can evoke a sense of power. It is useful for portraits and photos of historical monuments.

Leading Lines 

Leading Lines

Sometimes, the strongest leading lines might not fall on the rule of thirds intersections. In this situation, all you need is to trust your eyes. Place them where they create the strongest visual flow.

Again the rule of thirds does not work in some cases. For example, a photojournalist capturing a breaking news event might not have the luxury of composing perfectly balanced shots.

Finally, photography is an art form. If you have a strong artistic vision for your photo and it requires breaking the rule of thirds, go for it! Experimentation and creativity are important for developing your unique style.

FAQ | Rule of Thirds

How Do You Get the Rule of Thirds On A Camera?

Almost all modern cameras and smartphones have this feature. they enable a grid overlay within the camera’s viewfinder or live preview on the screen. In the camera settings, you will get the option to show the grids. Then enable it and apply them while capturing the photos.

What is the Golden Ratio in Photography?

The golden ratio or phi (Φ) is a mathematical proportion of roughly 1.618 to 1. We find this golden ratio in nature. The artist and the photographers use this concept as a compositional tool. It is similar to the rule of thirds, but it offers a slightly different approach.

Checkout Our Latest Articles

Final Thoughts

The rule of third is the basics photography techniques. Wherever you go for learning photography, the first lesson you will get is how to use the girds. And for beginners, this is a great point to start. You can create more realistic compositions by applying this technique. 

It’s a simple yet powerful guideline that helps you arrange elements in your frame. Thus you will get more balanced, interesting, and appealing photos.

Here you have got an insight into this topic. We have tried to explain the fundamentals of this rule, its key points, and how to position your subject, horizons, and leading lines. 

The motto was to help you take your photography to the next level.  However, it is just a starting point. Explore advanced techniques like off-center placement, diagonals, and creative use of negative space. 

Finally, do not be afraid of breaking the rules. Try to create more artistic photos even if it requires breaking the rules. Try to experiment with new ideas and do not think about the result. Practice more and more to build your skills. Thus one day you will also become an expert photographer. 

Show your love

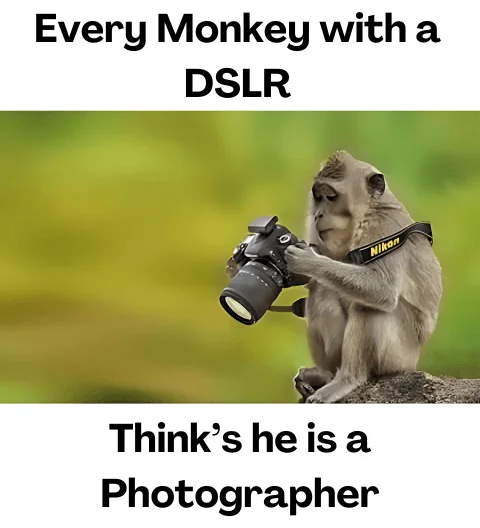
18 Best Funny Photography Memes You Need To See

Funny Photography Memes, Photography Memes

The world of photography is vast. There are advantages and disadvantages to photography. Similarly, a lot of things happen with the photographers. All these things create a world of humor. These memes bond the photographers as well as the viewers over their shared experiences. Here are the 18 funny photography memes that turned frustrations into laugh-out-loud moments. 

How Can You Create Your Photography Memes?

Creating photography memes is easy if you know the tricks behind it. For a winning meme, the picture and words must work together!

A strong connection will make the meme funnier and more relatable to other photographers. Then keep your meme short. You do not need to write a paragraph to describe a funny moment in the memes. People scroll quickly online, so your meme needs to grab attention fast. 

Then comes the most important part, “humor”. The best funny photography meme uses humor to capture the funny side. So, use catchy captions that people can easily connect with. Eye-catching images play a role in grabbing attention. Again, it has to be relevant. You can start with the popular meme templates.

Then focus on your audiences. Consider who you’re trying to reach with your meme. Spreading like wildfire! Memes are a fast and effective way to connect with a large audience. So, use them wisely. Finally, Avoid offensive humor or inside jokes. Keep it lighthearted and relatable to a broad range of photographers.

What are the Resources I Need to Create Photography Memes?

Now we are moving towards a more technical part. To create photography memes, you need a few essential resources. Let’s learn about them: 

A. Photographs

This is the first thing that you will need. You can use your captured photos. If they are not available, you can use the stock photos. There are a lot of free or stock photo websites available. You can find high-quality images. 

Some Popular Sites Include:

  • Unsplash
  • Pexels
  • Pixabay
  • Shutterstock (paid)

B. Meme Creation Tools

Expert photo editing skills give you a head start in creating hilarious memes! You can mobile or desktop photo editing software like Canva, Photoshop, PicsArt, and Gimp.  Moreover, some websites offer quick meme-generation services. You can also use them. 

  • Imgflip Meme Generator
  • MemeGenerator.net
  • Kapwing

C. Text Resources

Then you will need the text resources. Use appropriate fonts like Impact or Arial Bold. Most meme generators and graphic design tools include these fonts by default. Get inspiration from the popular memes. These will help you create a catchy caption. 

18 Best Funny Photography Memes for You

Here we have created 18 ideas for you.  Let’s see how we have developed these meme ideas.

01. When You’re Out of Ideas

When You're Out of Ideas, Photography Memes

You have worked the whole day to capture a beautiful shot but it is not happening. This situation is so frustrating. Here you can use the image where a photographer staring blankly at their camera.

02. The Perfect Shot

The Perfect Shot, Best Photography Memes

A photographer has put his everything to capture a perfect shot. You can use the image of a photographer who is lying on the ground, awkwardly contorted to get a unique angle. Captions like “When you do whatever it takes for the perfect shot” can also be an option for this meme.

03. Editing Struggles

Editing Struggles Meme, Photography Memes

Editing has been a problem for the photographers. Still, they need to do some editing before delivering the photos to the clients. You can use an image on a computer screen filled with editing software and a tired photographer in front of it. The caption can be “When you spend hours editing and it still doesn’t look right.”

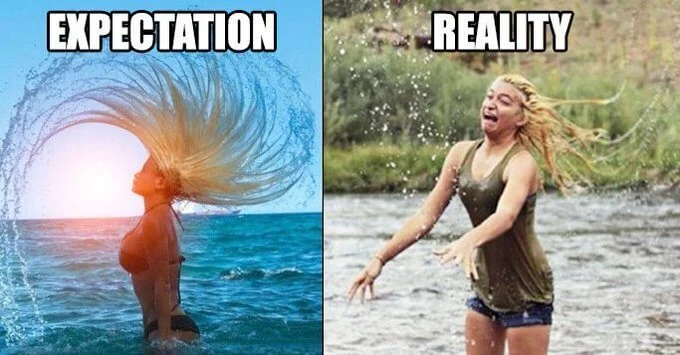
04. Model Expectations vs. Reality

Model Expectations vs. Reality Meme

This is another issue that most of the photographers usually face. They expect their models in a condition but find them in another condition. Thus it affects the planned photography set up.

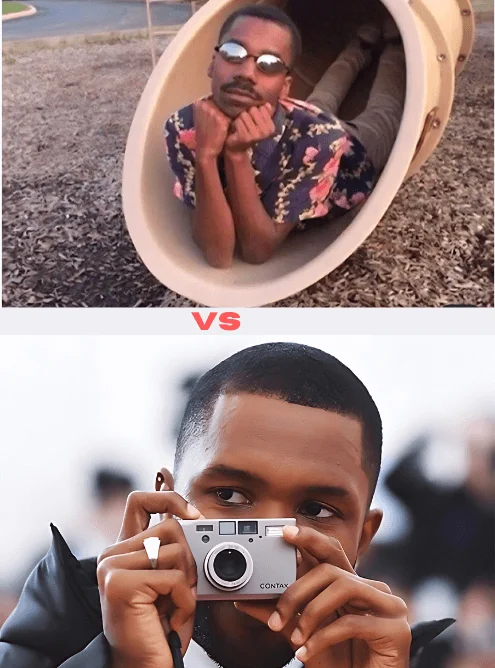
You can use an image of a professional model posing gracefully vs. a friend looking awkward in a similar pose. The caption can be like this, “Expectations vs. Reality in a photoshoot.”

05. Gear Acquisition Syndrome

Gear Acquisition Syndrome, Photography Memes

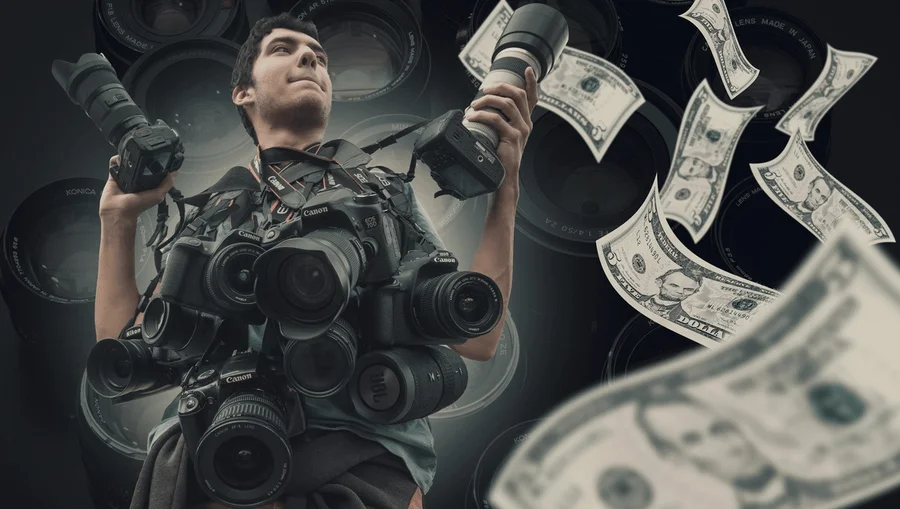
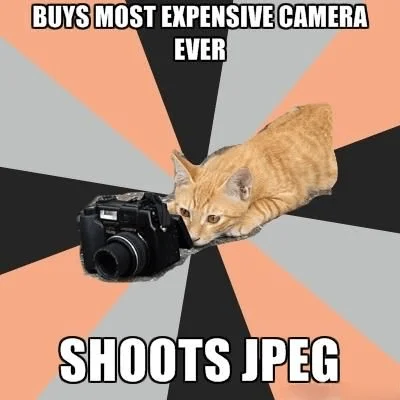
We understand that photographers have a love for their gear. And they want to get the new gears to take more elegant shots. But when you have so many gears it becomes a sweet problem.

You can use a meme template where a photographer is surrounded by an excessive amount of camera gear. The perfect caption would be “You can never have too much gear. Said no wallet ever.”

06. Low Battery Panic

Low Battery Panic Meme

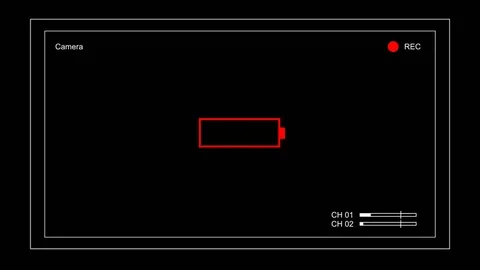
It happens with every photographer. Knowing a dead battery can ruin a shoot, most professional photographers carry backups. Still, the panic remains. If the camera gets shut down in a shot what will happen? 

Use an image where a photographer looking horrified at their camera shows a low battery warning. You can use this caption, “When your camera battery dies at the worst possible moment.”

07. Natural Light Lover

Natural Light Lover Memes, Funny Photography Memes

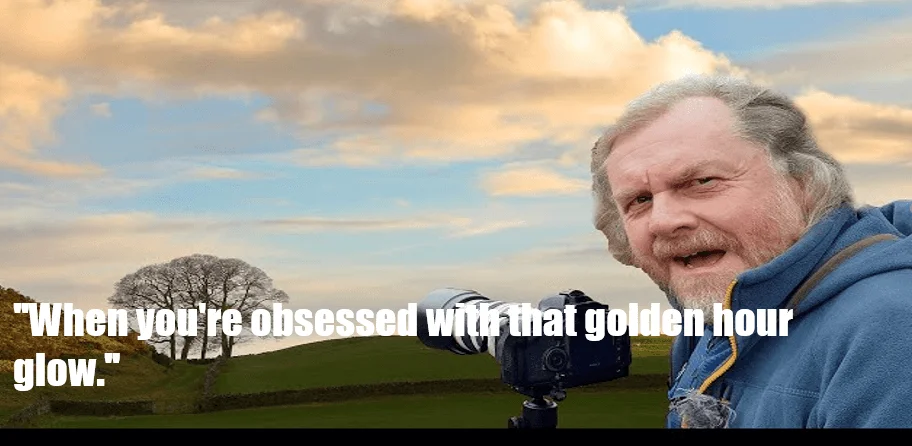
Expert photographers love manipulating natural light. Sometimes they need to show a lot of patience to capture the best natural light shot. Use an image like a photographer chasing the sunset with a camera. The caption can be, “When you’re obsessed with that golden hour glow.”

08. Social Media Pressure

Social Media Pressure Meme

Sharing your photos on social media is even more fun when you connect with your audience! Sometimes, this works as a pressure. Select an image of a photographer who anxiously checking their phone. Use captions like “When you post a photo and keep checking for likes.”

09. Weather Problems

Weather Problem Meme

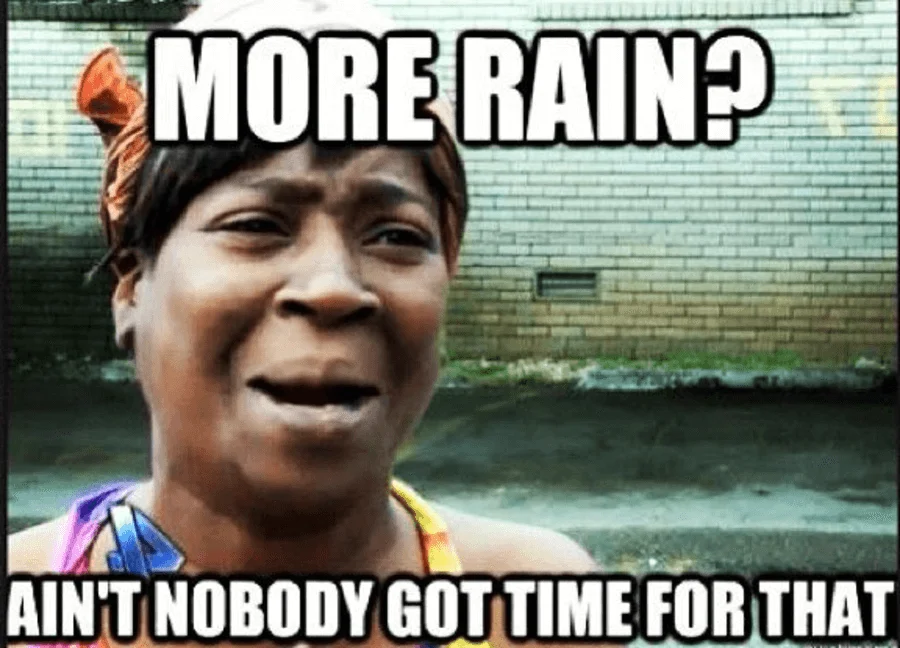
Photographers still face this challenge frequently. They prepared for a shot but the romantic rain may have appeared and did the most unromantic thing with him. Use an image where a photographer is drenched in rain trying to protect their camera. You can use this caption “When the weather app said sunny but you get caught in a storm.”

10. Photographer vs. Paparazzi

Photographer vs. Paparazzi, Photography Memes

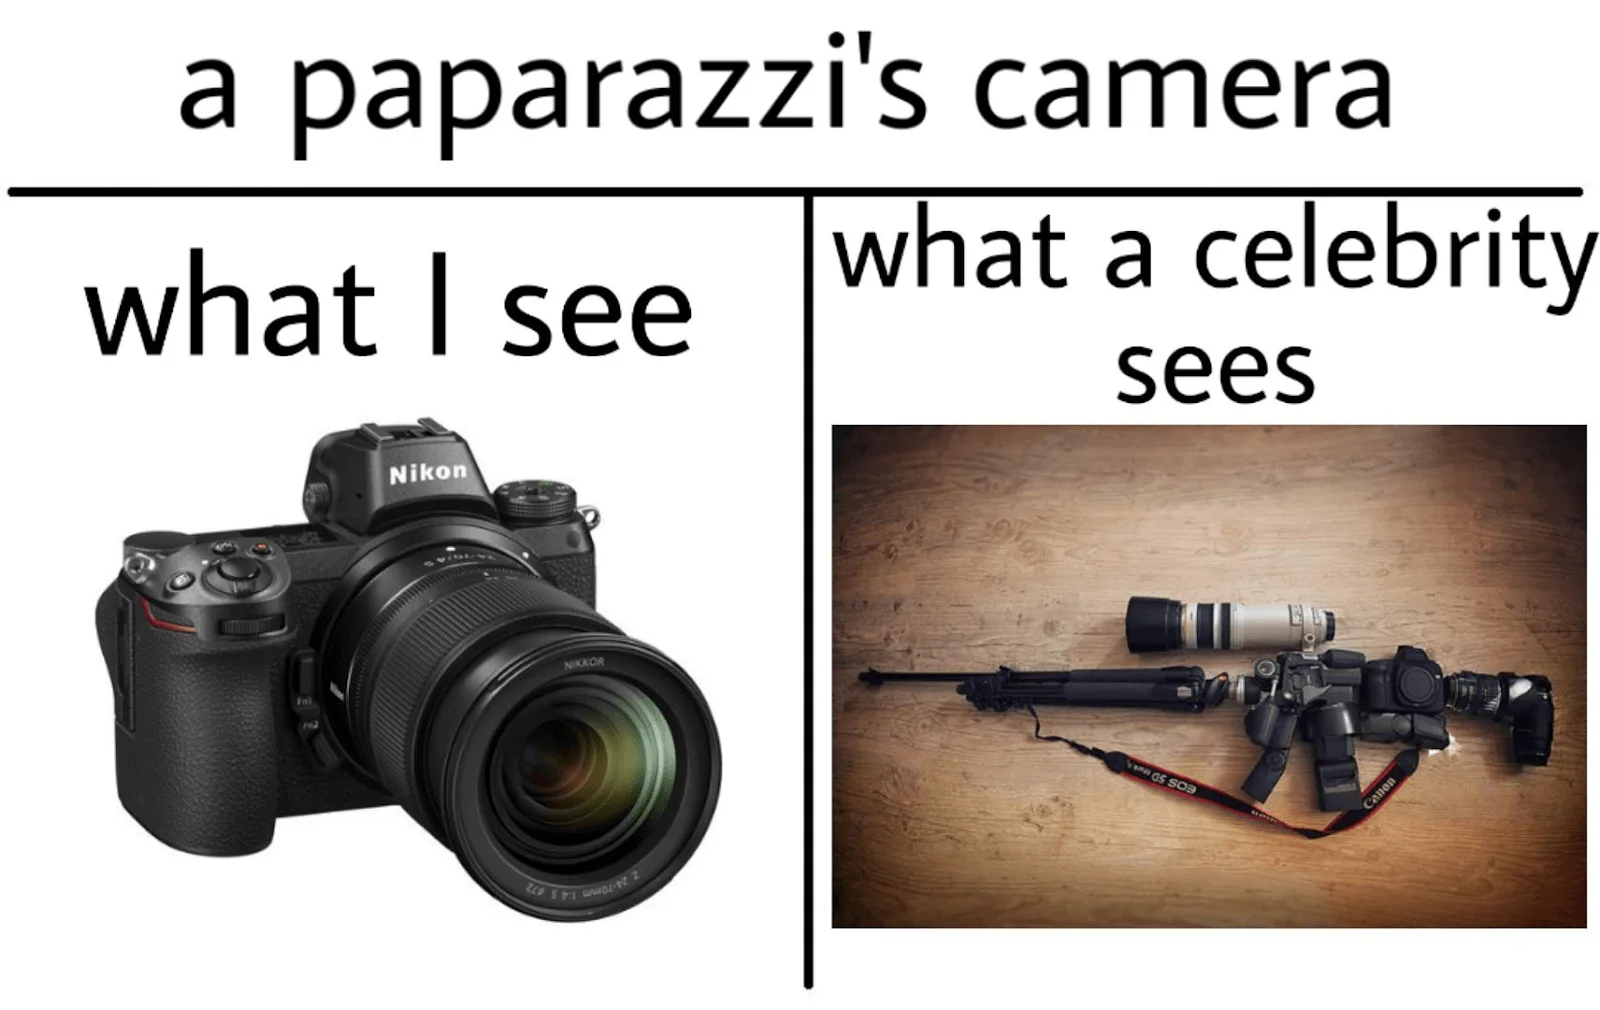
There is a distinct difference between a paparazzi and a photographer. The paparazzi play a most aggressive role. You can use this concept as a meme idea. The caption can be, “Me at a family event vs. me at a professional shoot.”

11. Animal Photography

Animal Photography Meme

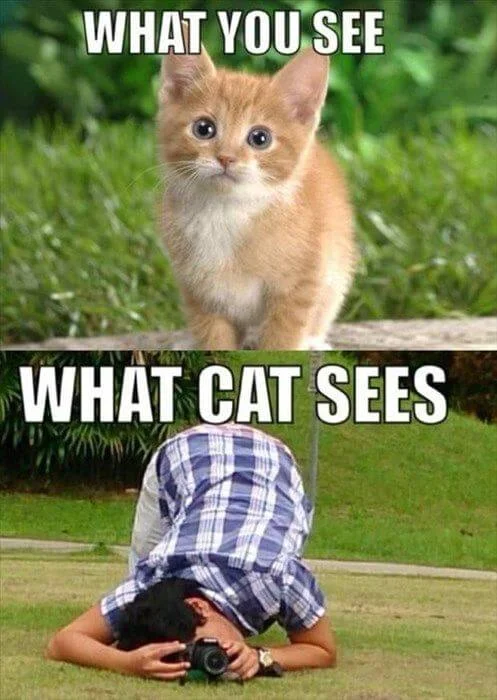
This meme is more suitable for a wildlife photographer. Using theme memes you can show their struggle funnily. You can choose an image where a cat or dog refuses to cooperate for a photo.

12. Memory Card Full

Memory Card Full, Photography Memes

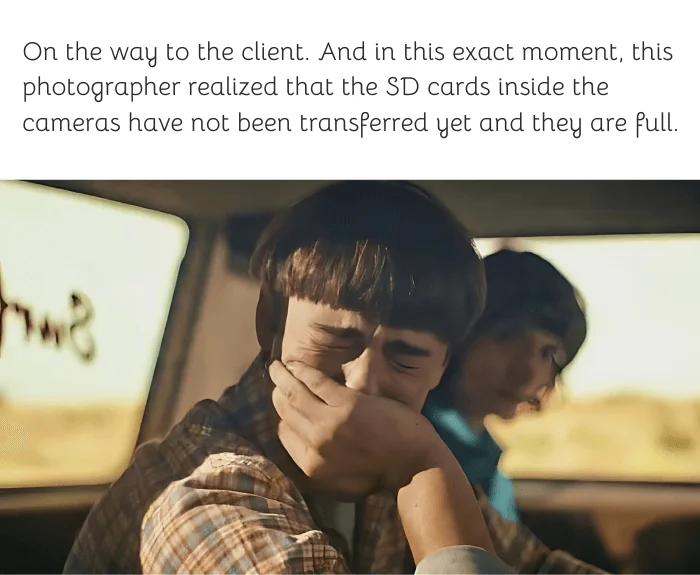
This is another issue that photographers frequently face. The memory card of your camera can run out anytime. It would be a shocking situation for the photographer. An image of a shocked photographer realizing their memory card is full. The caption will be “When your memory card is full, but the perfect moment just happened.”

13. Group Photo Chaos

Group Photo Chaos Meme

Someone in the photo might get outfocused or blurred. Also, chaos may happen with the positions of the models in the photo. Choose a chaotic group photo attempt with people looking in different directions. Use captions like “Trying to get everyone to look at the camera at the same time.”

14. Lens Envy

Lens Envy, Photography Memes

Using this meme you can show off your newly bought expensive lens. Use image like a photographer admiring another photographer’s expensive lens.

15. Candid Fail

Candid Fail Meme, Funniest Photography Meme

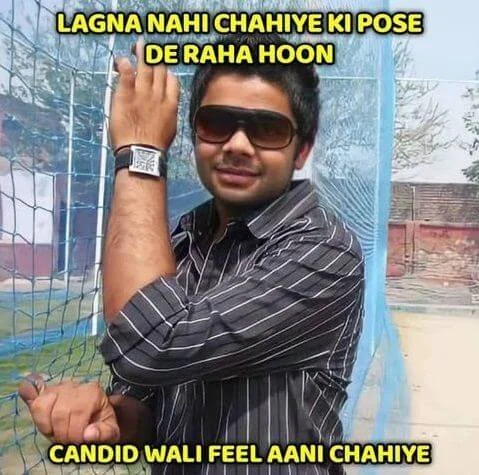
Some people post 20, 30, or even 100 photos at a time. Using this meme you can make fun of them. Use an image like a supposedly candid shot that looks posed. The caption can be, “When candid shots aren’t as candid as they seem.”

16. Photographer vs. Friends

Photographer vs. Friends Meme

You are a professional photographer and your friends are asking for the benefits. Also, you can show the similarities between you and their professions.

Use an image of friends taking selfies vs. a photographer with professional gear. You can use this caption “When your friends take selfies and you’re the professional photographer.”

17. Photographer’s Workout

Photographer’s Workout Meme

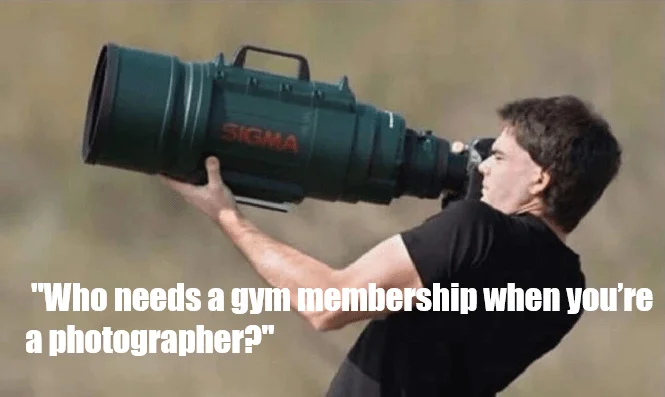
Another funny meme subject. Use an image where the Photographer is loaded down with gear, ready to capture the perfect shot. Then use a caption like, “Who needs a gym membership when you’re a photographer?”

18. Lens Cap Dilemma

Lens Cap Dilemma Meme

Use an image where a photographer looks confused while holding their camera with the lens cap still on. Then use the caption, “When you can’t figure out why your shots are all black… and then realize the lens cap is still on.”

10 More Exotic Captions | Funny Photography Memes

Meme generation is easy. But you need to right caption to provoke the concept. Here are the 10 captions for you: 

  1. “When you realize it’s Monday tomorrow.”
  2. “That moment when you walk into a room and forget why you came in.”
  3. “When you see your crush vs. when they see you.”
  4. “Me trying to get out of bed in the morning.”
  5. “When you find out there’s no Wi-Fi.”
  6. “When you realize you forgot to hit ‘Send’ on that important email.”
  7. “Me after five minutes of studying.”
  8. “When someone asks if you want dessert.”
  9. “When you pretend to understand what’s going on.”
  10. “When the pizza finally arrives.”

FAQ | Photography Memes

What are Alternatives to Photoshop?

Though Photoshop is a professional image editing program, there are a lot of software and online image editors. For example, you can use GIMP, Lightroom, Pixlr, etc to edit your images. 

What is the Easiest Way for Meme Generation? 

Online meme generators offer the easiest way to generate memes. They offer a lot of templates. You can choose one from those templates. Then place the text on them.

Checkout Our Latest Articles

Final Thoughts

Here I have tried to give you an insight into the world of meme generation. Here you have learned about the type of photography memes and the resources you need to pull out your idea. Finally, it depends on your creativity. So give your time to create the memes. Initially, it may seem a bit difficult. Keep practicing, and you can become an expert too!

If you need high-impact memes to promote your products, consider collaborating with a professional meme creation service. These services can create data-driven content that resonates with your audience and boosts engagement.

Show your love

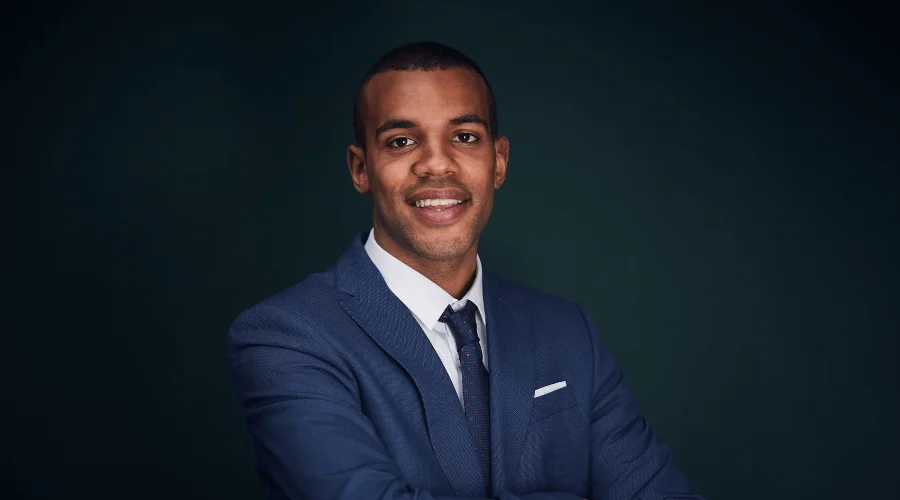
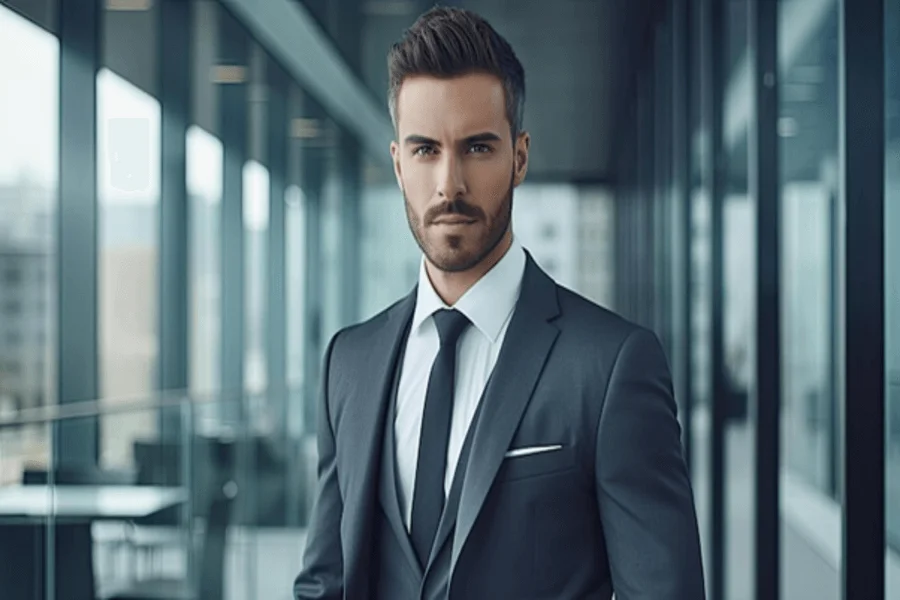
13 Best Men & Women Professional Headshot Examples

Professional Headshot Examples

In the professional world, the headshots in a CV give the first impression of the candidate. So, it has to be eye-catching and flawless. The professional headshot examples in this article will help you capture impressive headshots.

Your professional portraits or headshots work for you creating a first impression to the recruiters. A high-quality image can even build credibility. But what are the definitions of a professional headshot?

Is it only the photo where you have to be in formal dresses? Or is it like looking directly into the camera with a big smile or with a serious face and capturing only your head? Well, a headshot can be your brand. It has to be captured in a way that viewers can connect with you through the photo.

People are more likely to connect with someone who appears approachable and reliable. So, we have to be cautious about it while taking the photos. Considering all these facts we have discussed with the top-rated photographers and professionals of this genre.

Tips for Professional Business Headshot Pose

Professional Business Headshot Pose, Professional Headshot Examples

A professional headshot isn’t just about how you look; it’s about how you project yourself. When you are posing for professional business headshots a few things you must consider. Here are some tips for professional business headshot poses:

Body Language

Body language plays the most vital role in professional business headshots. You have to be confident in the photos to give viewers a positive impression of you. That’s why, avoid slouching forward. Again, most of them stand straight while posing for a headshot. But, a slight turn of the body creates a more dynamic and flattering pose.

Head and Expression

A slight head tilt adds personality to the photo. However, avoid tilting too far. Then make direct eye contact with the camera. It is the way to project confidence and engagement. A closed-mouth smile or a subtle smile conveys professionalism. Moreover, you can have a wider smile for creative and lifestyle corporate headshots.

Technical Tweaks for Top-notch Quality Headshots

Top-notch Quality Headshots

A professional headshot is more than just a snapshot. It’s a carefully crafted image that conveys confidence, competence, and approachability. Let’s start:

  • Lighting is King (or Queen): Harsh shadows are a headshot’s worst enemy. Opt for even, diffused lighting. A studio setting offers controlled lighting, but natural light can work wonders too. Find a well-lit spot outdoors or near a window, avoiding the midday sun for its harsh glare.
  • Background Bliss: A clean, clutter-free background is essential. Solid colors like white, grey, or blue are popular choices. Avoid busy patterns that compete with your face. Remember, the focus should be on you!
  • Sharpness is Key: A high-resolution image ensures crisp details. Whether you use a professional camera or your trusty smartphone, ensure good quality to avoid a blurry, unprofessional look.

Professional Headshot Photo Editing Tips

Professional Headshot

Photo editing is like a second chance to the photographers. They use photo editing techniques to remove the inconsistencies from the photos. Thus, the photo becomes so flawless. All modern photographers use photo editing techniques.

Even the great professional headshots examples received a photo editing treatment. It gives them the freedom to concentrate on the composition more than the beautification of the subjects.  There are a lot of photo editing techniques that a portrait photographer usually uses for editing portrait photos.

However, the main focus of portrait photo editing is to make the subject look flawless. That’s why the photo editors usually work on the beautification of the subjects. In the process, they remove blemishes, spots, and dust, fix skin tones, and correct the background and overall color of the photos.

However, do not over-edit the photo. Excessive editing can make the photo look unnatural. So, the goal is to enhance the features while still keeping them natural. For color correction of the image, fix the brightness, white balance, shadow, exposure, and contrast of the image.

You can use different photo editing programs to edit your photos. But the professionals love to use Adobe Photoshop to edit portrait photos. The Photoshop brush tool works amazingly for skin retouching. You can soften any blemishes or imperfections using the healing brush or clone stamp tool.

However, make sure that the texture doesn’t go off while editing. Otherwise, it will create a plastic appearance. Then work on the teeth and eyes of the subjects. You can use the dodge tool or clone stamp tool of Photoshop to lighten these areas.

Remove any unwanted object from the image. Use the crop and straighten tool to get rid of these elements. Also, you use the content aware fill of Photoshop. Thus, you can create perfectly looked professional headshots.

13 Best Men and Women Professional Headshot Examples

You will get several professional headshot examples by searching on Google. But all of these photos are not unique in style. Let’s learn about the top 13 trending professional headshot examples:

01. Arm Crossed | Professional Headshot Examples Female

Arm Crossed Headshot, Professional Headshot Examples

Though crossed-arm photos are generally not recommended as corporate photos, it has been getting popular in recent times. People are using the crossed arm professional headshots on their social media accounts.

You can use these photos as a cover or profile pictures on social media platforms. Additionally, freelancers use these photos to create promotional materials for their services.

02. Confident Gaze Looking Directly at The Camera

Confident Gaze Looking Directly at The Camera, Examples of Professional Headshots

It is one of the most popular professional headshot ideas. The model needs to maintain good posture for this photoshoot. So, keep the model’s shoulders back and relaxed, chin slightly lifted. The body angle can be straight or slightly turned. Keep the arms relaxed at the sides and make strong eye contact with the camera.

03. Leaning Slightly with A Warm Smile

Leaning Slightly with A Warm Smile, Professional Headshot Examples

In professional headshots, the photographers usually have very little scope to showcase the personality of the model. But this pose allows to portray a more approachable characteristic of the model. So, slightly lean towards the camera. Have a warm smile that reaches your eyes. It makes you more approachable.  

04. The Tech Entrepreneur

The Tech Entrepreneur Headshot, Professional Headshot Examples

The tech entrepreneur headshot pose is slightly different from the other corporate photoshoots. Here the subject will be in a more casual attire. You can use a laptop, tablet, or other electronic devices as props.  The tech entrepreneur headshots project authority and competence.

Make sure the background is neutral-colored or blurred. Keeps the focus on the model. The rule of thirds will help you to create a better composition.   

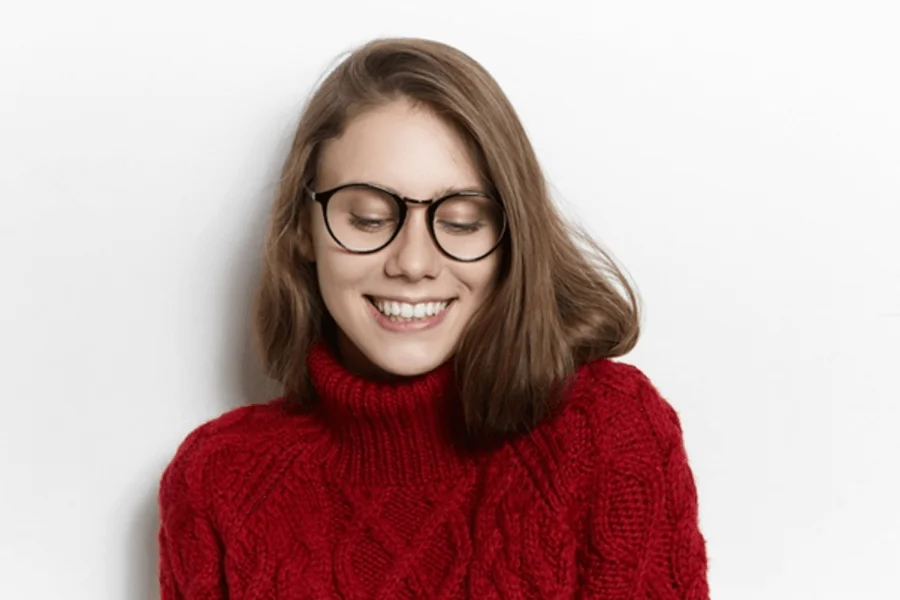
05. Glass-Wearing Portrait Shots

Glass-Wearing Portrait Shots, Female Professional Headshot Examples

Professional photos with glasses can be fun. But you have to ensure that the glasses don’t become a distraction. Also, ensure your eyes remain the center of focus. Clean your glasses with a lens cloth before the shoot. It will remove any dust. Additionally, you can wear glasses with an anti-reflective coating. Thus, you can minimize the glare from lights.

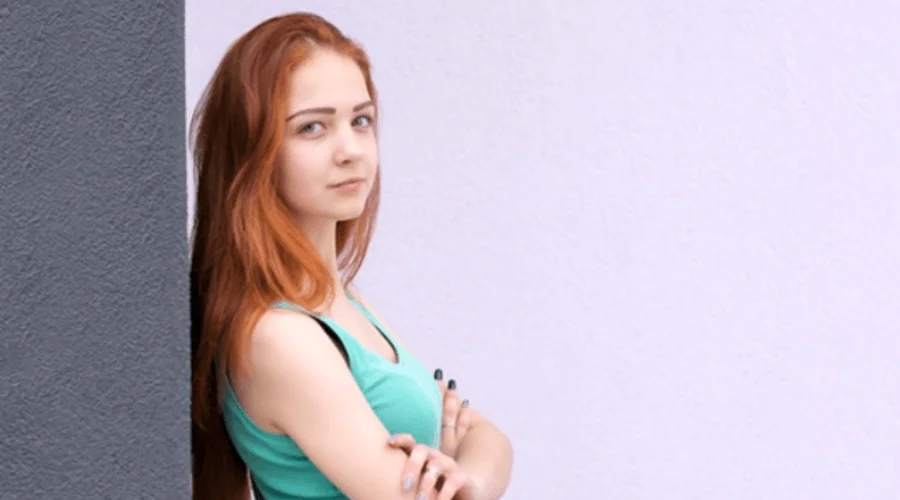
06. Lean Against a Wall

Lean Against a Wall, Professional Headshot Examples

It is another example of a professional headshot. Avoid an excessive lean. A slight leaning against the wall is sufficient. Also, ensure there are no distracting elements in the background, such as clutter or busy patterns.

07. Hand on the Hip With A Confident Posture

Hand on the Hip With A Confident Posture

The hand-on-hip pose is a classic headshot choice for the professional. This pose adds a fun element to professional headshots. Place one hand gently on your hip. However, you can experiment with different hand positioning.

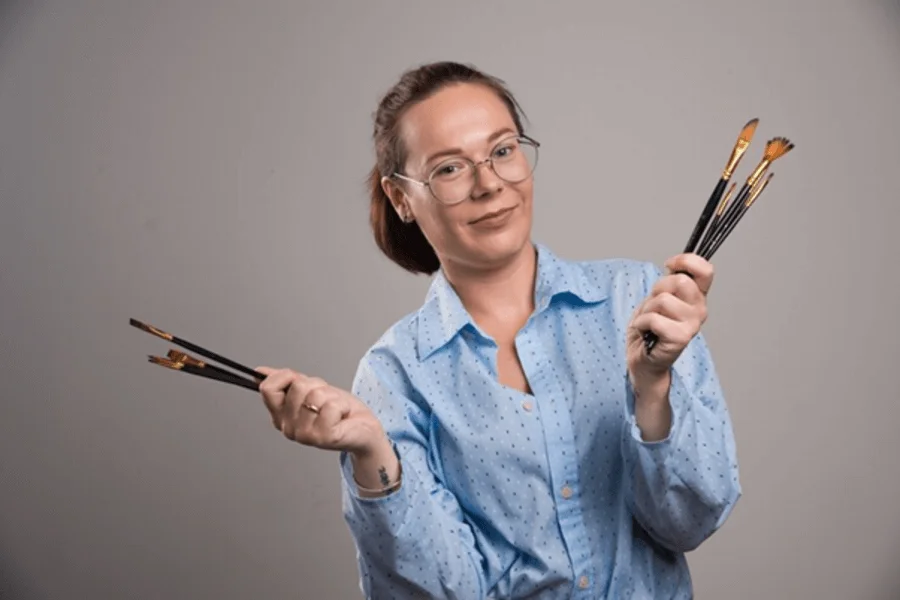
08. Artist In the Studio Holding a Paintbrush

Artist In the Studio Holding a Paintbrush, Professional Headshot Examples

This pose is for professional artists. It is a way to showcase your creativity and passion for art. Hold the brush handle close to your face. Wear more casual attire for this pose. You can make direct eye contact with the camera or look slightly off-camera for a mindful photo.

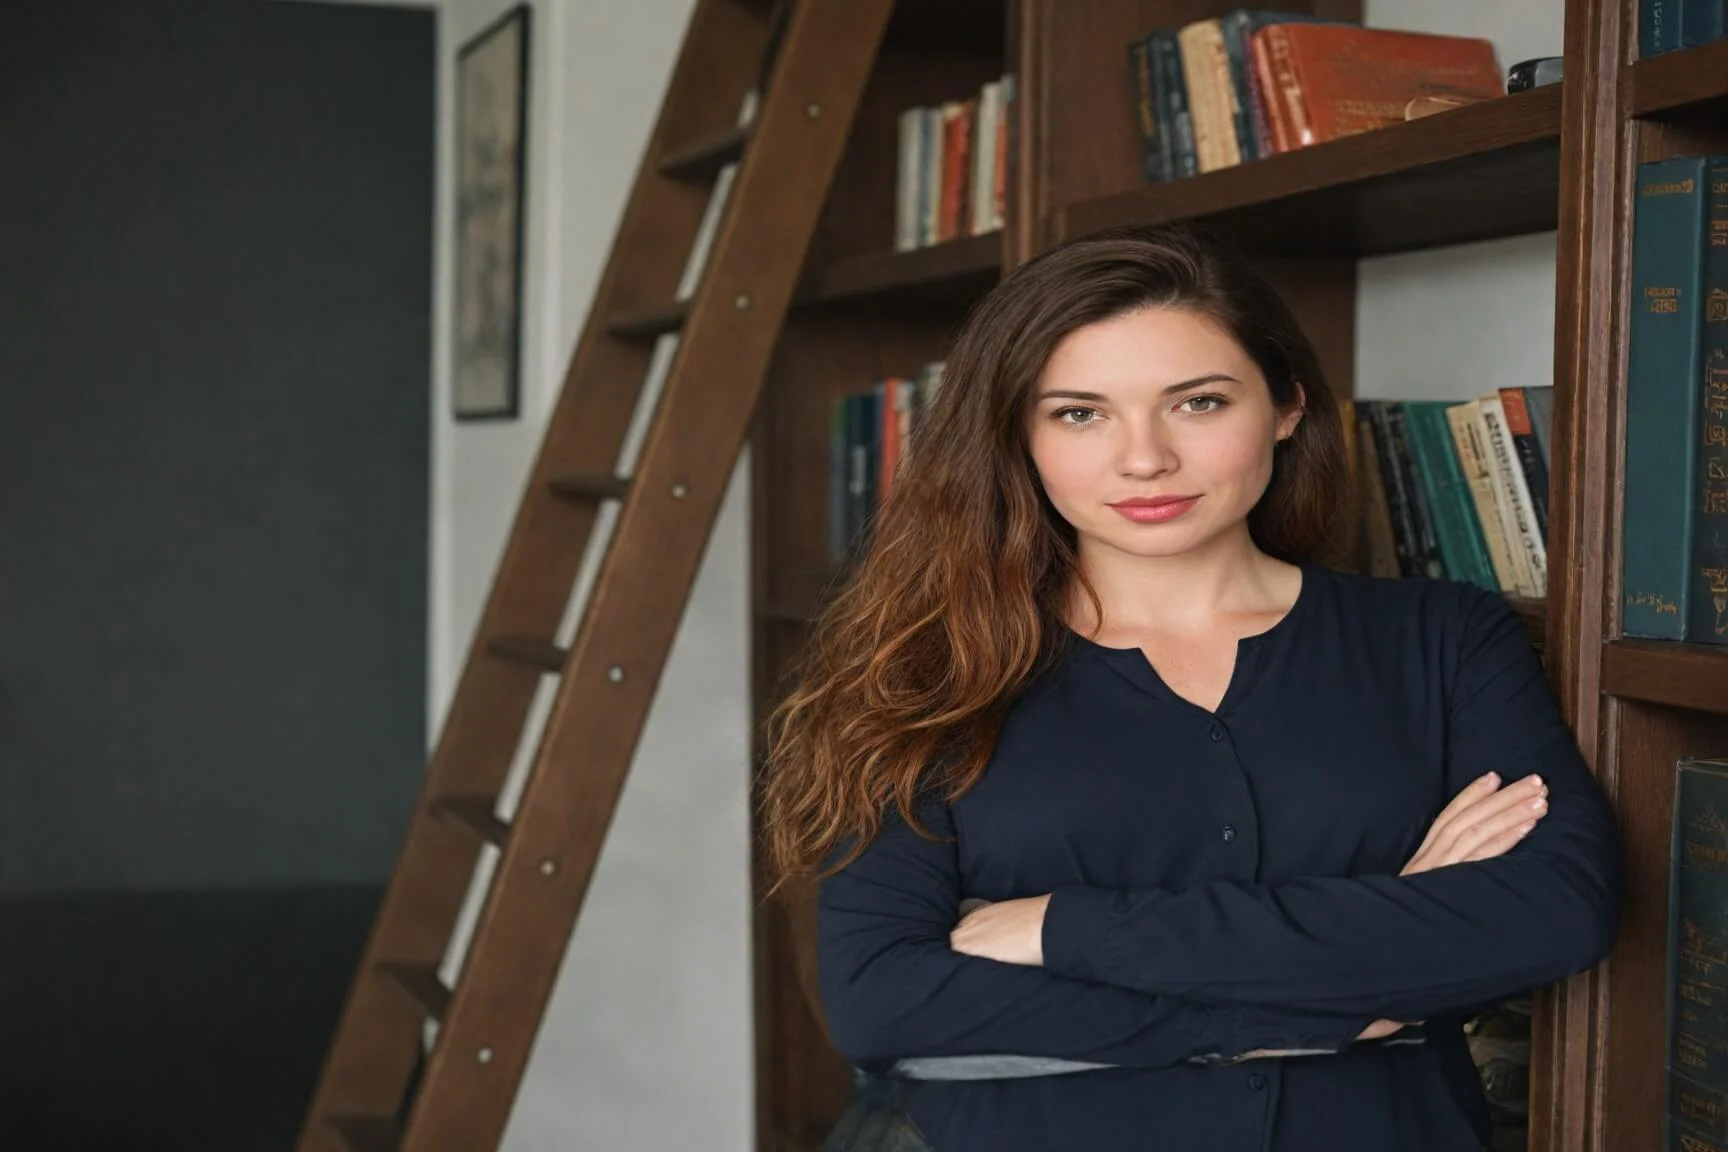
09. In Front of a Bookshelf

In Front of a Bookshelf, Professional Headshot Examples

Choose a bookshelf filled with books relevant to your profession. Ensure the books are neatly organized. The body angle should be slightly turned towards the camera. Moreover, you can pose by leaning slightly with one hand resting on the bookshelf.

10. Fitness Enthusiast Headshots

Fitness Enthusiast Headshots

Choose clothing that showcases the best definition of the mode. Action-oriented poses work best for this category. A genuine smile on the face of the model brings energy to the photo. For trainers specializing in specific areas, a determined expression can showcase focus and discipline.

11. Smiling With A Slight Head Tilt

Smiling With A Slight Head Tilt

It is a great professional headshot example for men and women. A good posture is also key to this headshot photography. Yet, the body angle can be around 15-30 degrees.

However, do not tilt your body or head too excessively. Tilt your head slightly to one side. Then have a gentle smile on your face. In this type of photo, the model will get the most focus.

12. Outdoor Headshots in Motion

Outdoor Headshots in Motion, Professional Headshot Examples

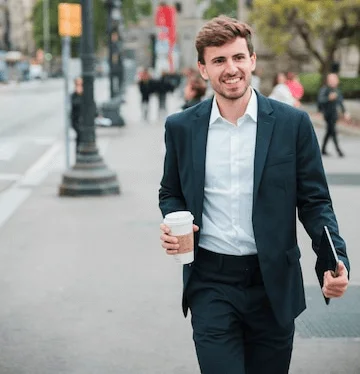
You can try this pose to create a more engaging image that sets you apart. So, engage in an activity that is related to the profession. Also, you can simply follow the example showing the photos.  So, wear your corporate look.

Then hold your coffee on one hand and a tab or a notebook on the other hand. Now capture the photo in a motion that you are walking to your office.

13. Relaxed Hands Headshot

Relaxed Hands Headshot, Professional Headshot Examples

A relaxed hand pose for the professional headshot is the most classic and safe option. Let your arms hang naturally at your sides with your hands slightly open or gently curled. You can slightly bend your elbows to prevent your arms from appearing rigid.

FAQ | Professional Headshot Examples

What is A Good Professional Headshot?

A good professional headshot shows your personality. Ensure the lighting is good and choose clothes that match the concept. Have a gentle smile on your face and ensure it doesn’t look unnatural.

Is A Selfie OK for A Headshot?

No, a selfie is not acceptable as a professional headshot. It has been captured by the rear camera.  

Can I Wear Makeup in A Headshot?

Yes, you can wear makeup for the headshots. Yet, ensure that the makeup looks natural. Excessive makeup can ruin the photo.

Don’t Miss Out

Final Thoughts | Professional Headshot Examples

So, these are the 13 professional headshot examples. You can follow these techniques to capture impressive professional portraits. Moreover, you can experiment with new ideas to explore this genre. Follow the experts in this field to understand their procedures for creating high-quality headshots.

Finally, the image editing methods are here to help you make the photos look flawless. However, a professional photo editing agency like Clipping World and Graphics Cycle can help you edit a bulk number of images. The company has experts in professional headshot editing. So, make an order now and get a discount based on it.

Show your love

15 Best Spooky Halloween Photoshoot Ideas in 2024

Best Spooky Halloween Photoshoot Ideas, Halloween Photoshoot

Halloween is a collection of traditions. These ceremonies have been celebrated over the centuries. The main theme of halloween photoshoot ideas is “darkness and scare”. People wear costumes to disguise themselves from evil spirits. So, costumes play the most important role in the Halloween photoshoot.

You have to choose costumes based on the theme of the photoshoot. Meanwhile, Halloween photography can be diverse and creative. So, do not hesitate to experiment with your ideas. Moreover, Halloween today is a secular holiday that’s mostly about fun and festivities. So, as a photographer, it becomes more challenging to create unique photos for the clients.  

That’s why we have come up with the 15 best halloween photography ideas. These themes will blow your mind. So, let’s begin the scary game. 

15 Halloween Photoshoot Ideas in 2024

Here are the 15 best halloween photoshoot ideas that you can try in 2024

1. The Classic Spooky Photoshoot

Classic Spooky Photoshoot, Halloween Photoshoot Ideas

Choose a dark and haunting location. The cemetery is a classic location for a spooky halloween photoshoot. You can create a set up of interesting tombstones and mausoleums using props.

Moreover, you can use an abandoned building or a moonlit forest. Search for the haunted houses in your town during Halloween. These houses have creepy decorations and special effects. You can capture spooky photos in these houses.

You can create a classic vampire look for this photoshoot. Use pointed plastic fangs and apply fake blood around the mouth. A fake bite mark will make things more spicy. 

Create fake scars with scar wax and makeup.  You can also use liquid latex to create raised stitches. Use red liquid lipstick and a fine-tipped brush to create jagged lines.  Add a touch of gloss for a wet, fresh wound effect (avoid replicating real injuries).

2. Witchy Vibes

Witchy Vibes, Halloween Photoshoot

It is one of the famous halloween photoshoot ideas. It creates a scary vibe. You need long hair and a flowing dress like a black gown for this photoshoot. Get accessories like a pointed hat, broomstick, a crystal ball, or a book of spells. These will add an extra layer to make the photo more conceptual. Then, go for whitish makeup on the face, smoky eyes, and dark lipstick.

A forest is a perfect location for a witchy photoshoot. Find a spot with tall trees, mossy rocks, and a winding path. Additionally, you can have props like Candles, Cauldron, Herbs, and Spices. Pose like you are casting a spell. Sit on the ground with your legs crossed and holding candles or other props in your hand.

3. Maleficent Look

Maleficent Look, Halloween Photoshoot

Maleficent look Halloween photo is getting famous these days. The make-up artists play the most critical for this photoshoot. Maleficent, the Mistress of All Evil, offers a compelling blend of dark magic. However, the Maleficent has another side, and it is love and affection. 

Maleficent’s signature is a long, flowing black gown. The matte fabric creates a more original vibe. You will need a high slit, dramatic sleeves, and a pointed collar. A pair of black, curved horns are essential. You can find pre-made horns online or in costume shops.

4. Include Pet 

Pet Halloween Photoshoot

Including your pet in the Halloween photos allows you to capture adorable moments and bond with your furry friend. If you have a cat, turn them into a mischievous witch’s companion. A pointy hat and a black cloak are all you need.

Then have your dog wear a white gown or black gown.  Then make it hold a pumpkin head bucket with its mouth. This theme will create a witchy vibe. Again, pets usually look their best in photos taken from their eye level. So, keep it in mind while taking pet photos.

5. Pumpkin and Baby

Pumpkin and Baby, Halloween photoshoot

Halloween photoshoots with babies are fun. You can create different styles with a halloween pumpkin head photoshoot. Take a pumpkin that is large enough to nestle your baby inside it. Then carve a scary expression in the pumpkin with the help of a knife. Dress the baby in a black gown with a long veil.  

Now put the baby inside the pumpkin and use dark light and some smoke behind the baby to create a dramatic environment.  Again you can take photos while your baby playing with the pumpkin. 

6. Couple in Pumpkin

Couple in Pumpkin, Halloween Photoshoot , Best Halloween Photoshoot Ideas

Pumpkin couple photoshoot is a trending Halloween photoshoot idea. This is simple and easy to execute. You need pumpkins that are large enough to fit your head. Crave scary expression in the Pumpkins.

You can do both playful and romantic pumpkin head poses to celebrate your Halloween. Wear matching outfits and accessories like scarves, hats, or jewelry for these halloween photoshoot ideas for couples.

7. The Vampire Couple

The Vampire Couple

The pale complexions are the base of the vampire photoshoot. Buy the vampire costume from the Halloween store. A hint of blood red around the lips or a small “bite mark” on the neck creates a vampiric danger. Stand close, gazing into each other’s eyes. Show your possessiveness and passion for your partner.

Try a vampiric kiss or pose for a bite on the neck of your partner. One partner gently bites the other’s neck, capturing the allure and danger of their love. 

8. Wedding in Halloween Costume

Wedding in Halloween Costume, Halloween Photoshoot

This is another popular Halloween couple photoshoot idea. You celebrate your wedding in Halloween style. Get a traditional Halloween costume. Also, you can wear scary masks in traditional wedding dresses. Skull painting on the face adds another dimension to this photoshoot. 

Hold your partner closely and opt for a kiss to create a romantic vibe for this Halloween-themed photoshoot. Use natural light for a soft and flattering look. Also, you can use artificial lighting sources to create a dramatic atmosphere. 

9. The Joker Look for the Boys

The Joker Look for the Boys

The Joker’s iconic villainy is popular among the boys. You can also take this concept for Halloween photography. If you can create this look by yourself, hire a professional makeup artist. Apply white foundation with an exaggerated smile.

The eyes have to be bold. Create dramatic eye makeup with dark green or purple eyeshadow and thick black eyeliner. Finally, use red lipstick to create an exaggerated smile. Choose a smoky background or a graffiti-covered alleyway for this photoshoot.  Use props like playing cards, fake weapons, or makeup kits. 

10. Apocalypse Aesthetic

Apocalypse Aesthetic, Halloween Photoshoot

The end of the world in your photography with this theme. Choose your location wisely for this photoshoot. However, there are a lot of scopes to add in the post-processing.

The deserted quarries, junkyards, or overgrown industrial sites are the locations you need for this photoshoot. Harsh sunlight will create realistic effects. Flickering light sources will also do that for you.

11. Levitating Photos

Levitating Photos

It is a fun and unique approach to Halloween photography. You can create the theme like a ghost floating or just floating like you are being passed. They choose a costume that goes with the concept. Then have a slower shutter speed like 1/2 second. Take a picture of the background without your subject.

Then position your subject in a levitating pose. Take a picture with your subject in position on the platform. Without moving the camera, take several additional photos of the scene with your subject holding the same pose but now without the platform. Now the rest depends on image editing. Photo Editing Company can help you with this.

12. Silhouettes

Silhouettes

The Silhouettes are always aesthetic. You can make haunting silhouettes for your Halloween photoshoot. The golden hour is the best time to create Silhouettes. The low angle of the sun creates a strong contrast between your subject and the background.
Classic Halloween costumes like witches, ghosts, vampires, or monsters work perfectly for silhouettes. These costumes have iconic shapes that’s why they are easily recognizable. 

13. The Frankenstein

The Frankenstein, Halloween Photoshoot

Mary Shelley’s Frankenstein is a haunting photoshoot idea. You will get the prosthetic mask at your local Halloween store. Create a costume that reflects the patchwork nature of the monster. Use mismatched clothing, uneven stitching, and prosthetics. 

14. The Zombie

The Zombie

“The zombie” is a classic Halloween photoshoot concept. The tattered clothing and pale makeup with exposed bone are the foundation for this photoshoot. Capture the vacant stare and slow, shambling movement of the undead.  Have your subjects pose with outstretched arms, dragging their feet, or reaching out for imaginary prey.

15. Underwater Horror

Underwater Horror, Halloween Photoshoot Ideas

Capture the feeling of underwater horror with a photo shoot in a pool. Use flowing fabrics, fake seaweed, and eerie lighting to create an unsettling atmosphere. 

Our Latest Articles

FAQ | Halloween Photoshoot Ideas

How to Do Color Correction of Halloween Photos? 

Well, the theme of Halloween photos is usually dark and eerie. So, when you adjust the color parameters, keep in mind that the color may not become too light or too dark. 

Do I Need a Professional Photographer? 

Yes, it is always a good choice to hire a professional photographer for Halloween photography. A professional photographer has a better idea about the camera and he knows to pull things up for this event. 

Final Thoughts | Best Spooky Halloween Photoshoot Ideas

So, these are the 15 most popular halloween photoshoot ideas. However, there is no limit to creativity. Experiment with these themes to create authentic Halloween photos. However, remember that the Halloween photograph depends largely on how the makeup is done. Creating eerie effects sometimes is difficult. 

In this regard, you can use photo editing software or photo editing services to create this dramatic effect. The Graphics Cycle is an expert in this field. The photo editors of this company know how to enhance the outlook of your photos. So, you just take the photos and tell the representative of Graphics Cycle to make it look according to your theme. 

Show your love

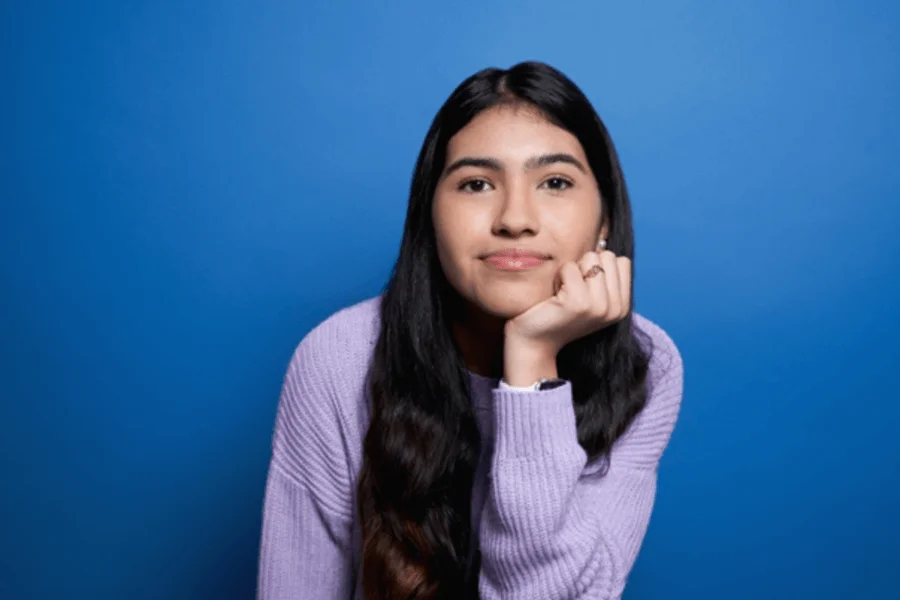
25 Best Graduation Photo Ideas for Sweet Memories Forever

Graduation Photo Ideas

The graduation day is special for every student. It is the day when we achieve our milestones.  The photos of this occasion will make us cherish this day for the rest of life. So, here are the best graduation photo ideas for you. 

Here you will get the 25 ideas for the senior graduation photos. So, if you are graduating from school, college, or university, these 25 photo ideas will make your graduation photos more fun, exciting, and stunning. 

25 Best Graduation Photo Ideas

Let’s see the top 25 to capture the best moments of your graduation day. My team conducted deep research to understand the ways young graduates love to take their photos and the trends of graduation photoshoots. Thus we have come up with this list for you. So, let’s begin. 

1. The Classic Cap Toss | Classic Graduation Pose

The Classic Cap Toss, Graduation Photo Ideas

The classic graduation pose is the cap tossing in the air. The cap tossing is a way to show your joy about getting a degree and stepping into the new world. So, wear the gown and go to an open space to throw the cap into the air. Have a wide smile on your face to show the pure elation of the moment. 

2. Thanking Your Teacher | Graduation Photo Ideas

Thanking Your Teacher, Fun Graduation Photo Ideas

Teachers guide us in achieving our graduation degree. So, the credit also goes to them for how they have guided us in the right direction. So, the graduation photoshoot with your favorite mentor and teacher is something that will be cherished for the rest of your life. Also, it can be one of the best graduation group photo ideas. 

Having the degree on your hand stand beside your teacher and pose with a gentle smile. Additionally, you can recreate a moment that happened in the classroom while wearing the gown and cap. 

3. Your Proud Family | Graduation Family Photo Ideas

Your Proud Family, Graduation Photo Ideas, Graduation Family Photo Ideas

Families are the greatest supporters of ourselves. On this special occasion, you must incorporate them in your photos to make this moment memorable. 

Here are a lot of graduation family photo ideas and styles you can follow to capture graduation photos with your family. But remember to show the family bonding in the photos. 

Capture special moments between you and each family member. This could be a warm hug with your parents, a celebratory high-five with siblings, or a beaming smile with grandparents.

4. In Front of School | Graduation Photoshoot Ideas

In Front of School, Master Graduation Photo Ideas

Show your school in your photos. Capture portraits in front of the main gate or your school/college. Get playful and pose with your school mascot (if available) in front of the school building.

This lighthearted pose creates a fun memory. Moreover, you can recreate the moment of the first day you enter the school premises. This pose showcases how far you’ve come.

5. Classroom Photo | Graduation Photo Ideas

Classroom Photo, Graduation Photo Ideas

The first-year classroom is where you start your graduation journey. Looking back to the moment makes us nostalgic and emotional. So, capture some photos in your classroom as well to remember the moment and your journey for the rest of your life. 

Sit at your desk, diploma in hand, surrounded by textbooks and school supplies. This pose showcases your academic achievements within the familiar classroom environment.

6. With Your Best Buddies | Friends Photoshoot

With Your Best Buddies

Friends are invaluable assets of this journey. The comrades of your academic journey with whom you have shared the notes and moments of joy must be in your graduation photos. Capture candids while gossiping, laughing, or doing your favorite activities.

Try for the fun graduation photo ideas with your besties. Wearing the traditional dress will make the photo more fun. For example, if you are an Indian Bengali girl, you can wear a saree with a grad cap on the head. 

7. When Playing Your Favorite Sport

Playing Your Favorite Sport, Graduation Photo Ideas

If you were a sports person in your school, this should be your go-to pose. It is a way to show your personality and energy in the photo. So, put on the grown and cap and pose like you are playing the game. Also, you can wear the team jersey and the gown on it. Then pose with football or other kits of your favorite sport. 

8. Receiving the Degree | Graduation Photos

Receiving the Degree

This is the most striking part of the whole ceremony. So, the photo you are receiving the degree from the faculty must be in your graduation photo album. Stand tall and proud in your graduation cap and gown.

A genuine smile of accomplishment is key! Well, do not directly look into the camera. The focus should be on the certificate being passed between you and your teacher.

9. Confetti Celebration | Graduation Group Photo Ideas

Confetti Celebration, Best Graduation Photo Ideas

A confetti celebration is a fun and festive way to celebrate your accomplishment. Toss the confetti high in the air with a big smile on your face. Jump to add dynamism to the photo.

Hold a handful of confetti in each hand and throw them outwards simultaneously. It will create a dramatic effect. Capture the confetti mid-air as it falls around you. Moreover, use a variety of brightly colored confetti for a vibrant and festive look.

10. Looking Far Away | Impressive Graduation Photo Ideas

Looking Far Away, Impressive Graduation Photo Ideas

Look away into the future are impressive graduation photo ideas. It is a gesture that you are stepping into a new life. Choose a location with a vast and scenic background wearing the gown and cap. Stand tall and confident.

Your posture should convey determination and readiness for the future. Aim for golden hour lighting. Thus you will get a warm and dreamlike quality to the photo.

11. Close Ups | Close-up Portraits

Close Ups, Graduation Picture Ideas

The close-up portraits show the model’s emotion through the detailed facial expression.  Capture a close-up of your face beaming with a wide smile and eyes sparkling with joy. Get a close-up of you holding your diploma. You can focus on the diploma itself.

12. In front of Your Favorite Spot on the Campus

In front of Your Favorite Spot on the Campus

You have spent a lot of days on this campus. Some places on the campus get close to the heart. Rake pictures in that place to capture the emotion attached to that place. Capture candids on that location or try to recreate the pose that you were once doing. 

For instance, you can pose in front of your department building, especially if it represents your field of study. This personalizes your photos and signifies the knowledge you gained.

13. Hugging Your Partner | Famous Senior Graduation Photo Ideas

Hugging Your Partner, Graduation Photo Ideas

Hugging your partner is one of the famous senior graduation photo ideas. It shows the support you have received from your loved one. A heartfelt hug with your partner, both of you beaming with pride, is a go-to pose.

Moreover, a sweet kiss on the cheek will add a touch of romance and affection to the photo.  Have and show the bond between you, and the camera lenses will create the magic. 

14. Lean Against A Wall | Popular Graduation Photo Idea

Lean against A Wall

Leaning against the wall is another popular graduation photo idea. It is a casual pose for your graduation photos.  Maintain good posture while leaning against the wall. Avoid slouching and keep your shoulders back for a flattering look.

Moreover, avoid the walls that are distracting. Find a spot with good lighting. Avoid harsh shadows by positioning yourself in indirect sunlight or using a diffuser if needed.

15. Photos with Your Pet | Fun Graduation Photo Ideas

Photos with Your Pet, Graduation Photo Ideas

Pets are part of the family. So, when you include a pet in your graduation photograph, it shows your personality. You can try poses like sitting on the staircase with the pet sitting beside you.

Also, you can hold the pet on your lap and give the shot looking straight into the camera. Moreover, you can capture your boding with the pet by hogging or playing its favorite game. 

16. Throwing Cap towards the Camera

Throwing Cap towards the Camera

Previously, we have tossed the cap into the air. You can also throw your cap towards the camera. It will create a different effect. The photographer should set the camera to focus on you. A fast shutter speed is necessary to capture the cap in mid-air.

17. Walking Through the Corridor

Walking Through the Corridor, Graduation Photo Ideas

The corridor through which you have walked every day during your class hours should be included in the graduation photos.  You can take the photo from behind as you walk through the corridor. Also, you can take the candids like you and your friends are goofing and walking towards the camera.

18. Getting Ready for the Ceremony

Getting Ready for the Ceremony

You are dressing up for the special occasion is an amazing photo idea. Pose in front of a mirror, adjusting your gown or cap. This photo reflects (literally!) the preparations and meticulousness that go into graduation attire.

Pose in front of a mirror, adjusting your gown or cap. This photo reflects the preparations that go into graduation attire. Moreover, you can capture a candid moment of someone helping you adjust your gown, zip it up, or straighten your cap.

19. Sunset Silhouette | Senior Graduation Photo Ideas

Sunset Silhouette, Graduation Photo Outfit Ideas

It is an exceptional way to capture your excitement for the occasion. You can capture the momentous occasion dramatically and symbolically. So, Find a vast open space such field, beach, or hilltop.

This allows for a clean backdrop and a full view of the colorful sunset. Stand with your back to the sunset, letting your graduation gown flow in the breeze. Thus you can create an impressive composition.

20. Generational Grads | Capture Family Bonding

Generational Grads

A beautiful way to capture family bonding. You, your mother, and your grandmother are in the same photo wearing the gown and cap. This creates a visual timeline and highlights the evolution of graduation gowns and caps.

Select a location that holds significance for the graduates involved. This could be the school campus, a place of shared memories, or even a family home. Consider incorporating props like yearbooks, old photographs, or school mascots from different eras. 

21. Music Lover Graduation Photo

Music Lover Graduation Photo, Graduation Photo Ideas

Now it is time for the music lovers. Pose while playing your favorite instrument while the gown and cap are dressed up. Or you can just stand or sit with your graduation gown on and hold your instrument close to you.

This can be a guitar, violin, saxophone, or any instrument that represents your musical passion. If there is a music room in your school, you can take photos there.

Again, you can use musical note-shaped confetti or cut your own from construction paper. Toss the confetti in the air as you jump or pose for a photo, adding a festive and musical touch.

22. Bookworm Bliss | Graduation Photoshoot

Bookworm Bliss, Graduation Photoshoot

Book lovers must include this idea in their graduation photoshoot. We all should include this idea in our graduation picture as we all get passed by reading the books(!). Include your favorite books or novels that have influenced you throughout your academic journey. Hold them close or spread them out around you.

You can use props like a pair of oversized reading glasses to add an extra layer of fun. Moreover, you can try the open-book jump pose. This energetic pose captures your excitement for graduation and your love for reading.

23. A Classic Graduation Portrait

A Classic Graduation Portrait

Holding your thesis book in your hand, pose stand, and be tall for a classic graduate portrait. Make eye contact with the camera for a direct and engaging portrait. Then, choose a clean and uncluttered background that won’t distract from the focus of the photo. Make the best use of the soft natural light to get proper exposure.

24. Take Photos Sitting on the Building Stairs

Take Photos Sitting on the Building Stairs

Your building stairs are a great place to capture the graduation photos. You can take solo photos on those stairs or you can include your friends and take some candids. Sit on a step and lean back slightly against the wall behind you. This creates a more relaxed and casual feel.

25. Show Your Culture

Show Your Culture

Do not hesitate to show your culture on this special occasion. If you are a foreign student, you should try your traditional dresses to capture the graduation photos. 

Final Thoughts | 25 Best Graduation Photo Ideas 

So, these are the 25 most used graduation photo ideas. Well, if you are a photographer, you may not get the desired result at the first attempt. So, practice these poses and experiment with the angles, lighting, and camera settings to get the best shot on the day. 

Moreover, photo editing agencies are here to remove inconsistencies from the photos. You can consult Clipping World to enhance the outlook of the graduation photos. 

Don’t Miss Out

FAQ | Graduation Photo Ideas 

How Do You Prepare for Graduation Pictures?

The preparation depends on the concept of the graduation photo. However, you can not think of graduation photos without the gown and cap. Find safe places and get permission if required. 

Do You Smile in the Graduation Photo?

Why not man? (!) Enjoy every bit of moment of your life. And this is your achievement, so have a wide smile on your face in your graduation photos.

Show your love