(function(w,d,s,l,i){w[l]=w[l]||[];w[l].push({'gtm.start':new Date().getTime(),event:'gtm.js'});var f=d.getElementsByTagName(s)[0],j=d.createElement(s),dl=l!='dataLayer'?'&l='+l:'';j.async=!0;j.src='https://www.googletagmanager.com/gtm.js?id='+i+dl;f.parentNode.insertBefore(j,f)})(window,document,'script','dataLayer','GTM-WWBG94S') Photography Archives | Page 3 Of 11 | Graphics Cycle

DJI Mavic Mini Drone Review in 2024 [Specs & Uses]

DJI Mavic Mini Drone Review

The DJI brand launched the DJI Mavic Mini drone on 15 November 2019. This has become popular for a few special features of this drone camera. In this DJI Mavic Mini Drone Review, I will explain why this is one of the best photos and videography.

There are numerous benefits such as lightweight, easy of use, and battery performance. But there are also a few disadvantages, like being unable to capture 4K videos. Anyway, the DJI has included 4k video recording features on their next version of the same product, “DJI mini 3 or 3 Pro”. You are going to lose yourself in a complete review, comparison, pros, and cons of the DJI Mavic Mini drone. 

Anyway, you might think that the camera has become an old version, there are a lot of the latest camera drones there. Yes, you are right, but the quality, user experience, and durability of this product are awesome. You can’t compare it with any other devices.
However, DJI has a few updated models of camera drones on their official website. But I don’t think that these drones are suitable for beginners. Now you are going to lose yourself in a complete review, comparison, pros, and cons of the DJI Mavic Mini drone. 
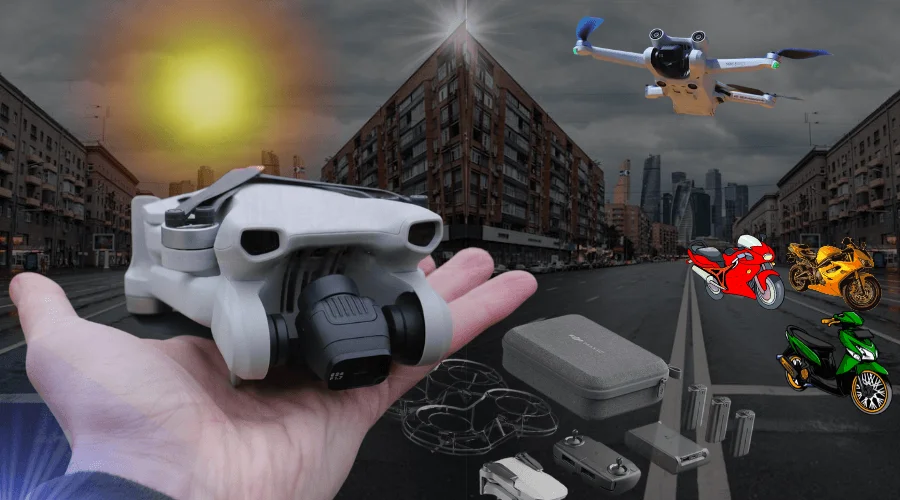
DJI Mavic Mini Drone Review

DJI Mavic Mini drone is a popular model of drone camera to take pictures and record videos. It is most famous because of its lightweight body, which is less than a smartphone. So it is very easy to carry for photography and videography.

Especially if you are a beginner photo or videographer who loves to capture aerial scenarios, then it is the best for you. Without further delay, let’s start reviewing each part and feature of the DJI Mavic mini-drone.

DJI Mavic Mini Drone Features

DJI Mavic Mini Drone, DJI Mavic Mini Drone Features

The mini-camera drone has become popular and still, it is a demanding drone among photographers. The reasons behind the popularity are a few features, such as:

  • The weight of this DJI Mavic mini drone is around 249 grams, and more especially, this drone doesn’t require FAA registration.
  • 2.7K video shooting capacity at 30 fps, this might be higher for better video quality.
  • The 1/2.3-inch sensor can capture a 12MP image.
  • Supports a 3-axis gimbals-stabilized camera to ensure the steady and smoothness of the footage.
  • Remote controller provides precise navigation and control of the drone and camera.
  • Travel convenience and easy to carry for the lightweight and ultraportable design.
  • Extended flight times options of 34 or 45 minutes depending on your needs.
  • Automatic transform low light into highlight with the night mode feature. 

These are special and unique features of this camera drone that other drones might not have. So, if you feel connected with these features, then you can go ahead. Otherwise, if you feel that it is not for you, then check the specifications for accurate information.

DJI Mavic Mini Drone Specifications

I have attached a table below to provide details information, specs, and a DJI Mavic mini drone review. You will get everything you need to know about the drone. 

<tdSpecifications

Equipment

Specifications

Details

DJI Mavic Mini Drone Specs

Weight249 grams (without battery)
Dimensions (folded)140×82×57 mm (Length × Width × Height)
Dimensions (unfolded)160×202×55 mm (Length × Width × Height)
Maximum Ascent Rate4 m/s (in S Mode)
Maximum Descent Rate3 m/s (in S Mode)
Maximum Flight Speed13 m/s (in S Mode, near sea level, no wind)
Maximum Flight DurationApproximately 30 minutes
Maximum Flight Range4 km (CE) / 2 km (FCC)
DJI Mavic mini wind resistance level8 m/s

DJI Mavic Mini Camera Specs

Image Sensor1/2.3” CMOS, 12MP
Lens Field of View (FOV)83 degrees
Aperturef/2.8
Photo Resolution4000×3000 pixels
Photo ModesSingle Shot, Interval, Panorama (2×2, 3×3, 180°)
Video Resolution2.7K: 2720×1530 at 25/30fps
Video Modes2.7K: 2720×1530 at 25/30fps

Gimbals Stabilization

Range of Motion Tilt:-110° to 35°; Roll: -35° to 35°; Pan: -20° to 20°
Stabilization Type3-axis (tilt, roll, pan)

Remote Controller

Operating Frequency2.4-2.4835 GHz; 5.725-5.850 GHz
Max Transmission Distance2.4 GHz: 2000 m (CE), 5000 m (FCC)
5.8 GHz: 2000 m (CE), 5000 m (FCC)
Battery Capacity2600 mAh
Operating Temperature0° to 40 °C (32° to 104 °F)

Battery Specifications

Capacity2400 mAh
Voltage7.2 V
Battery TypeLi-ion 2S
Energy17.28Wh

App/Software Details

App NameDJI Fly (Play & App Store)
Live Preview Quality720p/30fps
Required DeviceiOS v10.0 or later; Android v6.0 or later

Obstacle Sensing

Downward Sensing Range0.5-10 meters
Operating EnvironmentSurface with clear pattern and adequate lighting (lux > 15)

I have reviewed the DJI Mavic mini drone’s specifications. Included here are its dimensions, wind resistance level, camera specs, battery Specs, apps, and more. I hope you have a clear idea about the camera drone, and how powerful is it.

Okay, according to my using experience, if you can do anything basic videography photography. But it is not too powerful for advanced tasks like cinematography. Let’s talk about how much you need to spend to get this one into your pocket.

DJI Mavic Mini Drone Review for Price 

The DJI offers two variants of the Mavic Mini camera drone, the first one is single, and the second one is a combo. Those variants of the drone come with different price tags, the single one’s price is $389.99 and the combo pack for $449.00.

More than 70% of photo/videographers prefer to choose the combo package over the single one. Because it has 3X intellectual flight batteries, 3X remote controller, 2X micro USB cable, 2X spare controller, and more.

The estimated price of the combo pack’s extra accessories will be up to $100. So if you want to buy a Mavic Mini camera drone, try to purchase the combo pack.

So that you can save money and use extra accessories, especially batteries. Finally, considering all these things, the DJI Mavic Mini Combo pack has the best price over the single drone and other DJI Mavic mini models.

Advantages and Drawbacks of the DJI Mavic Mini Drone

Mavic Mini Camera can help you to take adventurous pictures by flying in the sky. Lower price than other drones, and the ability to record video up to 30 minutes, make it popular among photo and videographers. Besides many pros, I have found a few noticeable cons in this amazing device.

Let’s see both sides of the Mavic Mini Drone: 

Advantages

  1. Ultra-Lightweight: This is the most lightweight camera drone, with only 249 grams weight.
  2. Doesn’t require FAA registration, so you can use it for your needs without any hassle. Also, it is convenient and easy to carry for travel.
  3. Video Stability: A 3-axis gimbals-stabilized camera to capture and produce stable videos.
  4. Battery Life: You will have a 30-minute flight time for exploring the landscape from the sky per battery. Also, you can extend battery life without exchanging it, such as the ‘Power Saver’ mode on your mobile.
  5. Portability: If you fold down the DJI Mavic Mini drone, you can fit it in your pocket. So, it is easy to carry for outdoor exploration without a carrying bag.
  6. Affordability: Comparatively lower price than other drones.
  7. 12 Mega Pixel high-resolution photos.
  8. The smart, and attractive design of the camera drone is another plus.
  9. ‘Find My Drone Feature’ is a very helpful feature, integrated with the drone.

Drawbacks

  1. It Doesn’t capture 4k video footage, it supports only 2.7k regulation with 30fps
  2. No object-tracking feature, this might be a limitation for your videography.
  3. Doesn’t support the latest charger USB-C, the Mavic Mini charges via micro USB.
  4. It doesn’t detect obstacles for lacking a sensor.

In this stage of the DJI Mavic mini drone review, we have seen that this drone has a lot of positive signs to buy. But you have to compromise 4k videos with a frame rate of 60fps. 

Graphics Cycle’s Experience with the DJI Mavic Mini Drone Camera

The DJI Mavic Mini Release date was announced on 30 October 2019 and finally released by November. After 5 years of releasing the Mavic Mini, in 2024, when we were researching for a good drone camera, we were shocked. How this camera drone stays in the top position after 5 years of its launch!

In February 2024, before our annual tour of Graphics Cycle, we bought a DJI Mavic Mini. A few experts on our team said, it would be better, but it is perfect for beginners. We have tried in different wind levels, different locations, and weather.

Graphics Cycle's Experience with the DJI Mavic Mini Drone Camera, DJI Mavic Mini Drone Review

We have flown the drone in high wind weather for 20–25 minutes for one fully charged battery. Furthermore, we used this drone to produce dramatic B-roll footage and aerial shots. The price is affordable, it is easy to control and very stable.

Wait, it might be stable until 12-17mph wind, we flew in 10-15mph wind and it was 100% stable. Then the drone speed should be under 20mph, but you can increase it up to 25mph for sports footage. We have captured and attached a few photos from the DJI Mavic Mini. You will have an idea about the quality of the final results.

Conclusion

In summary, if you are an expert and want to do advanced videography with manual settings, then it is not for you. In this DJI Mavic Mini Drone review, we have discovered that this is the best drone camera for photo or videography. But you have to consider a few things, such as 2.7k regulation and 25–30 fps, which might not be enough for advanced videos.

Then let’s talk about the picture, a 12MP regulation camera is enough for a high-resolution drone photograph. So you don’t need to think about photography, only a bit of issues with videography.

However, You can shoot videography with this budget drone camera DJI Mavic Mini. Then it will require advanced video editing for precise, high-quality video footage. You can use these 2.7k resolution video clips on social media, or for any type of professional use.

Frequently Asked Questions

Is Mavic Mini Worth Buying?

The DJI Mavic Mini buying is definitely worth it, especially for beginners, who are looking for a user-friendly drone. The portable size, lightweight under 250g, doesn’t need any registration. Impressive 25–35 minutes flight time, with 10–15 minutes extensive time, is enough for beginners.

Advanced users might not be satisfied with the 2.7k resolution videos and 30fps. Now you have to identify your experience level, and then decide whether the Mavic Mini is worth buying or not.

How Far Can the Mavic Mini Fly?

According to the DJI, the Mavic Mini can go around 2.5 miles (4.02 km) far from the controller. But in reality, approximately 1.5 km is safe for flying. Far up to 2 km might be risky, because of connection loss and other obstacles.

Is a Mavic Mini Legally A Drone?

Yes, the DJI Mavic Mini is legally considered a drone. Because the weight of the drone is 249g, which is under 250g, that’s why it doesn’t require registration. However, it is crucial to adhere to local regulations and aviation laws when flying a drone.

Show your love

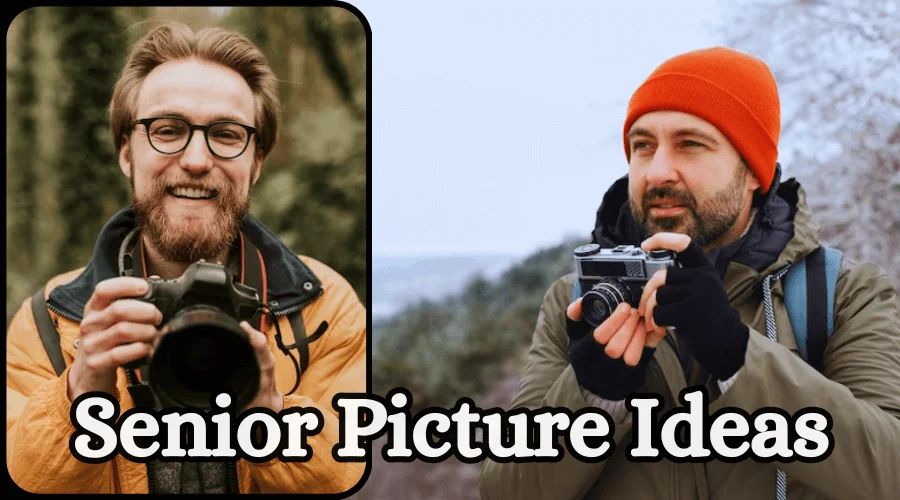
15 Best Senior Picture Ideas for Guys in 2024

Senior Picture Ideas for Guys

What are the best senior picture ideas for guys? Do not worry. Here you will get the 15 best ideas for your senior picture photoshoot for guys. This article will describe the ways to execute a successful senior photoshoot for guys. You will get to know about the pose, and location along with the ideas. So, without further ado, let’s start. 

15 Best Senior Picture Ideas for Guys

Capturing the desired photos requires years of experience in photography. Let’s learn about these 15 best senior picture ideas for guys and practice them to get high-quality photos. 

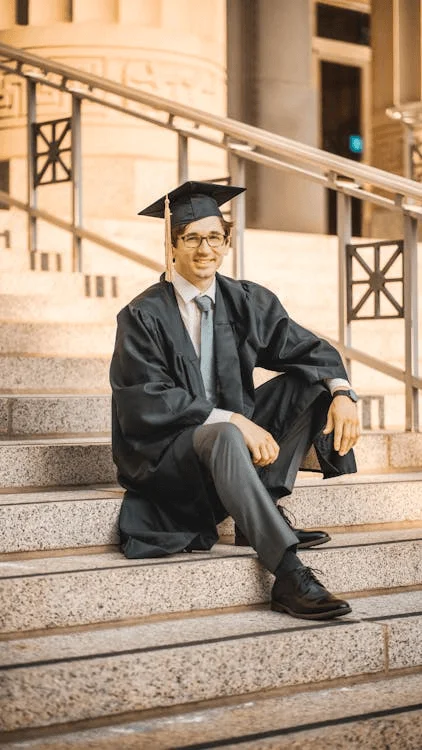
01. Iconic Graduation Shots | Graduation Day

Iconic Graduation Shots, Senior Graduation Picture Ideas

Graduation day is a special a for a student. And it is time for one to officially get the recognition to start a career in his chosen field. So, graduation is a momentous occasion. And you can take conic photos to commemorate it.

There you will find a lot of senior picture ideas for guys’ caps and gowns. You can create a special moment with your classmates and take the candid. Or you can go for the classic “The Throw” shots. Just throw your cap in the air with joyful expressions. 

Capture the photos before the iconic places of the university. For example, you can pose before the university library steps or the faculty’s main building. 

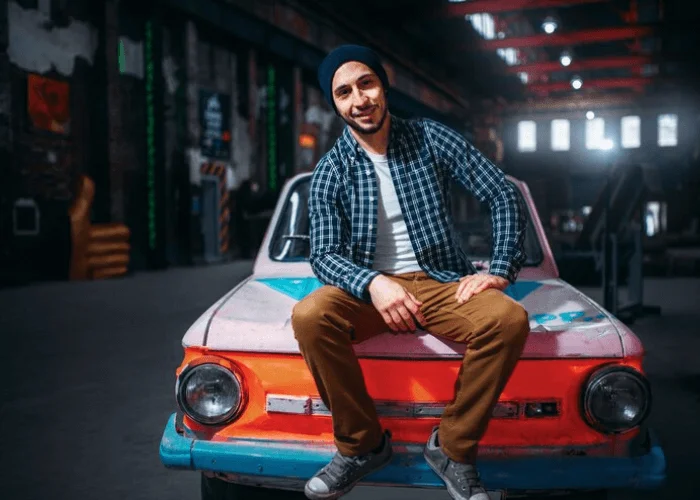
02. You in Your Car | A Responsible Senior Guy

You in Your Car Pose, Ideas for Guys Senior Pictures

The driving license is a recognition of leaving the sweet boy’s identity and becoming a responsible senior guy. So, gear up for a photo shoot that combines your love for cars and your style. Strike a pose next to your car.

So you’ll be able to show its sleek lines and timeless design.  A clean background like a scenic highway will make the photo more aesthetic. Lean against your car, hand on your hip, with a cool and collected expression. This confident and relaxed pose is all you need to show your bond with the car.

Capture photos from different angles – front, back, side, and close-ups of the car’s details. Also, take some wide shots to incorporate the surroundings in the photos.

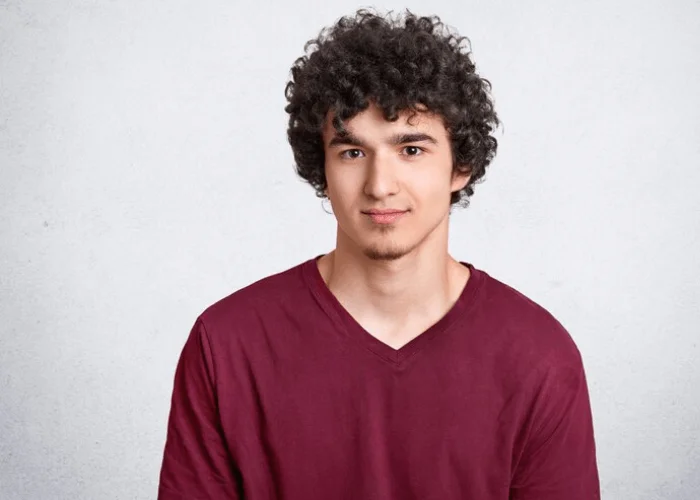
03. The Classic Headshot | Senior Picture Ideas for Guys

The Classic Headshot, Senior Picture Ideas for Guys

It is one of the go-to photography senior picture ideas for guys. A classic headshot photoshoot is a better way to portray your professionalism as well as personality. 

However, it does not mean to shoot in a studio setting.  The outdoor headshot is a trend. Yet, opt for a clean background like a brick wall or greenery. And make sure that the background doesn’t create a distraction.

In this type of photo eye contact with the camera plays the key role. It gives a confident look. Meanwhile, a subtle head tilt can add a touch of personality. 

04. Show Skill in Your Favourite Sport

Show Skill in Your Favorite Sport, Sport Senior Picture Ideas for Guys

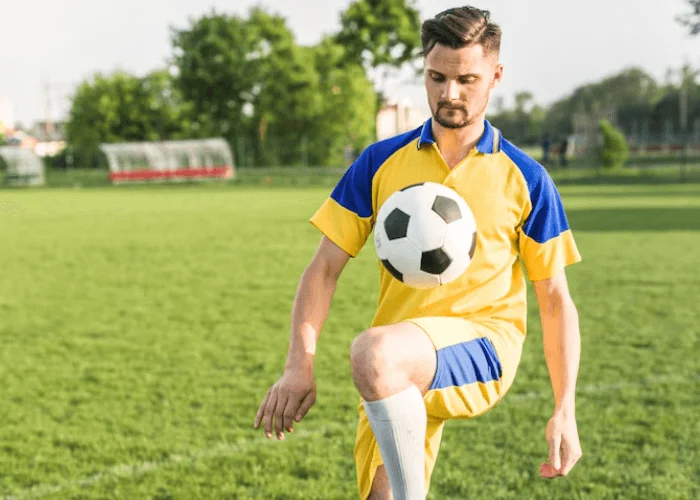
If you are a football lover like me, you will also love the senior picture ideas for guys’ football. You can pose action shots like throwing, catching, or running with the ball. Experiment with the angles to take dynamic shots.  

Meanwhile, a victory pose is always a classic one to enjoy the achievements of your team. Moreover, you take stunning and memorable pictures outside the ground with your teammates.

For example, the locker room portraits, weight room lifting weights, a discussion with the coaches, and holding trophies to celebrate your achievements.

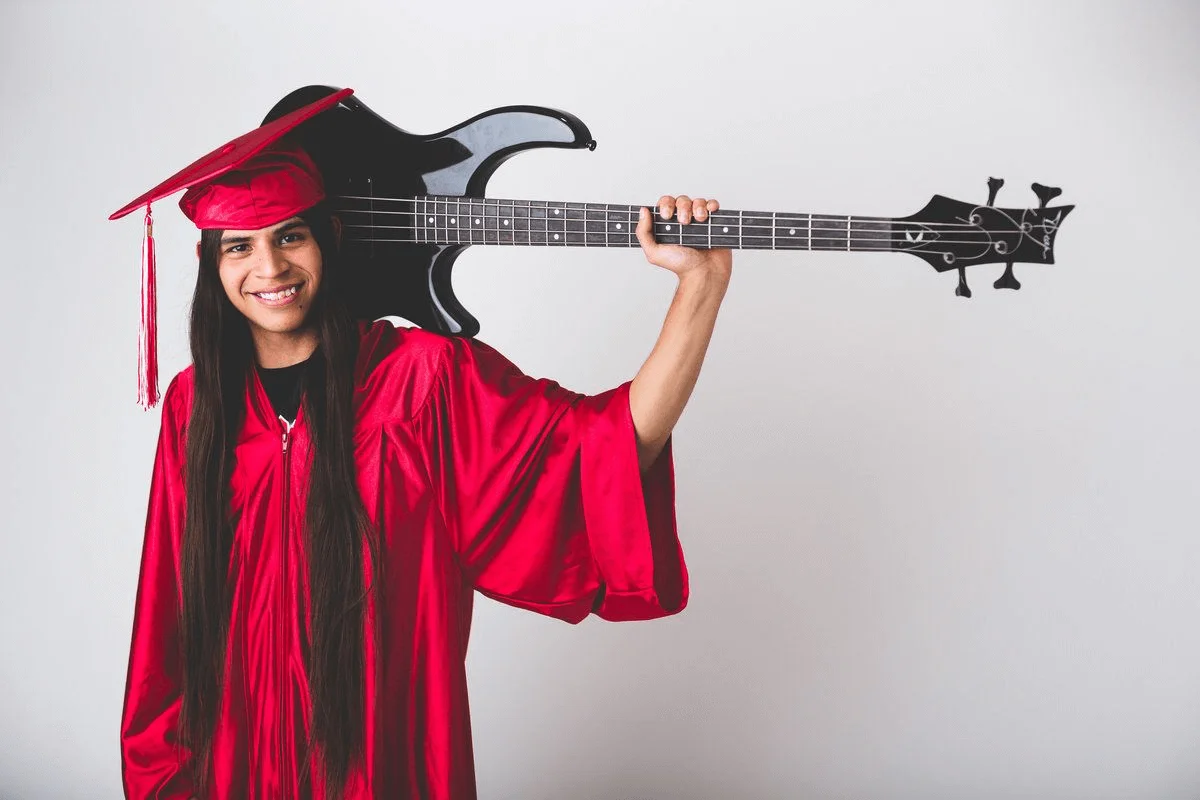
05. The Musician | Show Your Passion As A Musician

The Musician Pose, Senior Picture Ideas for Guys

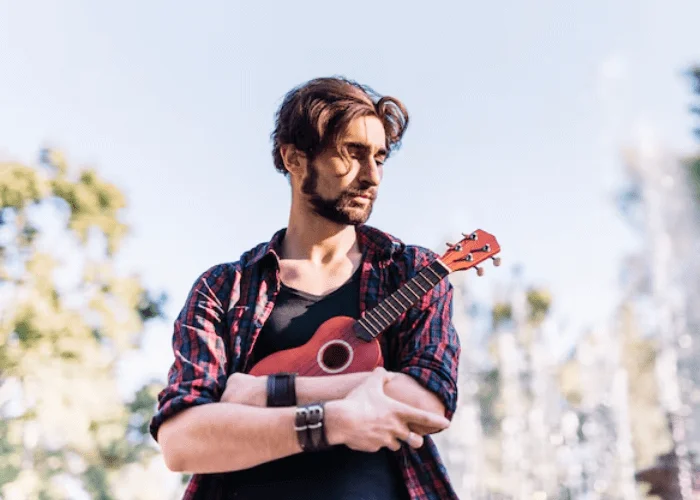
The senior pictures are a way to show your passion as a musician. Here are a lot of poses that you can try to capture your love for the music. You can capture rocking photos while playing your favorite instrument. Or you can just pose with the instrument holding by your hand. 

Moreover, dressing in a vintage band t-shirt will make the photo aesthetic. Let your style shine through in your outfit, pose, and choice of location. And shoot in a location that reflects your musical taste and style. 

06. Traveler | Senior Picture Ideas for Guys

Traveler, Unique Senior Picture Ideas for Guys

Show the adventurous you through the senior picture ideas for guys. Thus, you express your love for exploring the world. You can take photos in front of a famous iconic landmark to take the memory of your accomplishment of visiting a place.

For example, you can visit and take photos in front of the Eiffel Tower, the Statue of Liberty, and the Great Wall of China. They are on the favorite list of most of the travelers. 

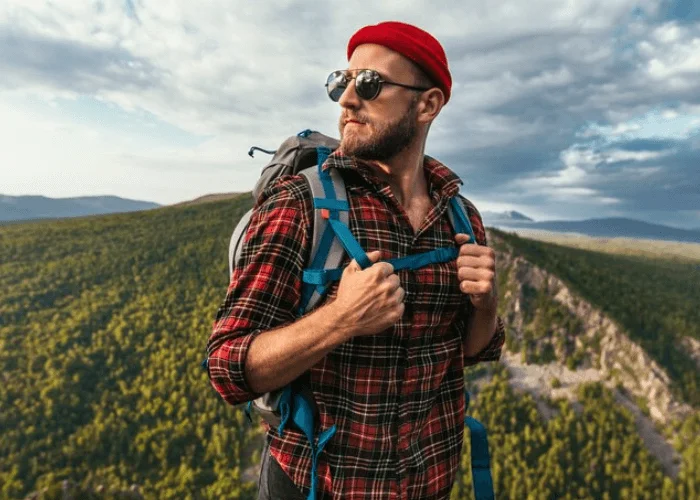
Moreover, you can take photos in front of natural wonders. Sit on a rock overlooking a breathtaking landscape or pose mid-hike on a scenic trail. Incorporate yourself with the serene beauty of the world. 

07. Looking Far away | Trendy Senior Guy’s Picture Idea

Looking Far away, Trendy Senior Guy's Picture Idea

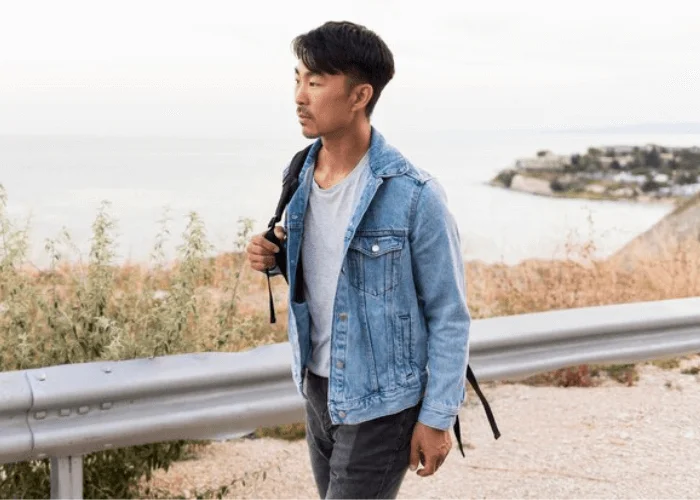
It is a trendy senior guy’s picture idea. Thus you capture the model’s hope through your lenses. So, chose a distraction-free background. Ocean Horizon or mountain majesty as a background is also a good option.

However, maintain good posture with shoulders back and a confident stance. This is the way to convey strength and determination.

Consider outfits that complement the location and your mood. You can choose casual wear for nature and a dress shirt for a city background. It is one of the most popular outdoor senior picture ideas for guys.

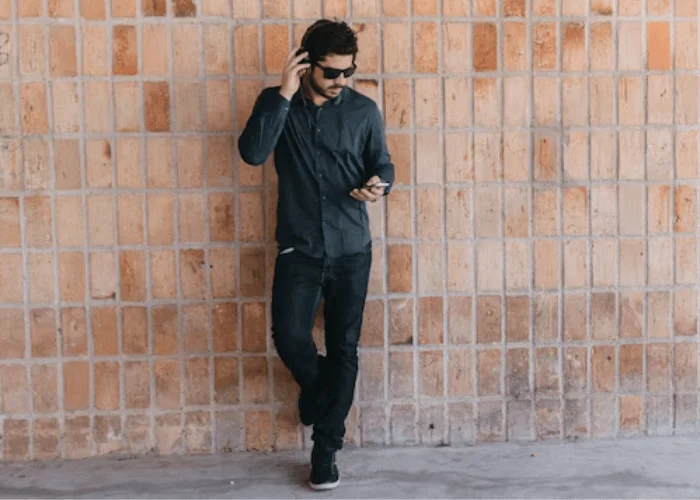
08. You Against A Wall in Your Town

You Against A Wall in Your Town, Senior Picture Ideas for Guys

It is a classic and go-to pose for senior boys. Leaning against a wall in an urban setting creates cool senior guy pictures. 

The classic pose for this picture idea is leaning against the wall with one hand in your pocket and the other casually resting on your hip. A positive posture with a sizeable smile will make it stunning. 

Moreover, you can lean back with one foot resting on the wall and the other on the ground. This pose adds a touch of dynamism and a casual vibe.

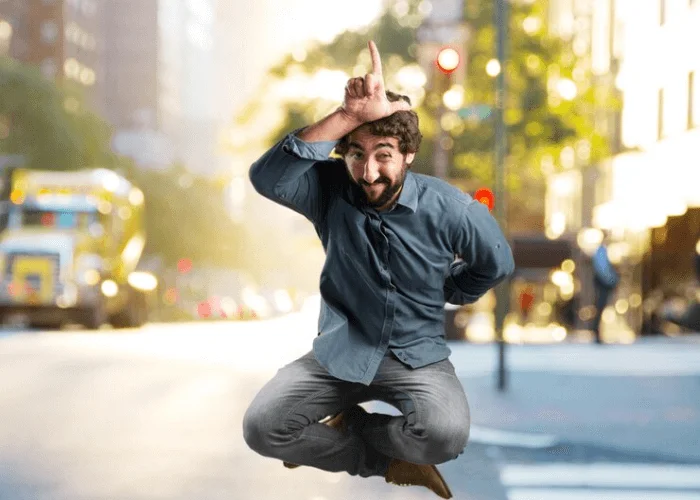
09. Action Shots | Capture of The Energy of Senior Guys

Action Shots

Action shots allow to capture of the energy of senior guys. So, take photos while doing activities like walking, jumping, running upstairs, or dancing.

Use a fast shutter speed (around 1/1000s or faster) to freeze the action and avoid blur. Then make sure the focus tracking is enabled on your camera. The burst mode works best to capture multiple frames of the action.  And, choose outfits that allow you to move freely. 

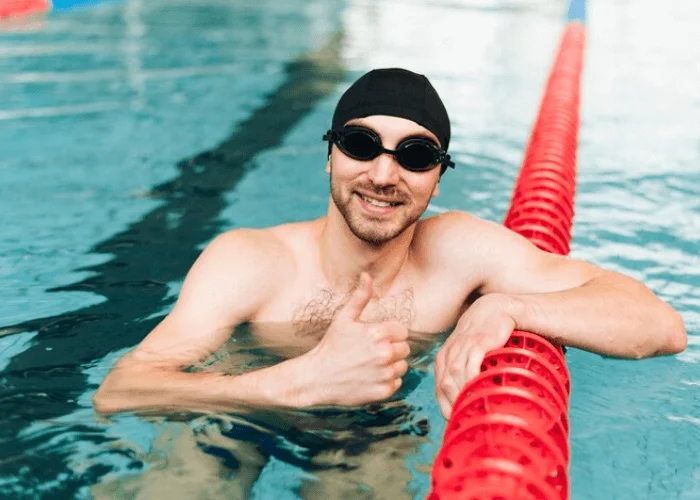
10. Swimming time Candid’s

Swimming time Candid's, Senior Picture Ideas for Guys

Swimming pool candids create a relaxed vibe in senior guy pictures. The photographer should be positioned discreetly. And make the best use of the natural light. You can photoshoot during the “golden hour”. 

Capture the joy of entering the cool water. Also, you can capture photos of you lounging on a pool chair, reading a book, or enjoying a conversation with friends.

Candid shots of playful splashing, games of water tag, or simply floating on your back create a fun and energetic feel.

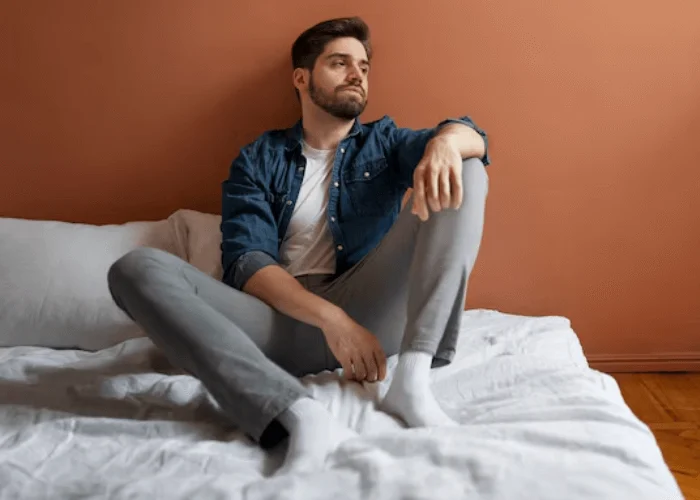
11. You in Your Room | Senior Picture Ideas

You in Your Room

The most comfortable place in the world is our room. You may not think about capturing photos in your room, but bring special emotion in senior guys’ pictures.

Capturing photos in your room allows you to show your passion and interest. Capture candid moments of you relaxing in your room, reading a book, listening to music, or simply enjoying your own space.

Also, experiment with the angles to get the unique features of your room. Capture details like bookshelves, record collections, or a cozy reading nook.

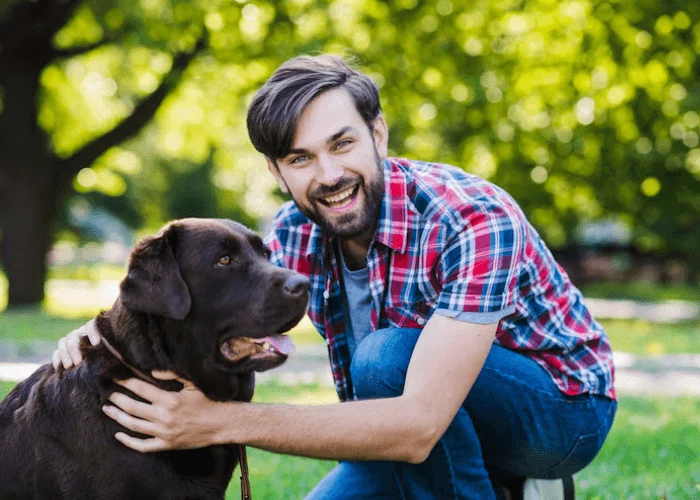
12. With Your Pet | Pet in the Senior Picture Ideas for Guys

With Your Pet

The pet is a part of our life. Including the pet in the senior picture ideas for guys is heartwarming. You can try several poses with your pet. The classic pet portrait is one of my favorites. 

All you need is to take your pet on your lap and sit on a chair. Then make eye contact with the camera while the photographer takes the shot. 

Cuddles on the couch is another popular and heartwarming pet photography idea with a senior guy. Capturing yourself playing with your pet is the way to show your bond. 

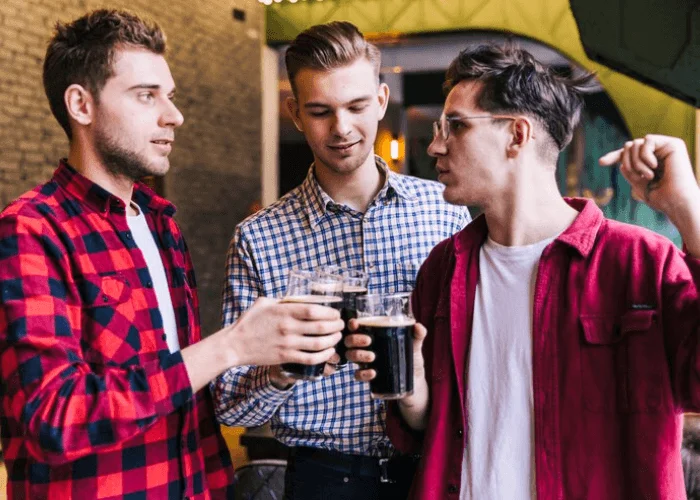
13. The With Friends Shot | Capture the Fun Times

The With Friends Shot, Senior Picture Ideas for Guys

Capture the fun times with your closest buddies with the “With Friends Shot” picture idea. Capture candids while doing the fun stuff or talking with each other, laughing and enjoying the moment.

Another popular picture concept with friends is the Silhouette at Sunset. Stand together against a breathtaking sunset. It creates a silhouette image that focuses on your friendship and the passage of time.

Choose a location that reflects your personality and shared interests. Whether it’s a park, a familiar hangout spot, or a scenic location, the background should tell a story.

14. The Vintage Vibe | Vintage Photoshoot

The Vintage Vibe

A vintage photoshoot is a fantastic way for senior guys to showcase a unique style and appreciation for the past. Pose amongst antique furniture, classic cameras, or vintage clothing for a timeless look. The classic dinner pose with a retro effect is also popular among young guys.

A touch of urban history will make the theme more authentic. So, find a wall with faded advertisements, or vintage gas stations for this photoshoot. Opt for vintage clothing like a leather jacket, a collared shirt, or a bolo tie.

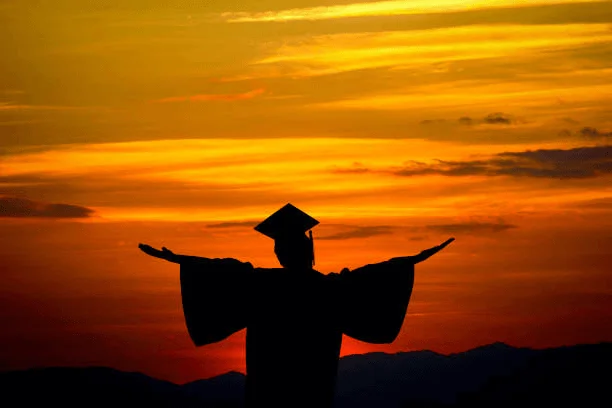
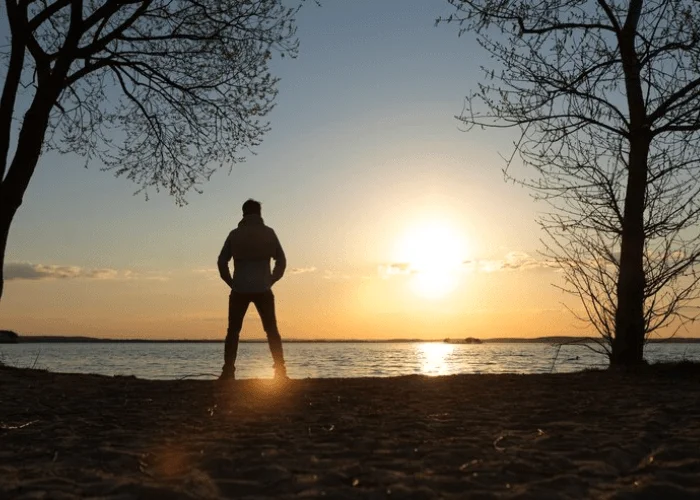
15. A Silhouette | Cool Senior Picture Ideas for Guys

A Silhouette, Senior Picture Ideas for Guys

It is a creative way to capture pictures for the senior guys. Silhouettes are cool senior picture ideas for guys. The key to a strong silhouette is a powerful backlight. Look for a location with a clear source of light behind you. Moreover, an open field with a clear sky and a setting sun creates a perfect backdrop.

Check Our Latest Articles

Final Thoughts | Senior Picture Ideas for Guys

So, these are the 15 best senior picture ideas for guys. Well, you can experiment with your looks, outfits, locations, and poses to get the best shot for yourself. Again, getting the desired photo depends on a lot of factors. You have to be an experienced photographer to get high-quality and flawless shots. 

So, practice the provided photography ideas till you execute the plan accurately.  Also, follow the famous photographers of this discipline to be up-to-date with the trends. 

Finally, leading image editing agencies like the GraphicsCycle are here to provide you with top-quality image editing services

FAQ | Ideas for Guys Senior Pictures

How to Edit Senior Guys Photos? 

First, recognize the problems with the photos. If you think the background is distracting remove it and replace it. Also, remove the unwanted elements from the photo. Then correct the color of the image. 

How Do I Choose A Senior Picture Outfit?

It depends on the location, mood, and concept of the photo. For example, a professional headshot requires professional outfits. Meanwhile, if you are traveling to a place, a casual outfit is preferable.

Show your love

Best 20 Pumpkin Head Photo Ideas for Social Media Trends

Pumpkin Head Photo Ideas

Are you looking for the best pumpkin photo head ideas to capture special moments with your friends and family? You are at the right place. Here I am going to provide you with the top 20 pumpkin photo ideas in 2024. 

20 Pumpkin Head Photo Ideas

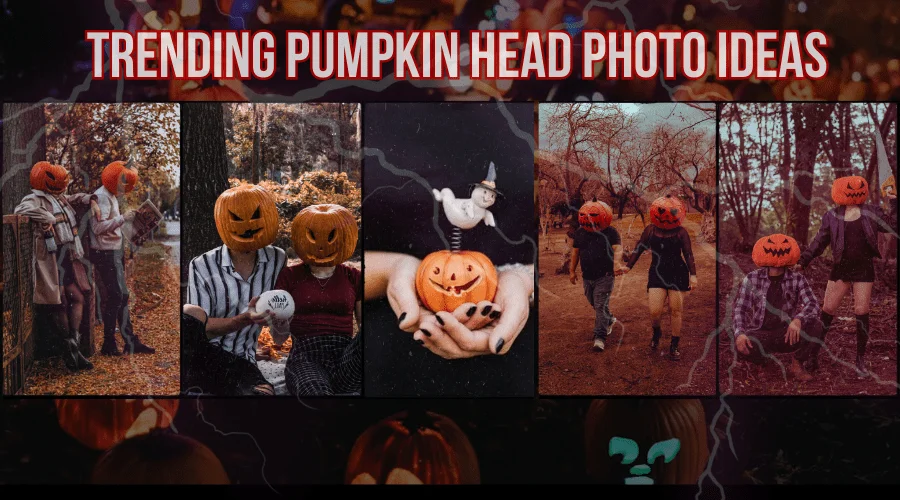
These 20 pumpkin head photo ideas are in the trend on social media platforms. They are easy to create and all you need is to follow the basic photography rules. So, let’s start. 

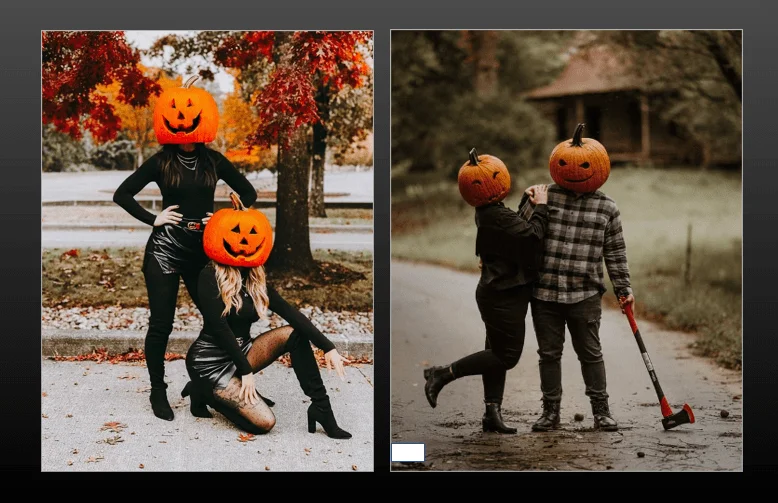
01. Pumpkin Head in Foggy Graveyard

Pumpkin Head in Foggy Graveyard

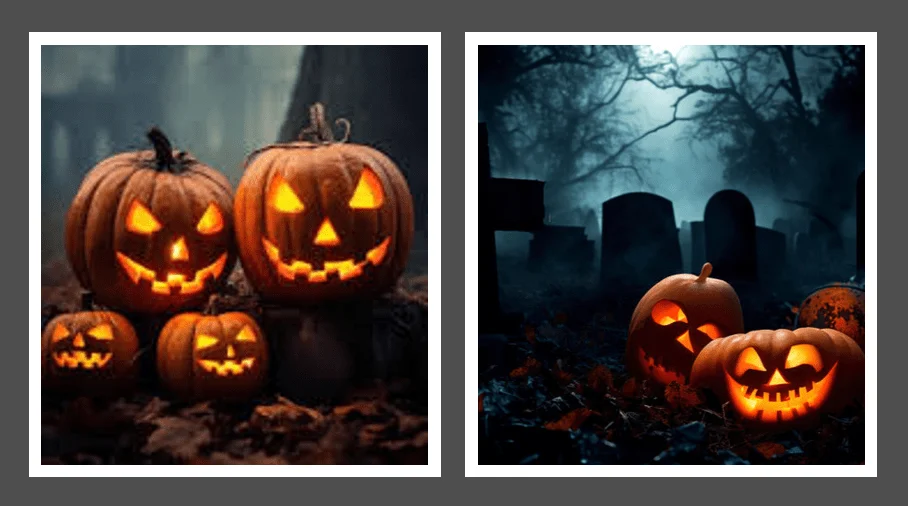
This is a popular halloween photography idea. A foggy graveyard scene is a classic way to take a pumpkin head photo.  The eerie mist gives a thrilling feeling in the photo. However, to get that picture, first, you need a graveyard at night that allows visitors. And, do not forget your safety gear.

Then go for the shooting on a foggy night. So, check out the weather forecast before going for the photoshoot. You can use a cemetery prop setup at a Halloween store instead of a graveyard. It is a good option, isn’t it? Then carve a hole in the pumpkin. Through this hole, you will use a light source to illuminate the inside of the pumpkin.

A Candle or battery-generated light source can do that for you. Carve a classic jack-o-lantern face, or something spooky and unique. To spice the composition, you can Dress in dark, tattered clothing.

02. Personality Craving | Pumpkin Head Photo Ideas

Personality Craving, Pumpkin Head Photo Ideas

These Pumpkin Head Photo Ideas allow you to be more creative. You can crave artistic expression using pumpkins and use them as a prop for the photoshoot.

Carve the pumpkin head with a big, excited smile and large, expressive eyes. It conveys curiosity and wonder. Then Dress in mismatched socks, a paint-splattered smock, or other clothes. Thus you can portray an eccentric personality.

03. Jack-o’-Lantern Glow on Face

Jack-o'-Lantern Glow on Face, Pumpkin Head Photoshoot

It is about the dramatic play of light and shadow. The scene should be dark, with only a faint moonlight visible in the background. So, choose a pumpkin with a well-defined face. It should have a thick enough stem to hold comfortably.

Then illuminate the inside of the pumpkin with an alight source. Lighting is the key factor for this photoshoot. You can shoot at night outdoors to show the effect efficiently. Focus on the person’s face illuminated by the pumpkin. So, the rest of the body fades into darkness.

04. Road Side Pumpkin Head Photoshoot

Road Side Pumpkin Head Photoshoot, Pumpkin Head Photo Ideas

A roadside location can be a good place for generating a versatile backdrop. Always prioritize safety when shooting on the side of the road. Find a location with a wide shoulder and be aware of traffic. Then choose the golden hour for a photoshoot. It will bring beautiful warm lighting to your photos.

There are different ways you can capture roadside pumpkin head photos.

For example, Lean on a stop sign with a mischievous grin carved on your pumpkin head. Follow the rules of thirds for this photo. Another way is sitting alone on a bus stop bench, with a pumpkin head resting on your hand.  

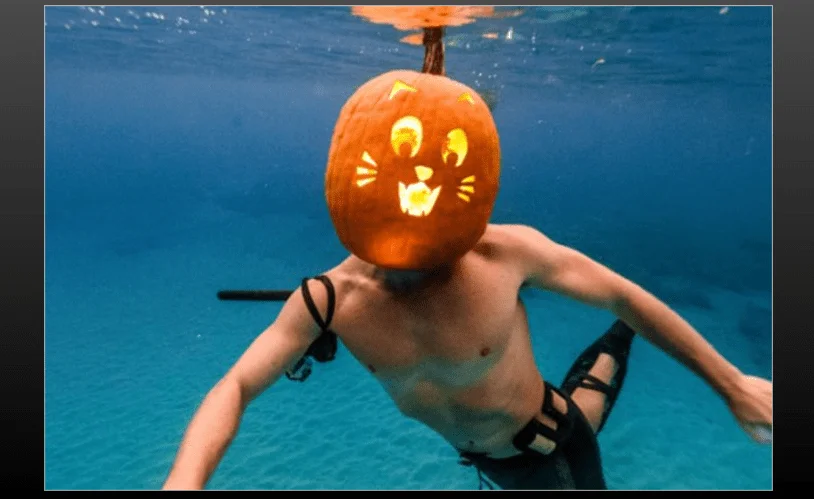
05. Underwater Pumpkin Head Photography

Underwater Pumpkin Head Photography

Underwater pumpkin head photography is a challenging task. But, if you can execute the plan perfectly, it will become authentic. So, have a certified dive buddy to help you in emergencies. Then you may need a professional photographer with skills in underwater photography.

Then, underwater environments are naturally dark. So, have a powerful underwater strobe or video light the pumpkin head and scene. Another thing to remember, is the pumpkins are buoyant. That’s why, use some weights to sink the pumpkin head.

Now crave the pumpkin head and seal the inside of the pumpkin with a waterproof sealant to prevent water from entering and rotting it. Then take the shot in a calm underwater environment and at the right depth. 

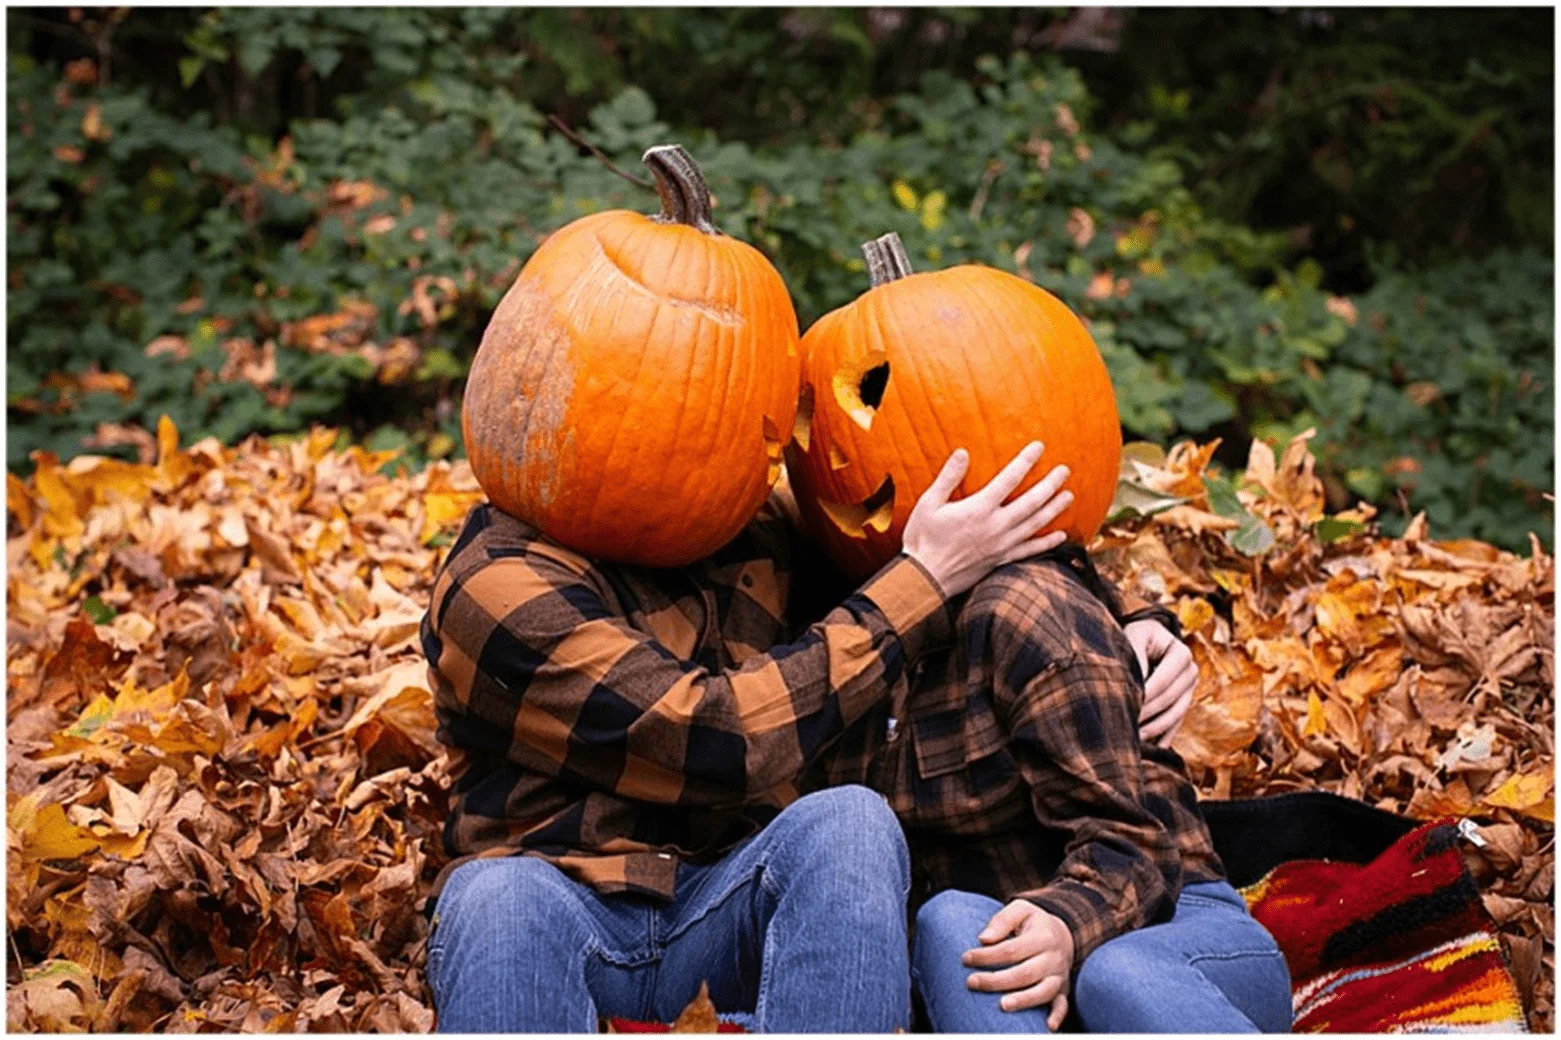
06. Happy Couple Pumpkin Head Photoshoot

Happy Couple Pumpkin Head Photoshoot

The couple’s photoshoot can be more spicy with the addition of a pumpkin head as a prop.

There are different ways that you can capture a couple of pumpkin head photos. For example, you can capture the couple carving pumpkins side-by-side, laughing and sharing silly ideas.

Again, as a pumpkin head, one partner proposes with a ring hidden inside a miniature pumpkin held out to the other. Another concept can be that the couple, as pumpkin heads, walk hand-in-hand through a field of pumpkins, bathed in warm sunlight.

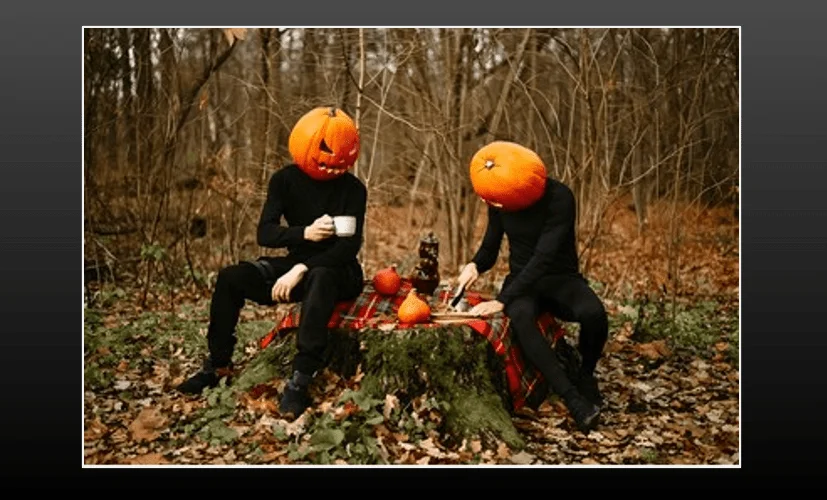
07. Pumpkin Head Tea Party in a Garden

Pumpkin Head Tea Party in a Garden

This is a familyPumpkin Head Photoshoot that is a way to bring elegance to your pumpkin head photoshoot with your family and friends. All you need is to use the colorful flowers and lush greenery to take a mesmerizing shot.

Well, you can find a botanical garden or a well-maintained park for this photoshoot. Then set up a miniature table and chairs suitable for your pumpkin heads.

Have some fall touches in the environment to make it look more beautiful. Then crave pumpkin heads with different expressions. You can even have a few non-pumpkin head “guests” for a more social gathering feel. Now take the shots holding tea cups by your hands 

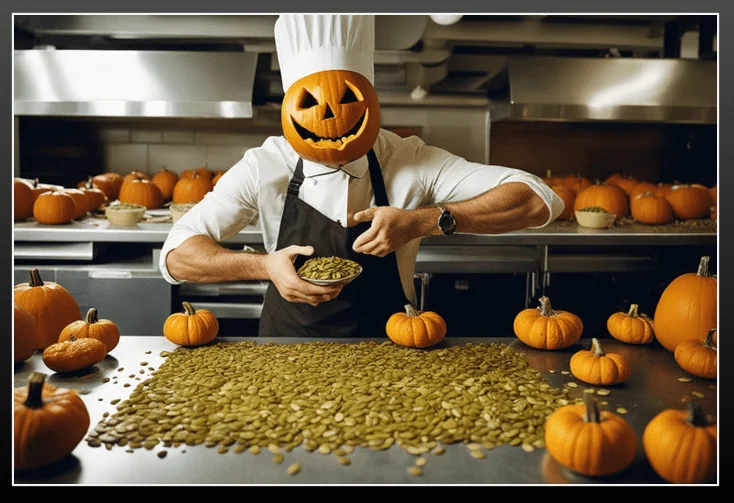
08. Pumpkin Head Chef Photoshoot 

Pumpkin Head Chef Photoshoot, Pumpkin Head Photo Ideas

The pumpkin head chef photoshoot is fun. It allows you to become creative with different photoshoot ideasSo go to your well-lit kitchen, and dress your model in a chef uniform. Carve the pumpkin head with a determined or focused expression. You can also add a chef’s hat or a toque carved on top.

Then capture the chef chopping colorful fall vegetables. You can also show the chef mixing a batter or a salad dressing in a large stainless steel bowl, with a whisk in their hand.

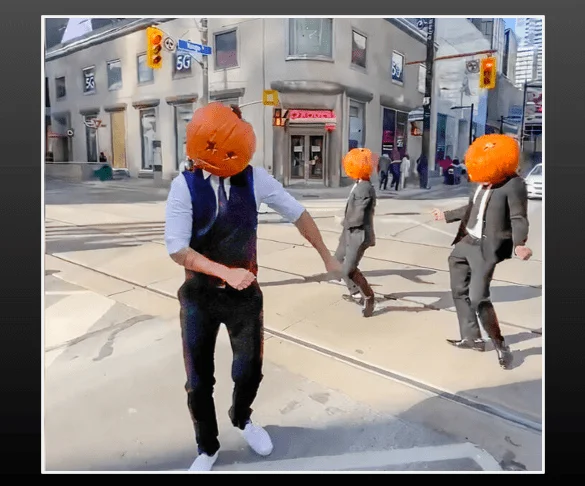
09. Pumpkin Head Dancing in the Street

Pumpkin Head Dancing in the Street

Pumpkin Head dancing in the street is an energetic way to showcase a unique talent. Carve the pumpkin head with a determined or excited expression. You can add a backward baseball cap carved on top for extra flair.

Then capture the pumpkin head dabcer performing various moves. For example take the shots of freezes, windmills, and headstands. So, focus on capturing the dynamic poses. Moreover, you can add props like boombox or headphones. It will indicate that they are listening to music.

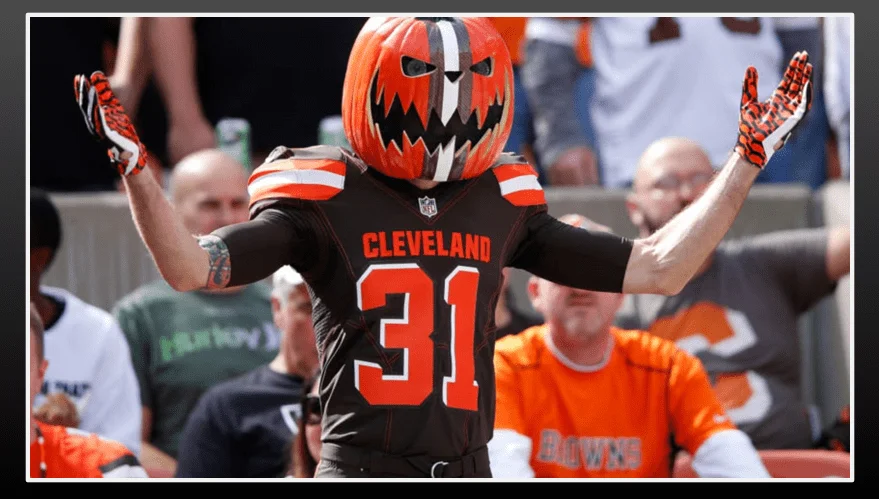
10. Pumpkin Head Super Fan

Pumpkin Head Super Fan

The Pumpkin Head Super fan photoshoot became famous after the Cleveland Browns fan incident on Oct 31, 2019.  There were over 60,000 fans and only of them were in the pumpkin head. And it goes viral immediately.

So, you can also cheer for your favorite team and capture your fan moments with the Pumpkin Head Super Fan Photoshoot. Capture the pumpkin head fan jumping for joy. Also, you can show how the pumpkin head fan grills burgers or holds a team flag at a tailgate party.

11. Pumpkin Head with Best Friend

Pumpkin Head with Best Friend

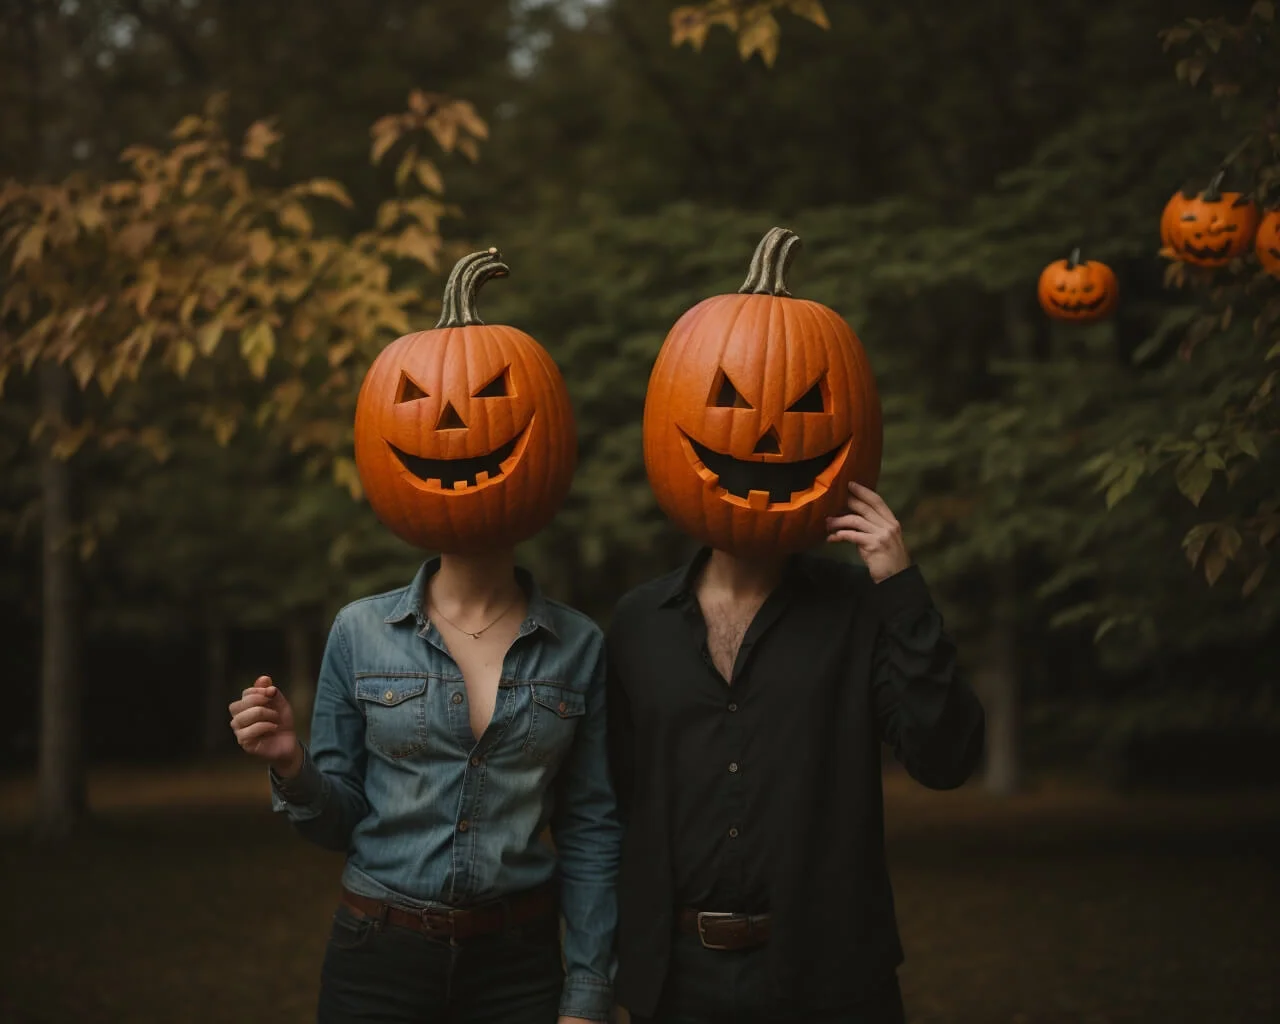
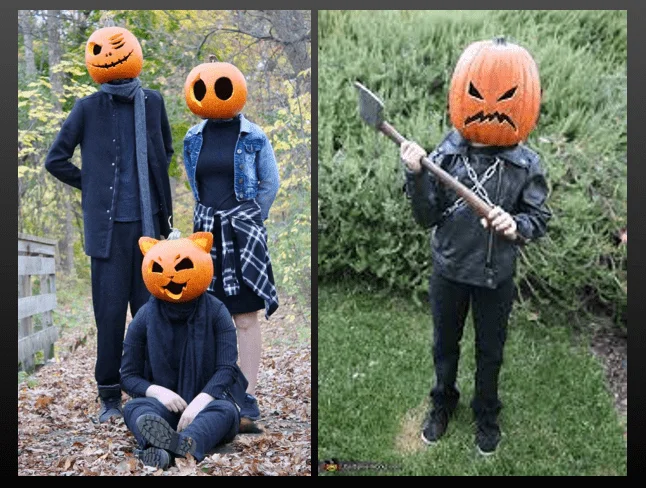
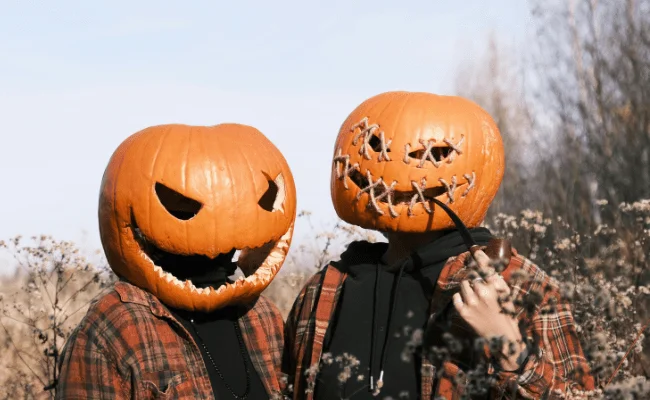
You can capture the funny moments with your best friend with the pumpkin head photoshoot. So, have some funny craving pumpkin for you and your friend. You can wear the same dark costume or mismatched costumes where one will be in silly clothes and the other will wear normal clothes. 

Again you can crave your pumpkin head with a similar expression. It will be a way to show your friendship. So, it depends on your creativity and what moment you want to capture with your bestie. 

12. Pumpkin Head Photoshoot Kids

Pumpkin Head Photoshoot Kids, Pumpkin Head Photo Ideas

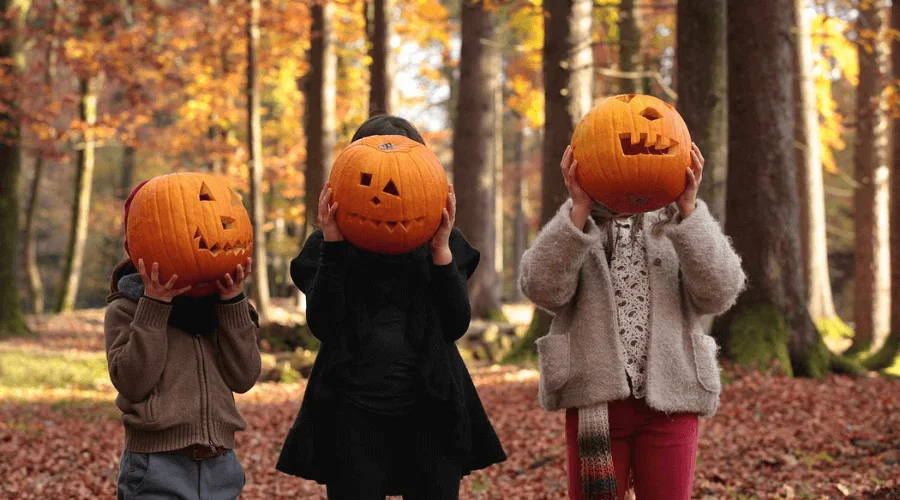
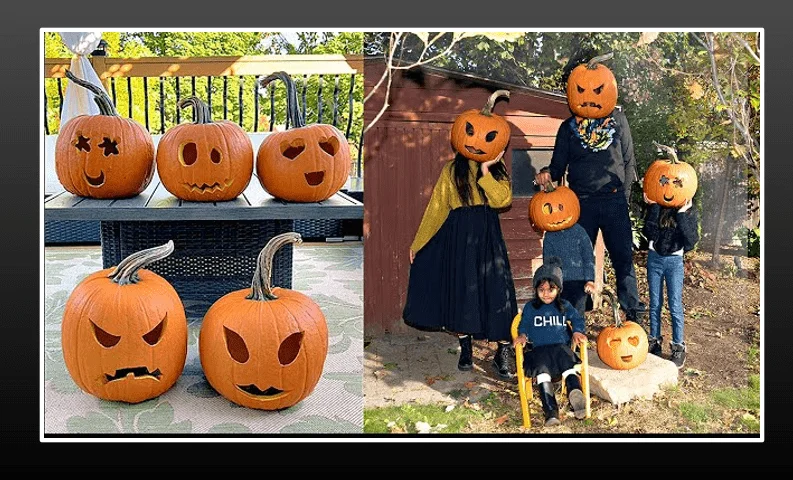
“Pumpkin Head Photoshoot Kids” is an amazing way to capture the magic of fall. You can capture the moments of your little ones while entertaining them. Similar to other pumpkin head photo ideas,  here you have a lot of scopes to be creative.  Starting from the craving for the pumpkin to the choice of costumes and location. 

Capture the kids painting their pumpkin heads with silly faces or designs. Then you can take the concept of a fairy tale in a forest or tea party. Choose small to medium-sized pumpkins. They are lightweight and easy for kids to wear comfortably.

13. Group of Pumpkin Heads Having a Bonfire

Group of Pumpkin Heads Having a Bonfire

A group of pumpkin heads having a bonfire is a classic fall photoshoot idea. It allows you to portray the mystery of fall most authentically. So, find a location that is safe for the bonfire. Then build a bonfire that is sizeable enough and has crackling flames. It will create a dramatic effect in the photo.

Then you can have different expressions of pumpkin heads for your group. Also having the same expression for all the friends creates some thrilling vibe. Put on your Halloween costume for this photoshoot. Also, have some props to add an extra layer of mystery. 

14. Pumpkin Head Swinging on a Swing

Pumpkin Head Swinging on a Swing

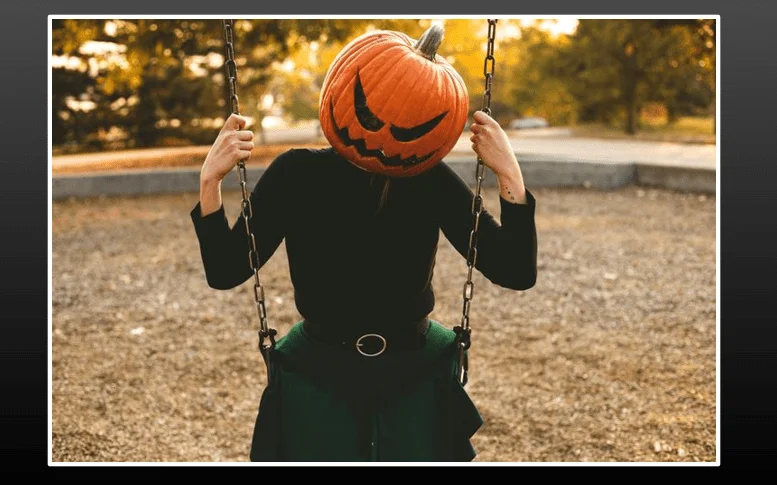
A pumpkin head swinging on a swing is another classic fall photoshoot concept. Put on your Halloween costume, crave expression in the pumpkin, and unlock the kids in you.

You can go to a playground with a classic wooden swing set or build one in your backyard with a tire swing hanging from a sturdy tree branch. The latter one will bring a more rustic feel. Shoot your photos during golden hour. At this time you will get a dramatic shot. 

15. Pumpkin Head Photoshoot Mom and Son

Pumpkin Head Photoshoot Mom and Son

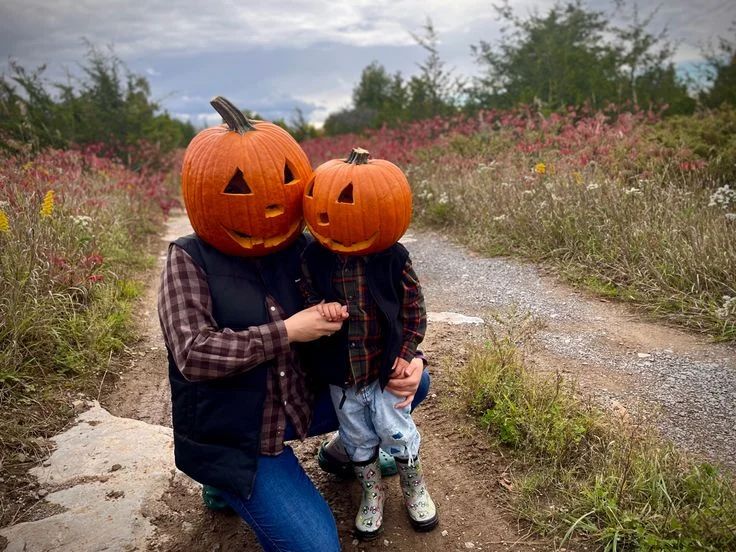
There are many ways to be creative with the pumpkin head photoshoot mom and son. Using this idea captures the wonderful bond between you and your son.  You can capture cute and playful moments with your son wearing pumpkin heads while exploring a pumpkin patch. Focus on capturing the candid moments.

For example, for the perfect pumpkins or playfully picking them up. Again, you can capture the moments with the Halloween costume put on. Pose like you two are the forever crime partners. 

16. Pumpkin Photoshoot Baby

Pumpkin Photoshoot Baby

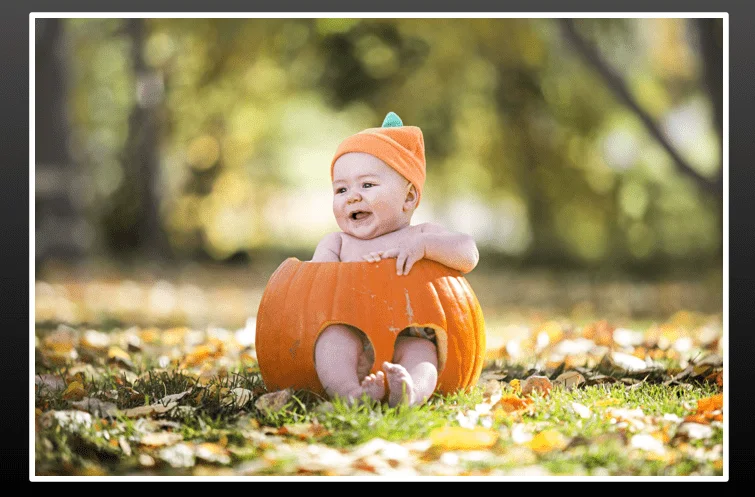
The pumpkin photoshoot baby is an adorable pumpkin photo idea. It allows you to capture the cuteness of your baby incorporating the fall vibe.

This baby photoshoot with a pumpkin depends on your creativity. For example, you can use a cozy blanket to wrap your baby. Then surround your baby with small, decorative pumpkins in various colors and textures.

Again you can take the shot as shown in the picture above. 

17. Pumpkin Head Proposing

Pumpkin Head Proposing

A pumpkin head proposal photoshoot is an adorable way to capture the special moment. So, choose a romantic and scenic location for the photoshoot.  This classic setting is perfect for a playful proposal. Surround yourselves with pumpkins and hay bales for a quintessential fall atmosphere. You can also use fairy lights or lanterns to create a romantic ambiance.

Carve the pumpkin head with a big, romantic smile. Then hearts are carved around the eyes, which will be a perfect pumpkin head for this photo idea. Capture the pumpkin head proposer kneeling on one knee, holding out a special “pumpkin ring.”

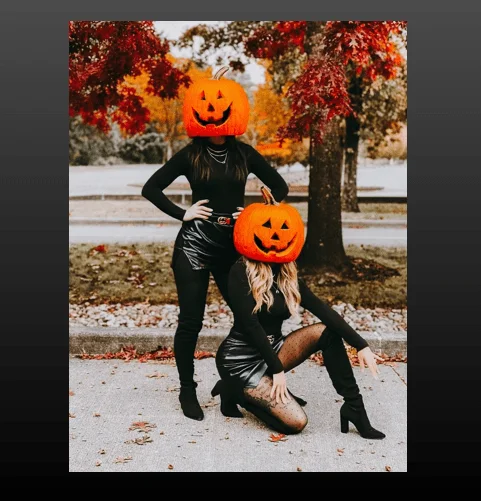
18. Pumpkin Head Photoshoot Girl

Pumpkin Head Photoshoot Girl

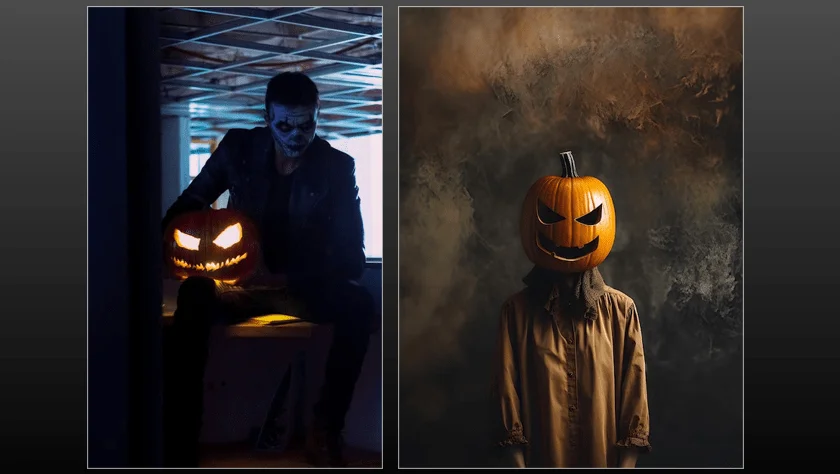
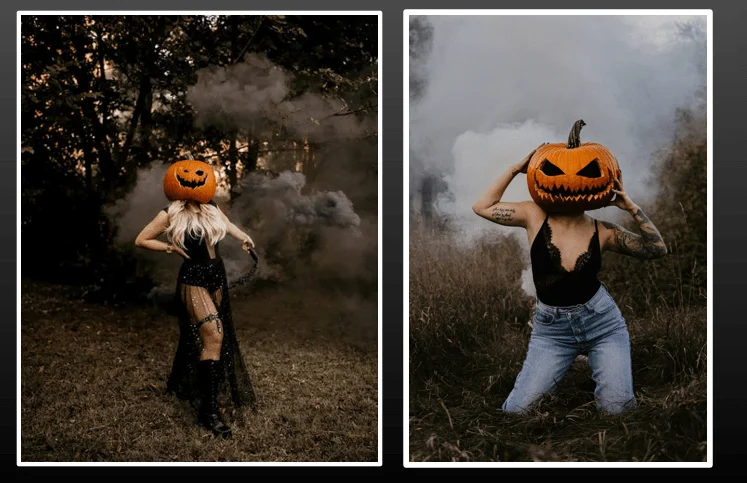
“Pumpkin Head Photoshoots Girl” is a way to be playful and creative. craving a pumpkin with a mysterious expression and putting on a Halloween costume is a perfect concept for girls’ fall photoshoots. However, having a smokey background like the photos will make your photo more eye-catching.

19. Two Pumpkin Head Telling Ghost Stories

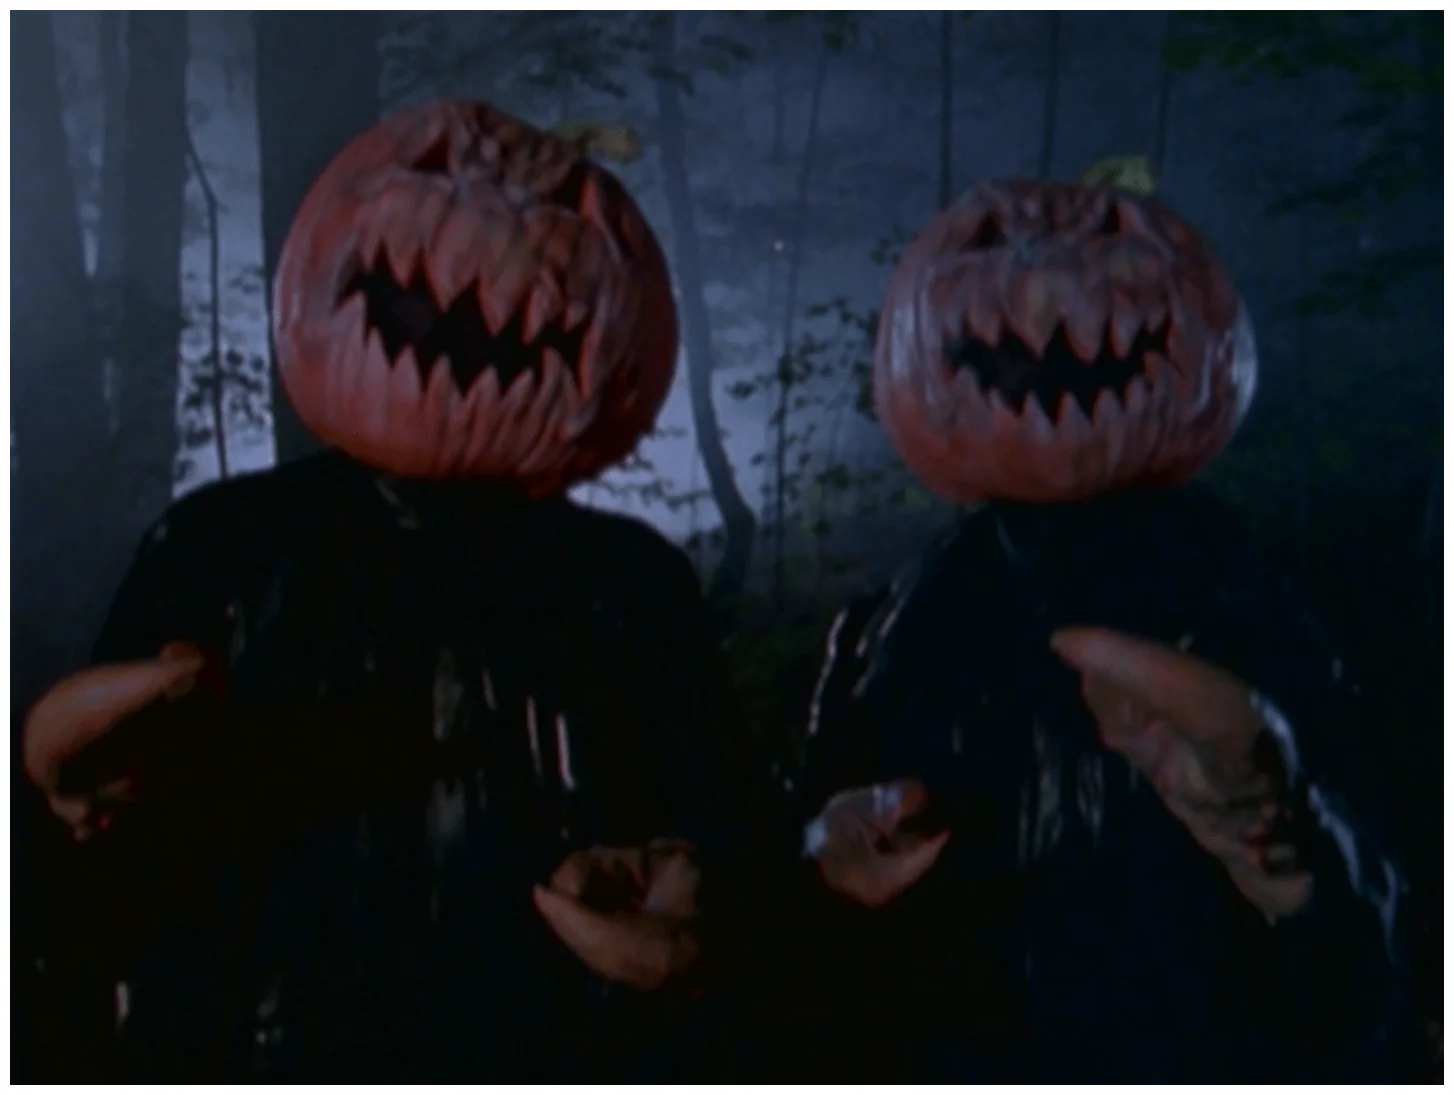
Two Pumpkin Head Telling Ghost Stories, Pumpkin Head Photo Ideas

A setting of a clearing in the woods with a crackling bonfire casting flickering shadows is necessary to create this photo. Two figures will sit on logs facing each other. They will be illuminated by the firelight. 

20. Father and Son Pumpkin Head

Father and Son Pumpkin Head

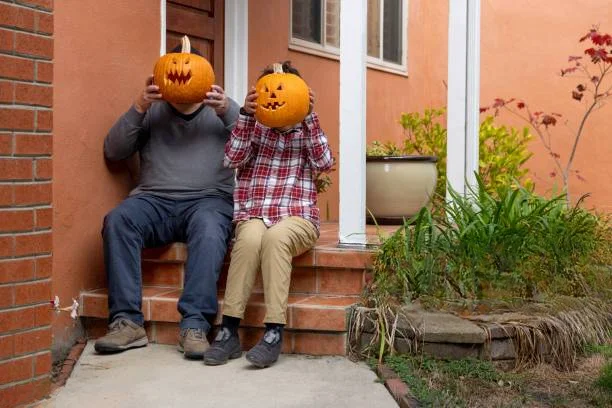
Capture the amazing father and son moments with the pumpkin head photography concept. Just follow the basic rules of photography and the magic will happen itself.

Final Thoughts | Pumpkin Head Photo Ideas

So, these are the 20 best pumpkin head photo ideas. Well, creativity is a diverse matter. Never afraid of experimenting with compositions and subjects. 

You can also follow the works of professional photographers to get ideas. Moreover, hiring a professional photographer will also help if you want to capture moments with your family. 

Then go for the post-production to fix the issues in the photo. The leading image editing agency Clipping World provides affordable image editing services. 

Don’t Miss Out | Pumpkin Head Photo Ideas

FAQ | Pumpkin Head Photo Ideas

How Big Should A Pumpkin Head Be?

The pumpkin head should not be very big or small. The size should be enough so that you can comfortably put it on.

How Do You Cut A Pumpkin Shape?

First, decide on what expression you want to crave. Then choose a pumpkin that is thick enough to cut into shape without breaking down. Then using the pencil draw the shape. Now take a knife and carefully start cutting it.

Show your love

Guide to Aesthetic Photography – Best Use of It

Aesthetic Photography, Aesthetic Photography Ideas

Aesthetic photography is gaining popularity with time. If you are also looking for ways to develop your career in this genre of photography, you are at the right place. 

Here you will learn everything about the ‘aesthetics’ in photography. I will describe to you all the elements of aestheticism in photography. So, you can cast these elements in your photography. Also, you will get some quick tips for creating mind-blowing photos. So, let’s start. 

How Does Aesthetic Photography Differ from Regular Photography? 

Aesthetic Photography

Aesthetic photography is the way of capturing photos that please the eye. The aesthetic photos evoke emotion in the viewer. It makes people thoughtful about finding a hidden fact or beauty.  

Aesthetic photos are not bound to technical aspects. Sometimes a mindful photo catches our eyes even if the conventional rules of photography are absent. Technical photography ensures your picture is clear and well-exposed. But, aesthetic photographer uses that foundation to build something truly captivating.

It is all about the composition, lighting, and color that stirs something within the viewer. However, regular photography is about technically capturing a scene or subject. This could be for documentation, capturing a memory, or even technical purposes.

In aesthetic photography, creative and artistic choices are the main focus. In regular photography, the subject itself might not be inherently beautiful. But the photographer aims to accurately represent it.

So, the aesthetic photographers are like painters. They use the camera lenses to create stunning and emotionally charged images.

What Makes Aesthetic Photography So Important? 

What Makes Aesthetic Photography So Important

Photographers are working hard to gain aesthetics in their photos for several reasons. It allows them to go beyond the technical aspects and show their creativity at its best.

The aesthetics photoshoot helps the photographers to develop their unique style. The focus on emotions allows photographers to connect with viewers on a deeper level. It allows them to make a relationship with the audience. And they will get recognized by their photos. As a result, they can create a place in this field using this genre.

The aesthetic photos are the appreciation for beauty. So, these photos play a big role in visual culture, influencing trends in advertising and fashion. They are more likely to be shared in the online space.

Aesthetic Portrait Photography is popular for promoting brands. So, you can incorporate aesthetic photos for marketing to get more conversions. 

Elements of Aesthetic Photography

The magic of “aesthetic” in photography lies in its elements. Let’s go through them to create visually stunning and emotionally evocative images.

A. Composition

Composition plays a vital role in creating aestheticism in your photography. Here are the key compositional elements of aesthetic photography: 

A.1. Rule of Thirds

Rule of Thirds, Rule of Thirds in Photoshop

It is one of the very basic rules of photography. The rules of thirds will make your work easier to create a mind-boggling composition. You have to place the main components of your photo in one of the intersection points to see the magic. This creates a balanced and natural feel, as our eyes are naturally drawn to these areas.

A.2. Leading Lines

Leading Lines in Photography, Aesthetic Photography

Lines within your image can be powerful tools to attract viewers. So, try to incorporate the roads, fences, rivers, or even a person’s gaze. These lines can lead the eye directly to your subject. As a result, it will add depth and a sense of direction to your image.

A.3. Negative Space

Negative Space in Photography

A space around your subject is also important for creating aesthetic photos. It will create a sense of calm. You can isolate your subject to enrich its grandeur. Also, it is helpful in evoking emotion. Casting the subject around a space makes the viewers thoughtful about the concept that lies in the photo.

A.4. Symmetry vs. Asymmetry

Symmetry vs. Asymmetry, Aesthetic Photography, Aesthetic Photoshoot

Symmetry means order and balance. Imagine a perfectly centered reflection in water or a building with identical columns on either side. Symmetrical compositions are pleasing to the eye and evoke a sense of peace.

Meanwhile, an asymmetric composition provides a more dynamic and interesting composition. Asymmetric composition is an effective way to portray a specific mood in your photos.

A.5. Headroom and Legspace

Headroom and Legspace

When photographing people, ensure you leave appropriate space above the head (headroom) and below the feet (legspace) to avoid a cramped feeling.

A.6. Patterns and Repetition

Patterns and Repetition

Patterns and repeated elements add interest and create a sense of rhythm within your photo. Look for patterns in architecture, natural formations, or even clothing.

B. Lighting

Here comes the 2nd most vital element in aesthetic photography. Lighting creates the mood, drama, and overall feel of your image. Let’s see how you can use lighting for aesthetic photos: 

B.1. Natural Light

Natural Light in Photography

To create aesthetic photos, you must have the skill of using and manipulating natural light. It offers a variety of qualities at different times of the day. For example, in the morning you will get a soft and diffused light. It is perfect for creating a gentle and airy aesthetic.

On the other hand, the midday light is harsh. But, it offers a strong shadow which is ideal for bold, graphic compositions. And the golden hour creates magic in photography. It is the hour shortly after sunrise or before sunset. You can manipulate this warm, golden glow to create a perfect dreamy, and romantic atmosphere.

B.2. Artificial Light

Artificial Light in Photography, Aesthetic Photography

Natural light plays the main role in aesthetic photos. However, you can manipulate the artificial lighting to create drama in the photo. There are several artificial lighting sources available in the market. You can choose any of them based on your requirements.

For example, the Studio Strobes are powerful flashes. you can use them to freeze motion. On the other hand, the Softboxes offer diffuse harsh light sources. So, it helps create a softer and more flattering look.

B.3. Shadows and Highlights

Shadows and Highlights

Shadows add depth, dimension, and mystery to your image. You can control them by adjusting your light source or using reflectors. Moreover, highlights are the brightest areas of your photo. So, make the best use of them to draw the viewer’s eye.

B.4. Light Direction

Light Direction in Photography Lighting

Light direction is the key to making the best use of light sources for your subject. So, you will need to experiment with the light direction to understand which direction creates aestheticism for your photos. You can use the front light to illuminate the subject from the front. It creates a flat look. 

Meanwhile, the backlights are positioned behind the subject. They create a rim of light and a dramatic silhouette effect. You can also use the side lights to create strong shadows and highlight the texture.

C. Color

Color is one of the key differences between an aesthetic photo and a regular photo. Color means life. So, when you cast the perfect colors in your photo, it creates beauty.

C.1. Understanding Color Theory

Color Theory

It is the first step to understanding the rules of playing with colors.

  • Primary Colors: Red, yellow, and blue – the building blocks of all other colors.
  • Secondary Colors: Green, orange, and violet – created by mixing primary colors.
  • Tertiary Colors: A combination of primary and secondary colors, offering a wider range of hues.
  • Complementary Colors: Colors opposite each other on the color wheel (e.g., red and green, blue and orange). They create high contrast and visual interest when used together.
  • Analogous Colors: Colors that sit next to each other on the color wheel (e.g., blue, blue-green, green). They create a harmonious and pleasing look.

C.2. Color Palette

Color Palette, Aesthetic Photography

Understanding the color theory, you can go for a color palette that is best for your subjects.  For example, the warm tones, are a combination of reds, oranges, and yellows. This tone is suitable to create a feeling of warmth, comfort, and energy. Perfect for creating a cozy or vintage look.

The cool tones are for the calmness and peace. You can choose this tone for natural aesthetics. The muted tones are the desaturated versions of any color palette. They offer a sophisticated and timeless look.

Here is an example of black-and-white photography:

C.3. Set the Mood

Set the Mood of Aesthetic Photography

Colors have an inherent relationship with our psychology.

  • Red: Passion, excitement, danger
  • Orange: Enthusiasm, creativity, warmth
  • Yellow: Happiness, optimism, energy
  • Green: Nature, growth, peace
  • Blue: Calmness, trust, security
  • Purple: Luxury, mystery, creativity

So, experiment with colors and set harmony in casting colors in your photo. Thus you can tell a story and build an emotional connection with the viewers.  Don’t be afraid to break the rules –  sometimes unexpected color combinations can create truly stunning results.

Styles of Aesthetic Photography

Styles of Aesthetic Photography

The world of aesthetic photography is so diverse. Aesthetic photographers plethora of styles. Let’s see some of the most popular styles in this genre: 

  • Minimalism: Minimalism is about clean lines, negative space, and a limited color palette. It focuses on a simple mood with serenity and elegance.
  • Vintage: It is about warm tones, faded colors, and textures reminiscent of old photographs or films. It creates a mood of nostalgia, romance, and a touch of mystery.
  • Dark & Moody: Focuses on deep shadows, dramatic lighting, and a cool color palette (blues, blacks). It creates a mystery mood. 
  • Light & Airy: a soft light with airy backgrounds. It creates peacefulness and a dreamy vibe. 
  • Pastel: This style casts soft, muted pastel colors throughout the image. An innocent nostalgic vibe you will get in these photos. 
  • Retro: Foeses on bold colors, and geometric patterns with elements reminiscent of a specific past era. It gives a touch of Skitch in the mood.
  • Cinematic: Dramatic lighting, shallow depth of field, and compositions inspired by film techniques.

Essential Tips for Taking Aesthetic Photos

Let’s see some of the best tips for taking aesthetic photos: 

Mind Your Surroundings

Mind Your Surroundings

This is where you can find your elements for aesthetic photography. It allows you to create a harmonious and clutter-free environment in your photos. Imagine a workspace with a clean desk, organized shelves, and calming artwork. It promotes focus without any stress on your eyes.

The same goes for your wardrobe – well-maintained clothes that fit well and are organized by color or style make getting dressed a more enjoyable experience.

Museums and Art Galleries

Museums and Art Galleries, Aesthetic Photography

Museums and galleries showcase a wide range of artistic styles. Artworks themselves are masterclasses in composition. You can learn a lot of things by observing this artwork. 

Observe how artists use lines, shapes, negative space, and color to create visually compelling pieces. Meanwhile, you can use these artworks as elements to create aesthetic photos. 

Follow Other Photographers in This Field

Photographers

Explore the work of photographers who specialize in aesthetic photography. Thus you will get ideas, color palettes, and subject matter for creating mindful photos.

Following prominent photographers allows you to stay updated on the latest aesthetic trends in photography. This can help you incorporate these trends into your work while still maintaining your voice.

Bottom Line

Creating aesthetic photos requires practice and a particular skill set. Do not lose your home so early. Follow the popular photographers’ work to understand their techniques. 

It is all bout how you portray the world through your lens. Experiment with angles, lighting, composition, and colors. These are the elements you need to use to turn an average-looking photo into an aesthetic one. 

Do not worry about the technical aspects while capturing a scene. Fix the inconsistencies in the post-production. Photo editing agencies like Clipping World, the clipping path service provider can help you improve the aestheticism of your photos. 

Check Our Latest Articles

FAQ

How to Find Aesthetic Pics?

Different websites offer aesthetic photos for free. You can visit Pexels, canvas, Freepik, or Unsplash to download your required photos. 

What is the Aesthetic Quality of A Photo?

Aesthetic photos please the eyes of the viewers. So, all the qualities in your photo that appreciate the beauty of nature are aesthetic qualities. The elements like color, composition, lighting, and subject matter are the qualities aesthetic photographers try to bring into their photos. 

Is Aesthetics Important in Life?

Yes, aesthetics in life is important. It allows us to think about our life out of the box. We can explore new things like culture, and beauty and use them in our social community.

Show your love

How Big Is A 4×6 Photo | Best Size in Pixels, CM, & Inches

How Big is a 4×6 Photo

Understanding the photo dimensions is important to present your photographs perfectly. But we often lose our way of finding the right dimension for our projects. So, how big is a 4×6 photo? Here you will get the answer. 

A 4×6 photo has different uses starting from printing to sharing snaps on social media. A 4×6 photo refers to the width of the photo will be 4 units while the height will be 6 units. 

The unit can be inches, centimeters, millimeters, or pixels. Depending on the unit the size of the photo will also change. For example, you can create a photo dimension of 4 inches in width and 6 inches in height. So, it is a 4×6 photo. Again, a photo can be a photo of 4 pixels in width and 6 pixels in height. 

On both occasions, you will get a 4×6 photo, but the size of the photo is different due to the unit of measurement. 

The 4×6 photo size is versatile as you can use it for different purposes. But, you must know its comparison to other standard photo dimensions. Thus you can make the best use of this dimension. 

Here we will go from its basic measurements to practical applications. If you are a photographer or photo editor, this is the guide to make the most of your 4×6 prints. 

Significance of Aspect Ratio

Different Aspect Ratios

The aspect ratio of a photograph refers to the proportional relationship between its width and height. It is expressed as a ratio of the width to the height, typically written as “width: height.” For example, the aspect ratio of a 4×6 photo is 4:6.

Understanding the aspect ratio is important for the visual presentation. It determines the shape of the photograph. Hence, control the overall appearance of the photo. 

A square photo has an aspect ratio of 1:1. It means its width and height are equal. Meanwhile, rectangular photos like the 4×6 have aspect ratios where one side is longer than the other. The aspect ratio influences the composition and framing decisions.

Moreover, different aspect ratios are important for different purposes. The 4:3 aspect ratio is commonly useful in digital cameras and old television screens. But, the 16:9 aspect ratio is prevalent in modern widescreen displays. So, based on the aspect ratios you can choose the most appropriate format for their planned output.  

The aspect ratio is also important for cropping and resizing the image. You can change the aspect ratio by cropping the image. Professional Photographers often need to consider how cropping impacts the overall aesthetic and storytelling elements of the image.

The aspect ratio also influences how photographs fit onto different paper sizes. For example, a 4×6 photo has an aspect ratio of 2:3, which matches the standard 2:3 aspect ratio of full-frame digital cameras. This compatibility ensures minimal cropping when printing digital images onto 4×6 photo paper.

4×6 Photo Size in Inches, Centimeters, Millimeters and Pixels

4x6 Photo Size in Inches, Centimeters, Millimeters and Pixels, How Big Is A 4×6 Photo

Have you ever wondered exactly how big a 4×6 photo is? This popular print size might seem straightforward, but there’s more to it than meets the eye! Now, we’ll dive into the world of 4×6 photos, exploring their dimensions in inches, centimeters, millimeters, and even pixels!

4×6 Photo Size in Inches 

4×6 Photo size has a standard aspect ratio, which is why it is common and popular among everyone.  But sometimes they ask about it, “What is the 4×6 Photo size in inches?”. 

Well, the 4×6 photo size measures in inches.

  • Width in inches=4 inches
  • Height in inches=6 inches

Thus we get a 4×6 photo size in inches.

4×6 Photo in Centimeters 

To convert inches to centimeters, you can use the following formula:

Centimeters=Inches×2.54

For a 4×6 photo:

  • Width in centimeters:
    • Width = 4 inches×2.54 cm/inch = 4×2.54 = 10.16 cm
  • Height in centimeters:
    • Height = 6 inches×2.54 cm/inch = 6×2.54 = 15.24 cm

So, a 4×6 photo measures approximately 10.16 cm x 15.24 cm.

4×6 Photo in Millimeters

To convert inches to millimeters, you can use the following formula:

Millimeters=Inches×25.4

For a 4×6 photo:

  • Width in millimeters:
    • Width = 4 inches×25.4 mm/inch = 4×25.4 = 101.6 mm
  • Height in millimeters:
    • Height = 6 inches×25.4 mm/inch = 6×25.4 = 152.4 mm

So, a 4×6 photo measures approximately 101.6 mm x 152.4 mm. This is a 4*6 photo size in mm.

4×6 Inch Photo Size in Pixels

To calculate the size of a 4×6 inch photo in pixels, we need to consider the resolution or pixel density (pixels per inch, PPI, or dpi – dots per inch) at which the photo will be displayed or printed. Common resolutions for digital images range from 72 to 300 pixels per inch, with higher resolutions typically yielding sharper images.

Let’s assume a resolution of 300 pixels per inch (PPI), which is commonly used for high-quality prints:

  • Convert the inches to pixels for both width and height:
    • Width in pixels = 4 inches * 300 pixels/inch = 1200 pixels
    • Height in pixels = 6 inches * 300 pixels/inch = 1800 pixels
  • Calculate the total number of pixels:
    • Total pixels = Width in pixels * Height in pixels = 1200 pixels×1800 pixels =2,160,000 pixels

So, a 4×6 inch photo at a resolution of 300 pixels per inch has a total of 2,160,000 pixels. This is a 4×6 inch photo size in pixels.

How to Create A 4×6 Photo Size in Photoshop?

Photoshop

Talking about creating a 4×6 photo, Photoshop stands out with its unique features. Creating a 4×6 is super easy. First, you have to select a unit on which you want to cut your photo by the aspect ratio of 4:6. 

Step 1

launch Adobe Photoshop on your computer.

Step 2

  • Go to “File” > “New” to create a new document.
  • Enter the dimension 4×6 in the New Document dialog box. 
  • If you select the unit in inches, set the Width to 4 inches.
  • Then, set the Height to 6 inches.

Make sure the resolution is set to your desired pixel (e.g., 300 pixels/inch for high-quality prints). Moreover, you will get an option to choose the Color Mode (usually RGB for digital use or CMYK for print). If you are ok with all the parameters, click “OK” to create the new document.

Step 3

Import your image. You can import the image by dragging and dropping it onto the canvas. Otherwise, navigate to “File” > “Place Embedded” to insert the image you want to edit.

  • If your image is larger than the canvas, you may need to resize it to fit.
  • To transform the image, select the image layer,
  • Then press Ctrl+T (Windows) or Command+T (Mac) to activate the Transform tool.
  • Then hold the shift key and adjust the corners by dragging. 

Step 4

Save Your File by going to “File” > “Save As”. Select the desired file type and hit ‘save”.

In this way, we can create a 4×6 photo size in Photoshop.

Image Resize Option

Image Resizing, How Big Is A 4×6 Photo

The image resize option is another way to create a 4×6 photo. If you want to create a 4×6 photo in pixels, the width will be 1200 pixels and the height will be 1800 pixels. 

So, navigate Image>image size from the option bar or use the shortcut Alt+Ctrl+I from the windows. From the new options bar, set the height, and width, and make sure the constrained aspect ratio (chain icon) is not active. 

Uses and Applications

The 4×6 photo size is versatile. You can use it for different purposes from printing to crafting. Let’s learn where you can make the best use of the 4×6 photos:  

Printing Purposes

Portrait Family Photography, How Big Is A 4×6 Photo

You can use the 4×6 photos for printing family portraits Thus you can share the captured special moments with loved ones. The 4×6 photos are also used for the vacation photos.

The event photographers are using  4×6 photo capture and creating albums for their clients. The 4×6 photos are suitable for printing professional portraits. It is the standard size for distribution.

Digital Photo Formats and Social Media Posting

Digital Photo Frames

The 4×6 photo size is highly compatible with digital formats. So, you can easily share your photos on social media platforms such as Instagram, Facebook, and Twitter. 

The 4×6 photos are perfect for creating digital photo albums. So, using this photo size, you can preserve memories in a digital format. You can also use this photo size for wallpaper or screensavers for desktops, laptops, or mobile devices. Moreover, they are convenient for attaching to emails.

Scrap Booking and Crafting

Scrapbooking And Crafting

It provides a standard size for printing and arranging photos on pages. That’s why they are frequently used for scrap booking.  Ideal for creating collages for parties, events, or home decor projects. We also see their application for creating handmade cards or invitations. 

Comparison with Other Standard Photo Sizes

The 4×6  photos are so compact compared with the larger sizes like 5×7 or 8×10 photos. 

Photo SizeDimensions (in)Dimensions (cm)Dimensions (cm)Aspect Ratio Use Case
4×64 x 610.16 x 15.24101.6 x 152.42:3Wallets, scrapbooks
5×75 x 712.7 x 17.78127 x 177.87:5Desks, nightstands
8×108 x 1020.32 x 25.4203.2 x 2544:5Wall displays, larger albums


How to Choose the Right Photo Dimension?

Choosing the perfect dimension is the first step in making a perfect composition. However, the selection of a photo dimension depends on several factors. 

At first, you need to understand your purpose. Is it for printing, digital sharing, web use, or something else? If you’re printing a photo to frame and hang on a wall, you might opt for a larger dimension for better visibility.

But, you need a smaller dimension for sharing photos on social media. Then you have to consider the platform to display your photos. For example, you may need a different dimension of photo to share on Instagram than placing it on a photo frame. 

Understand the aspect ratio for choosing a photo dimension. 

  • 4:3 is standard for many digital cameras
  • 3:2 is standard for 35mm film
  • 16:9 is a widescreen format

Then you have to think about the resolution of the photo. Resolution determines the clarity and detail of the image. Higher resolutions are suitable for printing and large displays. Meanwhile, lower resolutions may be used for digital sharing on social media on smaller screens.

Moreover, a higher resolution and larger dimension for displaying your photos in the gallery. The viewers can get up close to it, the larger dimensions work here. 

Final Thoughts

Creating a perfect photo composition requires a perfect dimension and resolution. In this post, I have tried to give you an insight into the world of photo dimensions. Now you know how big is a 4×6 photo.

You have learned the conversion procedures of a  4×6 photo in different units. Here you have also learned the applications of the 4×6 photos to use them according to your requirements. 

Still, if you think about creating a professional-level photo, you should consult with a professional photography and photo editing agency. 

FAQ | How Big Is A 4×6 Photo

Can I Use A Photo Resizer To Create A 4×6 Photo? 

Yes, you can use an online photo resizer to create a  4×6 photo. But, the resolution may be deteriorated. That’s why I prefer using Photoshop to resize the photos. And here you have got a way to resize photos in Photoshop. 

Can I Use A  4×6 Photo As A Social Media Profile Picture?

Yes, you can use a 4×6 photo as a social media profile picture. However, it may require some adjustments depending on the platform’s requirements.

Show your love