(function(w,d,s,l,i){w[l]=w[l]||[];w[l].push({'gtm.start':new Date().getTime(),event:'gtm.js'});var f=d.getElementsByTagName(s)[0],j=d.createElement(s),dl=l!='dataLayer'?'&l='+l:'';j.async=!0;j.src='https://www.googletagmanager.com/gtm.js?id='+i+dl;f.parentNode.insertBefore(j,f)})(window,document,'script','dataLayer','GTM-WWBG94S') Tips Archives | Graphics Cycle

How To Make A GIF in Photoshop

Make A GIF

GIFs are more engaging than images. Statistics show that daily 70 million GIFs are shared via WhatsApp and 36 million via Facebook. It implies that GIFs are a great addition to attracting the viewer’s attention. Therefore, how to make a GIF in Photoshop is one of the frequently asked questions on Google. 

Well, creating GIFs is an easy task in Photoshop. But most people need help to pull out the exact door of Photoshop. In this article, you are going to get this most demanded tutorial. 

I have provided step-by-step guidance. You create GIFs using a single image and using a series of images. Here you will get a tutorial on both the categories of GIF creation procedures. So without further delay, let’s get into the main topic. 

What is a GIF file?

A GIF (Graphics Interchange Format) file is an image file format. It supports static images and short animations. A GIF was developed in 1987 by CompuServe.  After that, it has become widely popular due to its ability to store multiple frames in a single file. Thus, it allows for simple animations and visual effects.

Key characteristics of GIF files 

A GIF has several characteristics. These characteristics help us to get a proper idea about GIFs and their uses. Let’s learn them in detail:  

Animations

One of the distinctive features of GIFs is their ability to support animations. A GIF can contain multiple frames arranged in sequence. The images are displayed one after the other to create a looping animation.

Lossless compression

GIFs use a form of compression. It is known as LZW (Lempel-Ziv-Welch) compression. It is a lossless compression type. That’s why no image quality is lost during compression. And the file sizes are generally smaller than other formats.

Limited Color Palette

GIFs are limited to a maximum of 256 colors in their color palette. This little color depth can reduce color accuracy. It makes GIFs more suitable for images with simpler color schemes or graphics than complex photographs.

Transparency

GIFs can also support transparency. So, you can designate one color in the color palette as transparent. This allows the background of the GIF to be see-through.  Thus, it becomes useful for images placed on various backgrounds.

Simple and Efficient

GIFs are simple to create and view. They are supported by virtually all web browsers and image-viewing software. Consequently, they become a widely compatible format.

Interlacing

GIFs can be interlaced. Therefore, the image is loaded in a series of passes, starting with a low-resolution version and progressively refining the details. This can lead to a more visually pleasing loading experience.

How to Make A GIF Using A Series of Photoshop

Creating a GIF in Photoshop involves creating multiple frames.  And then combining them into a single animated GIF. Here’s a step-by-step guide on how to make a GIF in Photoshop using a series of photos:

Prepare Your Content

Prepare Your Content, Make A GIF

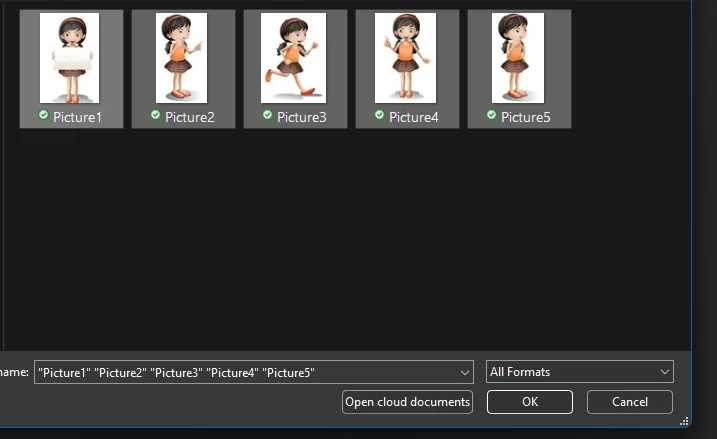
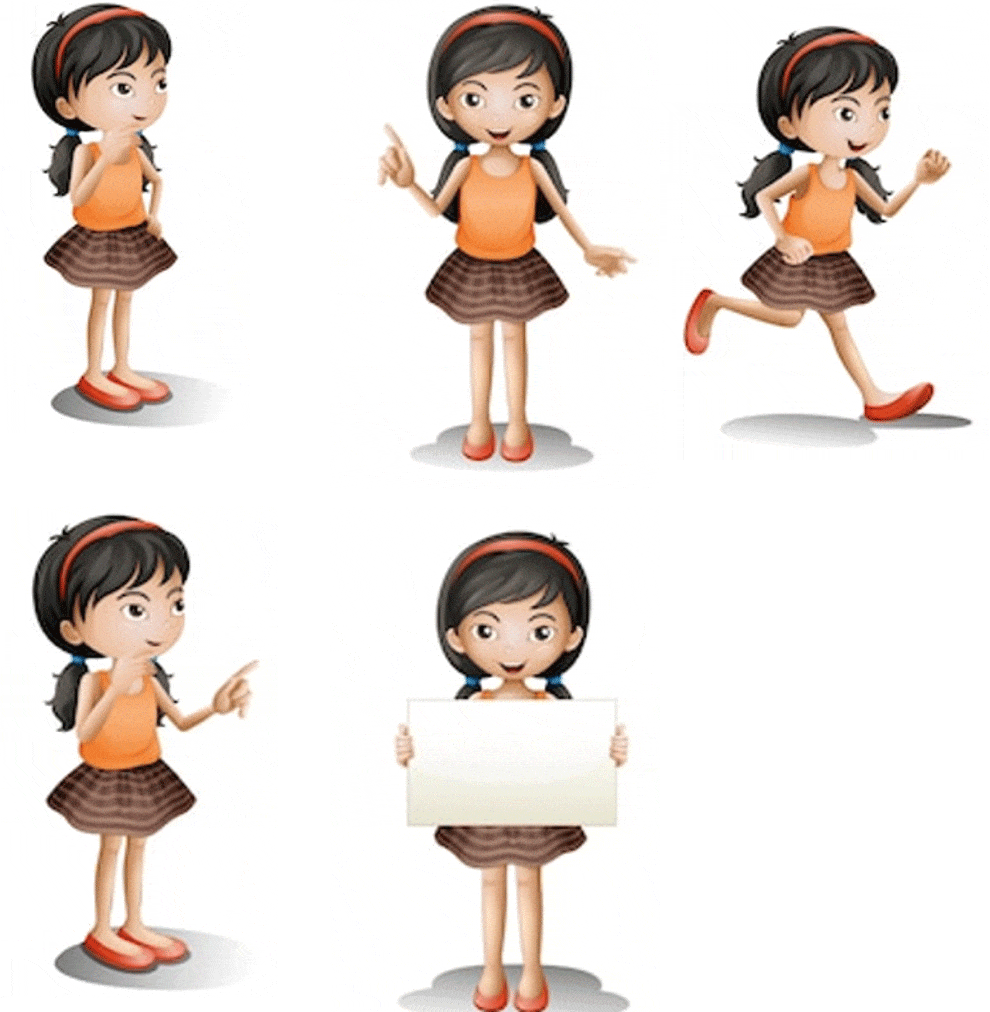
Decide what you want to animate. It could be a series of images, drawings, or text. Ensure your content is saved as separate image files or layers in a Photoshop document. I will be using the following images for this tutorial. 

Create a New Document

Open Photoshop Window

Open Photoshop on your system. Go to “File” > “New” to create a new Photoshop document. Set the document dimensions, resolution, and background color according to your preferences.

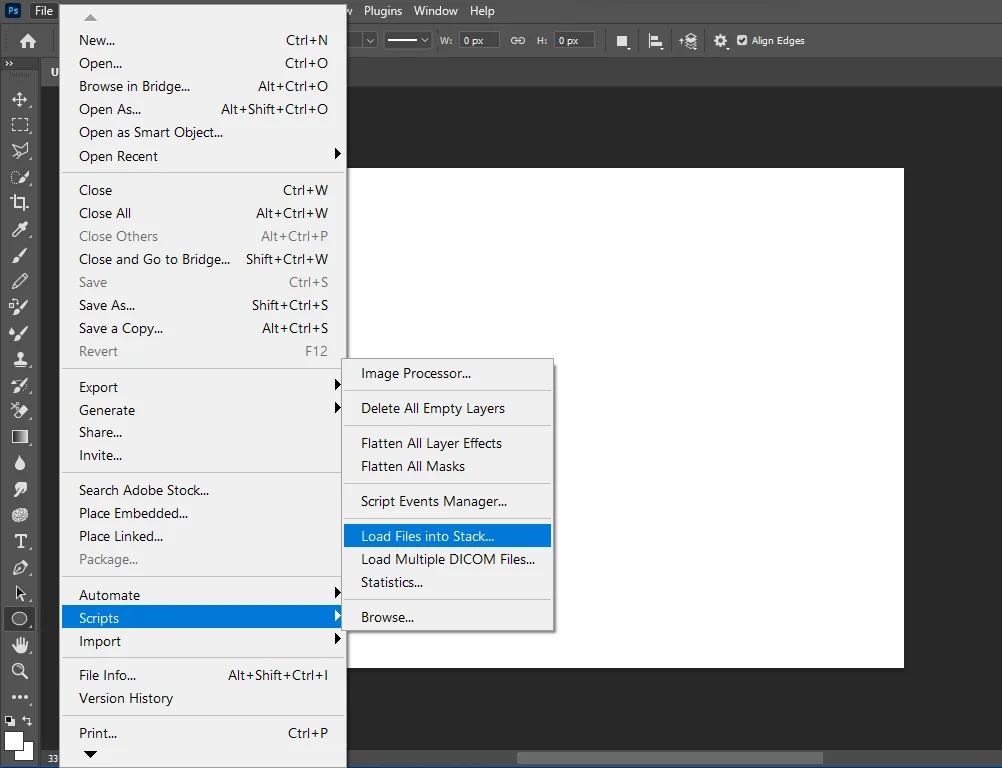
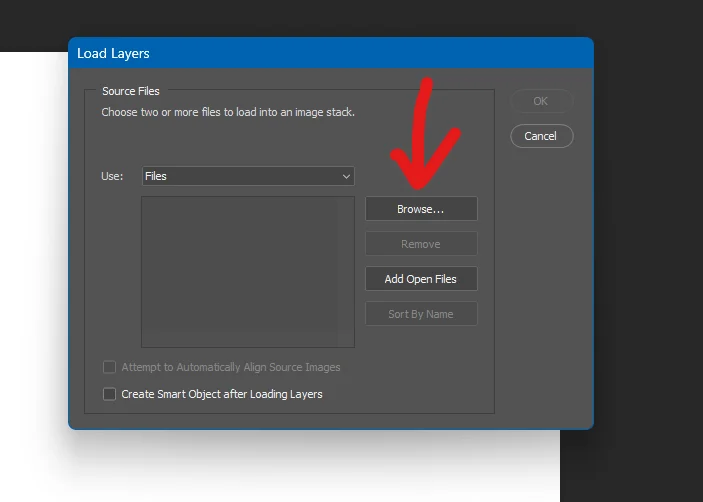
Then navigate to the File tab from the menu bar. Then, click “Scripts” from the list. Now click on “Load Files into Stack” from the side menu.  It will bring up a new window.

Now browse the image series that you want to transform into a GIF.  So, you have to navigate to File > Scripts > Load Files into Stack. 

Select Images

Select Images, Make A GIF in Photoshop

Select Images for GIF

Next, locate and choose the images you’ve saved on your computer to create a sequential GIF. Ensure that you carefully maintain the correct order of your photos, as any mistake in the sequence could affect the quality of your final GIF.

Once selected, your images will be displayed in a list format. Simply click the ‘OK’ button to proceed to the next step.

Timeline Panel

Timeline Panel

Create Frame Animation

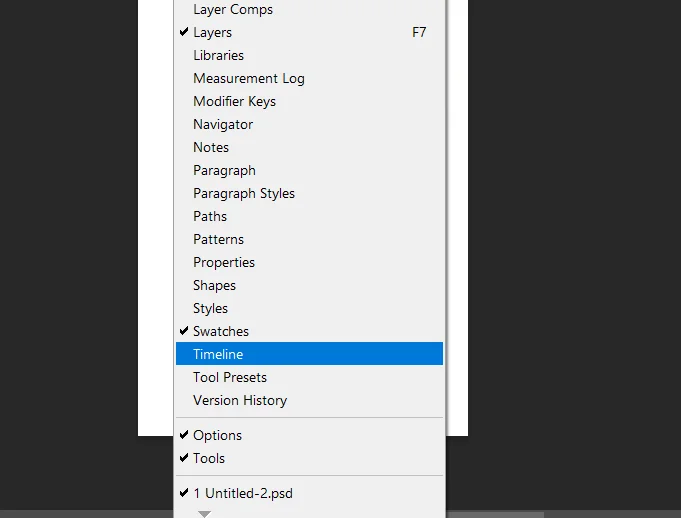
Go to “Window” > “Timeline” to open the Timeline panel. In the Timeline panel, click the menu icon and select “Create Frame Animation.”

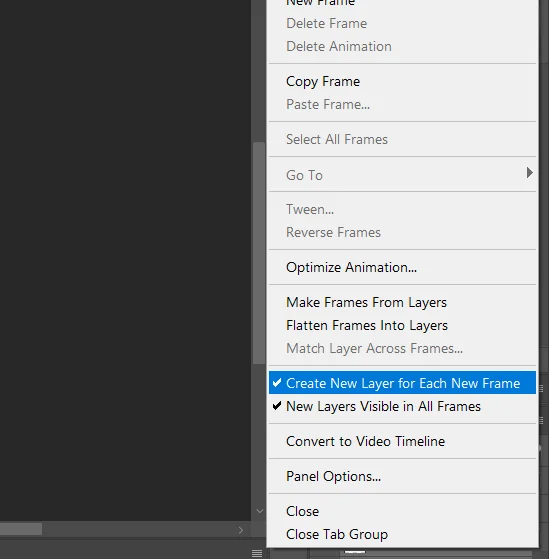
New Layers for Each New Frame

Create New Layer For Each New Frame, Make A GIF in Photoshop

Then click the menu icon on the right side of the timeline window. Choose “Create New Layer for Each New Frame from the dropdown list of options.

Select The Layers

Now, return to the menu bar and click on the “Select” section, then choose “All Layers” from the options. Alternatively, you can use the keyboard shortcut Alt + Ctrl + A to select all layers quickly.

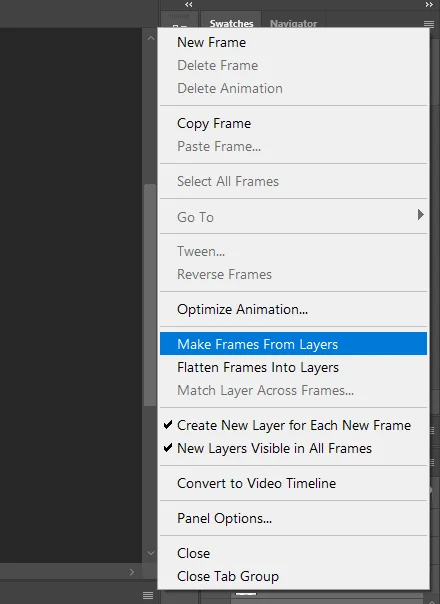
Transform The Layers Into Animation Frames

Transform The Layers Into Animation Frames

Next, once more, click on the menu icon within the timeline window. From the menu that appears, choose the option labeled “Make Frames from Layers.”

Export and Save The Frames

Export and Save The Frames 

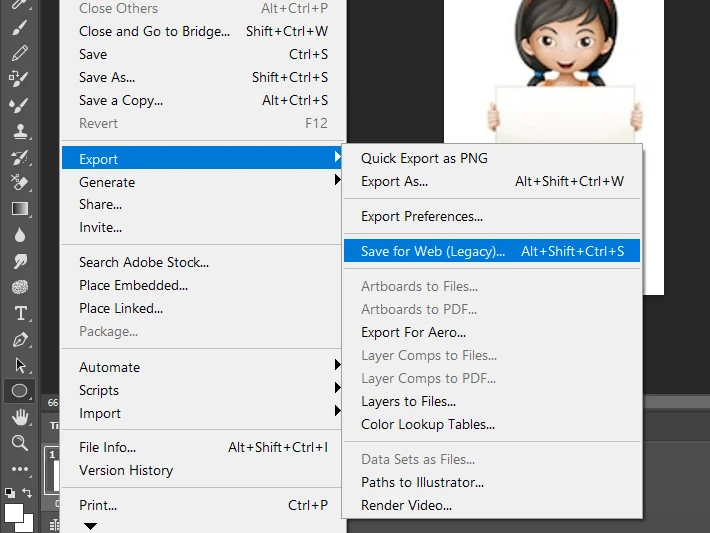
You’re nearly finished creating an animated GIF from an image sequence in Photoshop. However, before proceeding, you need to save the frames. To do this, navigate to the “File” menu, then select “Export” from the dropdown menu. Choose “Save for Web (Legacy)” from there to export the animation. The pathway is: File > Export > Save for Web.

Final Touch | Preview Your Animation

Click the “Play” button in the Timeline panel to preview your animation. Adjust frame durations and content as needed for smooth animation. If required, adjust the loop settings. You can set the animation to loop once, a specific number of times, or infinitely.

Save as GIF

Final GIF

Once you’re satisfied with your animation, go to “File” > “Export” > “Save for Web (Legacy).” Select the GIF format from the dropdown menu in the “Save for Web” dialog box.

Adjust settings like the number of colors, dithering, and more based on your preferences and the quality you want to achieve.

Preview the GIF in the dialog box to see how it will look. Click the “Save” button to save your animated GIF to your desired location. Choose your GIF’s file name and location and click “Save.” 

Final Thoughts

In summary, GIFs and images serve different purposes based on their characteristics. GIFs are commonly used for simple animations and graphics with limited colors.

At the same time, various image formats like JPEG, PNG, and others are chosen based on the image’s specific content and quality requirements. You can create GIFs by following the rules. Also, you can hire an expert editor to do that task for you. 

Read Our Latest Articles-

FAQ

Can I edit the frame duration in a GIF animation?

Yes, you can edit the frame duration in a GIF animation using the Timeline panel. Click on each frame to adjust its duration in seconds.

How do I make a GIF loop continuously in Photoshop?

In the Timeline panel, select “Forever” in the “Looping Options” dropdown to make the GIF loop continuously.

Can I add text to a GIF animation in Photoshop?

You can add text to a GIF animation by creating a text layer for each frame in the Timeline panel.

Show your love

12 Ways to Make A Full Black Background for Photos

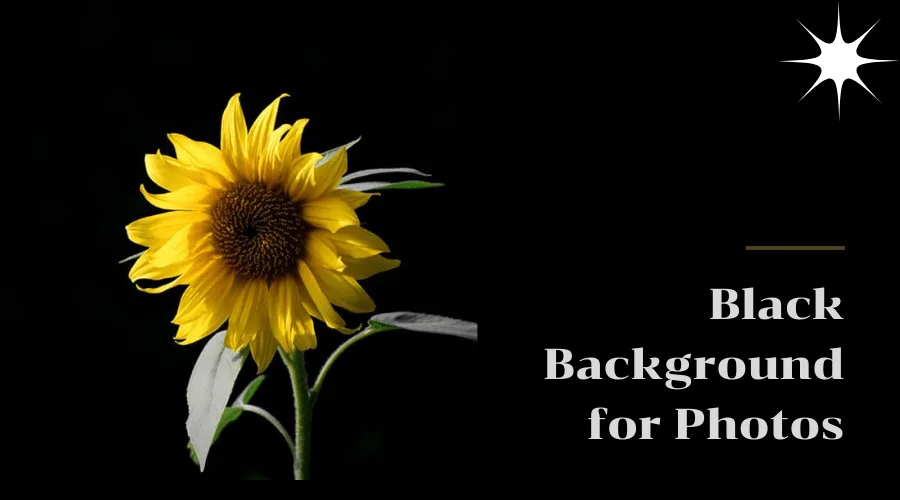
Black Background for Photos

black background appears completely black. It has no visible details or distractions. Black backgrounds are the best way to create a minimalistic look. The primary purpose is to make the subject stand out. Thus, you can draw the maximum attention to the subject. 

Again, the black backgrounds make the subject the sole visual point of interest in the photograph. Also, it has become a trend in social media to use a black background for portraits, headshots, flowers, animals, and product photos. That’s why learning how to make full black backgrounds has become essential.

Here, you are going through the 12 most straightforward ways to create the backgrounds you require for your photos. Read the article to learn and apply these methods according to the requirements. 

Importance of A FullBlack Background for Photos

Black Background

A full black background picture can have several significant benefits and purposes:

Subject Emphasis

A complete black background helps to emphasize the main subject of the photo. The issue becomes the primary focus by eliminating distractions and other elements, allowing viewers to focus solely on it.

Visual Impact

The contrast between a dark black background and the subject creates a striking and dramatic effect. It can add depth, elegance, and professionalism to the image.

Simplification

A black background simplifies the composition by reducing visual clutter. It creates a clean and minimalistic aesthetic, allowing the subject to stand out clearly and eliminating any unnecessary elements that could distract or confuse viewers.

Versatility

A full black background is versatile and can work well with various subjects. It can be particularly effective for portraits, still life, product photography, and other genres where the main focus is on the topic.

Creative Possibilities

With a full black background, professional photographers can experiment and play with lighting, shadows, and creative compositions. The dark canvas offers a blank slate for artistic expression and allows photographers to create unique and visually captivating images.

Brand Consistency

A full black background in commercial photography or branding can help create a consistent and cohesive look. It can showcase products or convey a specific mood or style that aligns with the brand’s image.

Things To Know For Creating A Black Background For Photos
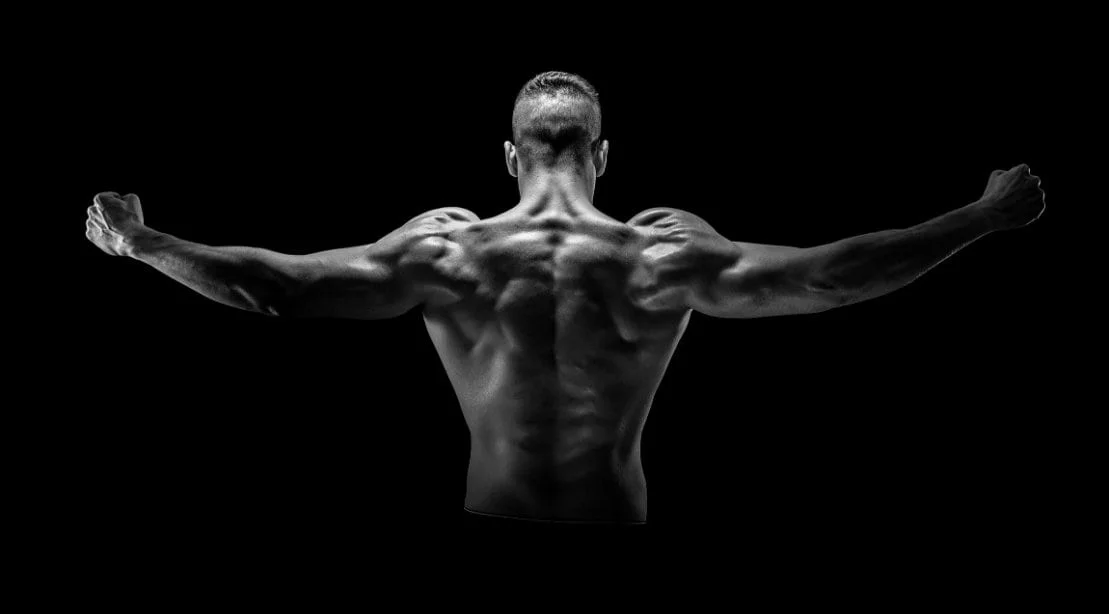
Black Background Images

To create a black background for photos, here are some key points to consider:

Lighting 

Proper lighting is essential for achieving a black background. The subject should be well-lit while the background remains in shadow or receives minimal light. This contrast between the subject and the background helps separate them and create a black background image.

Exposure Control

Controlling the exposure is crucial to prevent the background from becoming gray or washed out. Underexposing the image slightly can help darken the background. Experiment with different exposure settings to find the right balance.

Background Selection

Choose one of the black backdrop ideas or create one using materials like black fabric, paper, or foam board. Ensure the set is wrinkle-free and evenly lit to avoid visible textures or imperfections.

Distance & Positioning

Position the subject sufficiently from the background to minimize any light spills or reflections that could brighten the background. This helps maintain a solid black background for photo editing.

Use of Flags 

Employ flags or gobos (go-betweens) to block or control light spillage onto the background. These can be placed strategically to prevent unwanted light from hitting the backdrop, keeping it dark.

Light Modifiers

Consider using light modifiers such as grids or snoots on your lights to control their direction and focus the light on the subject while minimizing spillage onto the background.

Post-processing Adjustments

After capturing the image, you may need to make some adjustments in post-processing software like Adobe Photoshop. You can selectively darken the background further, adjust levels or curves, and eliminate any remaining details to achieve a pure black experience.

Test and Experiment

Creating a black background requires experimentation and testing. Continually review your results, adjust your lighting setup and camera settings, and assess the impact on the background until you achieve the desired effect.

12 Most Straightforward Ways To Make a Black Background For Your Photos

You know, the queen of all colors is black. Black is a classic color that transcends trends and remains visually appealing across different periods. It has a universal appeal and can lend a timeless quality to photographs or designs.

Moreover, black is often associated with emotions such as mystery, power, and depth. It can evoke a sense of intrigue and create a mood or atmosphere that resonates with viewers.

Black color holds significant importance and symbolism in the world of art. Since ancient times, artists have used black color as charcoal or ink to create a sense of depth and space in an artwork. By using various shades of black, artists can suggest shadows, voids, or the illusion of infinite space.

Black in photography also has a very long history. Photographers have been utilizing black color to create mysterious photos. Famous portrait photographers such as Annie Leibowitz, Peter Lindbergh, and Richard Avedon had thought about rethinking black in photography. 

However, making a perfect black background for photos is not challenging if you know the procedures. All you need is to give more focus on utilizing the natural light. No matter the original color, anything can become a black backdrop with the appropriate lighting and exposure.

These are the 12 ways that you can utilize to create a perfect black background. Let’s check these out: 

Use A Black Backdrop | Black Background Images
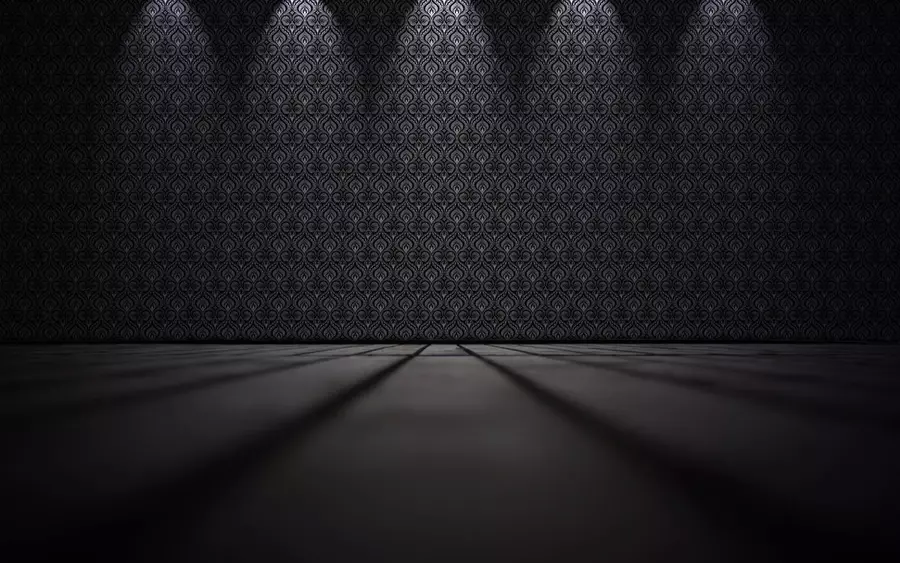
Use A Black Backdrop, Black Background Aesthetic

Set up a solid black backdrop behind your subject. This can be a black sheet, a black paper roll, or a black muslin cloth. However, you can get the same result from all types of black surfaces. You need to choose the backdrop based on your requirements. Consider the material of the backdrop. 

Moreover, setting up the backdrop is also easier. You only need to hang it behind your subject using a backdrop stand or tape it to a wall. Ensure it is stretched out to avoid wrinkles or folds.

Also, you can use an MDF board painted black or gray. Whatever the type of material you have used, consider that it is not reflective. Some paper backdrops may have a shiny surface. Consider these things before starting shooting. 

Set Up A Black Background Panel
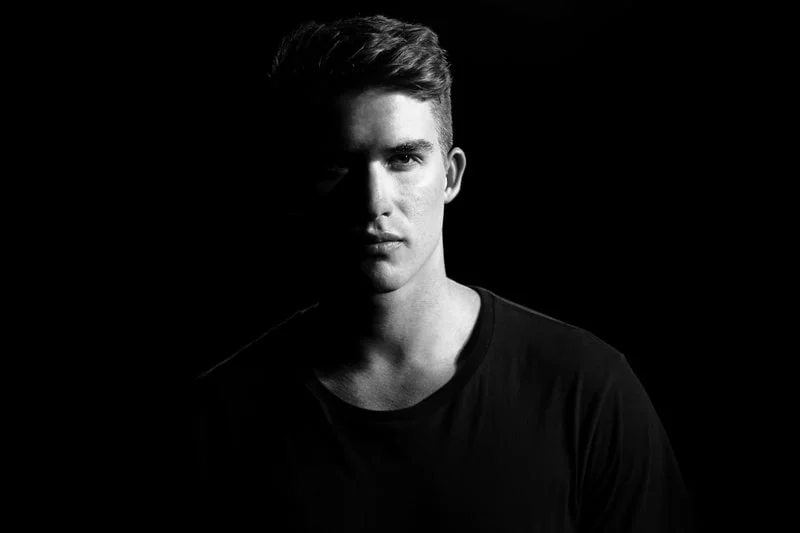
Set Up A Black Background Panel

Select a large black foam board or wooden panel as your black background. Ensure it is sturdy enough to stand independently or propped against a wall. Then set up the black panel in a location where you want to shoot your photos. If the panel doesn’t stand independently, use clamps or tape to secure it to a stand or wall.

Place your subject in front of the black panel, ensuring they are far enough from the background to avoid casting shadows or causing unwanted light spillage onto the board. After that, position your lighting equipment. Use a key light to light your subject and additional lights or reflectors to fill any necessary areas. 

Utilize The Spot Metering Mode
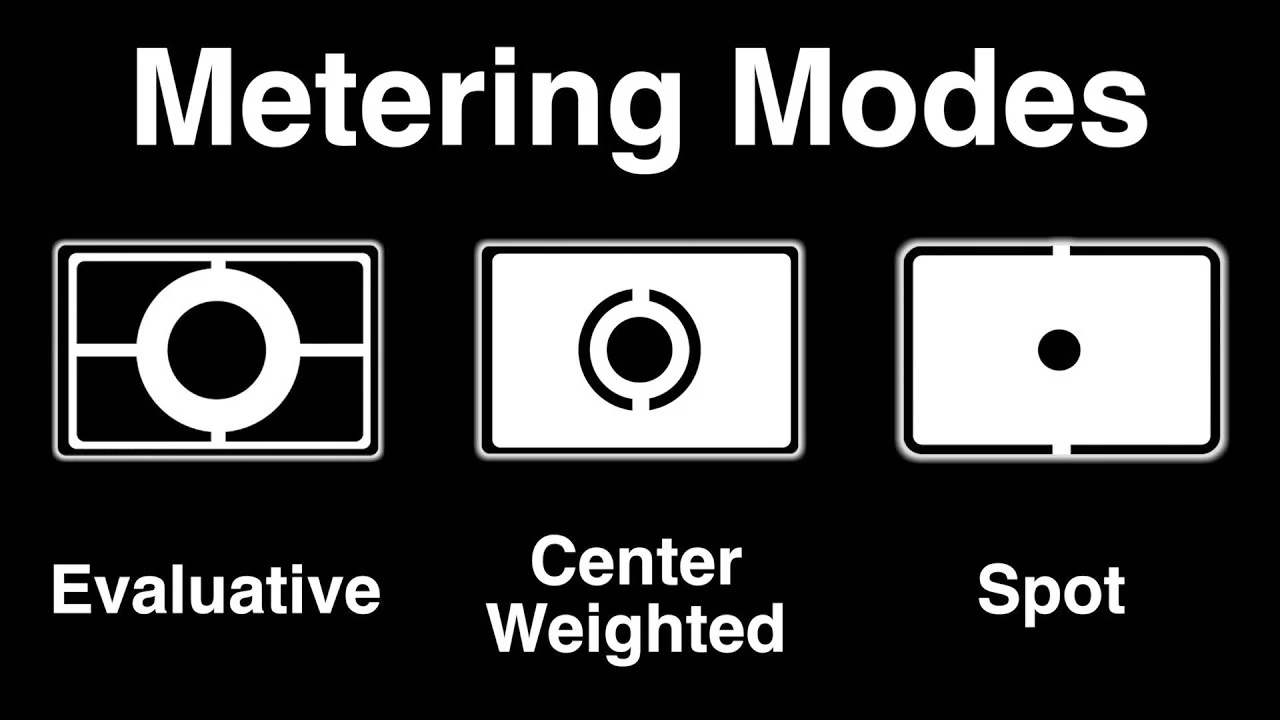
Utilize The Spot Metering Mode

Using the spot metering mode, you can measure the amount of light on the subject. Different light metering modes are available on every DSLR and mirrorless camera. They gather information from a section of the frame (or the entire frame) and then modify the exposure using this combination of data.

Access your camera’s menu or settings and select the spot metering mode. This mode measures the exposure based on a small, specific spot (less than 5% of the surface) in the frame rather than the entire scene.

Moreover, you need to position the spot metering area over a mid-tone space of your subject. Now half-press the shutter button or use the exposure lock button to lock the exposure reading. Recompose your shot as desired for the black background. 

Use A Gray Card | Pink and Black Background
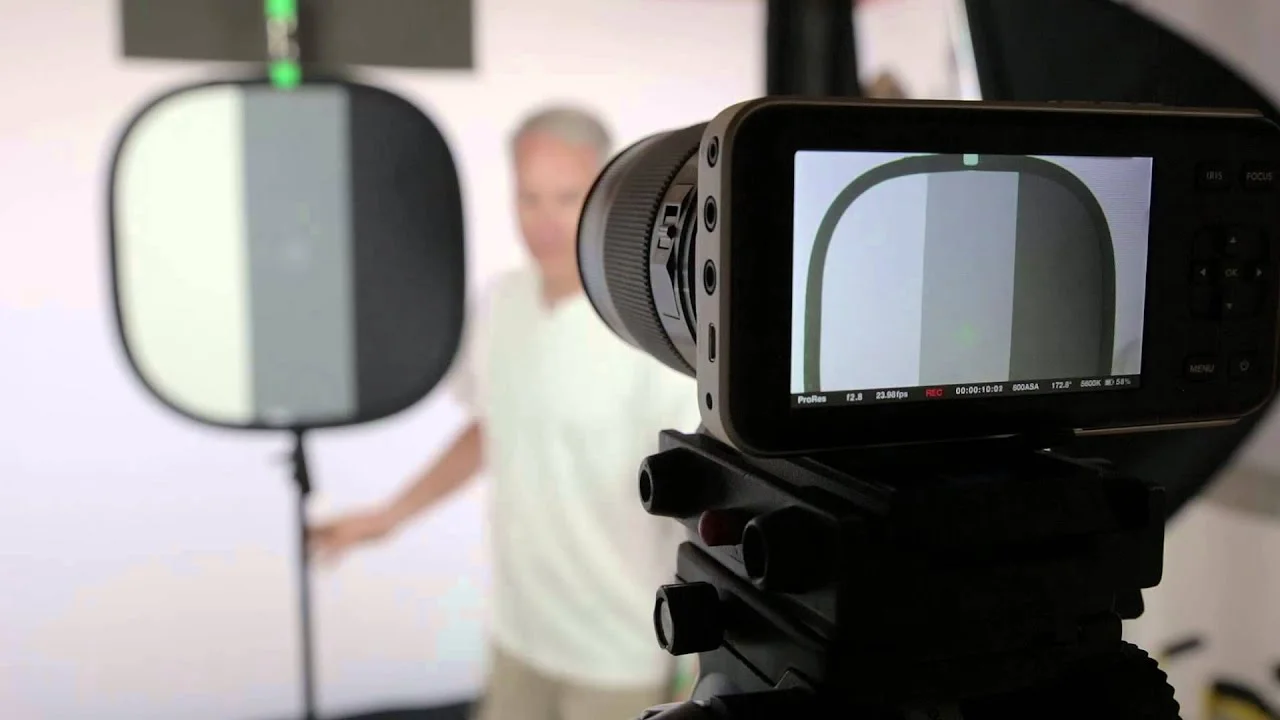
Gray Card For Photography

A gray card can help achieve accurate exposure when working with a black background. First, set your camera to manual or exposure mode with manual control. Adjust your aperture, shutter speed, and ISO based on your desired exposure values, considering your subject and lighting conditions. 

Now, you must aim your camera at the gray card, ensuring it fills the frame or takes up a significant portion. Use your camera’s spot metering mode to measure the exposure specifically from the gray card.

Angle Lighting In The Proper Direction
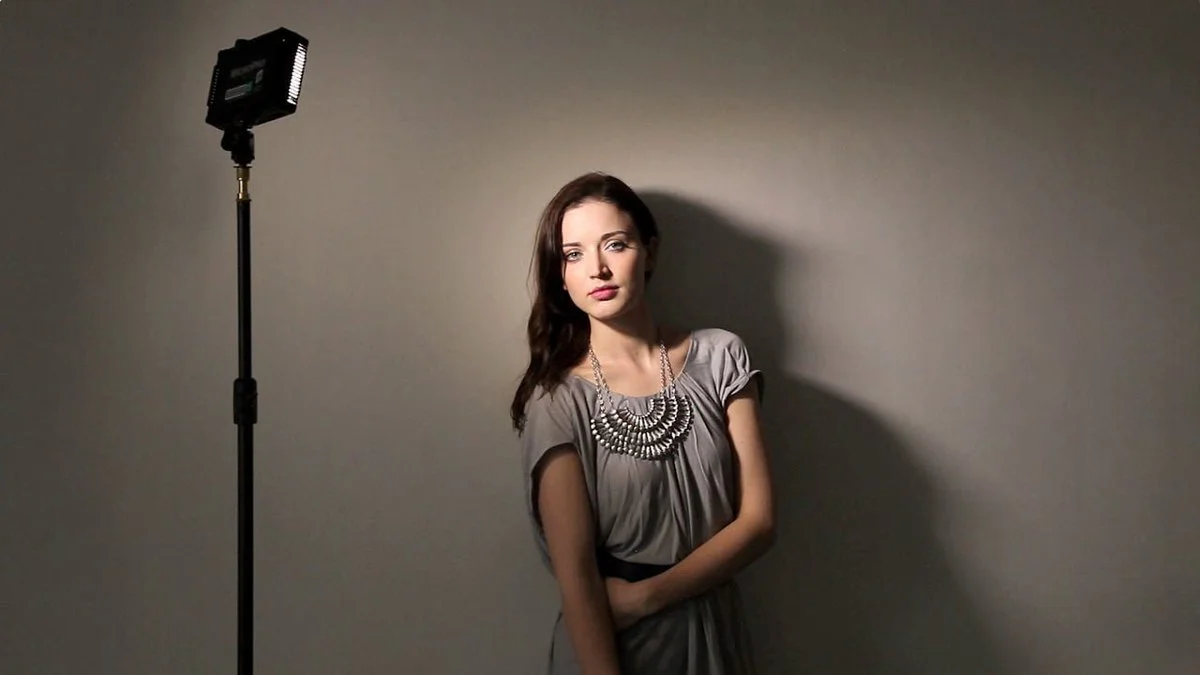
Angle Lighting, Black Background

You have to maintain proper spacing between the subject and the backdrop. Then angling lighting in the appropriate direction is essential to light only the subject. Thus, you can keep your issue in focus by reducing the light spreading onto the background. 

If you want a perfect black background, the light should only fall on your subject. Try using a Rembrandt lighting scheme or a lateral light at an angle that doesn’t reach the backdrop. This technique is ideal for interior settings where you can employ (or prevent) window or artificial light sources because it demands greater control over the morning. 

There are different ways to get perfect lighting on the subject. For example, you can place the light at a 45-degree angle without directly facing the subject. You can find an ideal spot for the subject by experimenting with the lighting setup. 

Utilizing An External Light Meter | Black Background Wallpaper
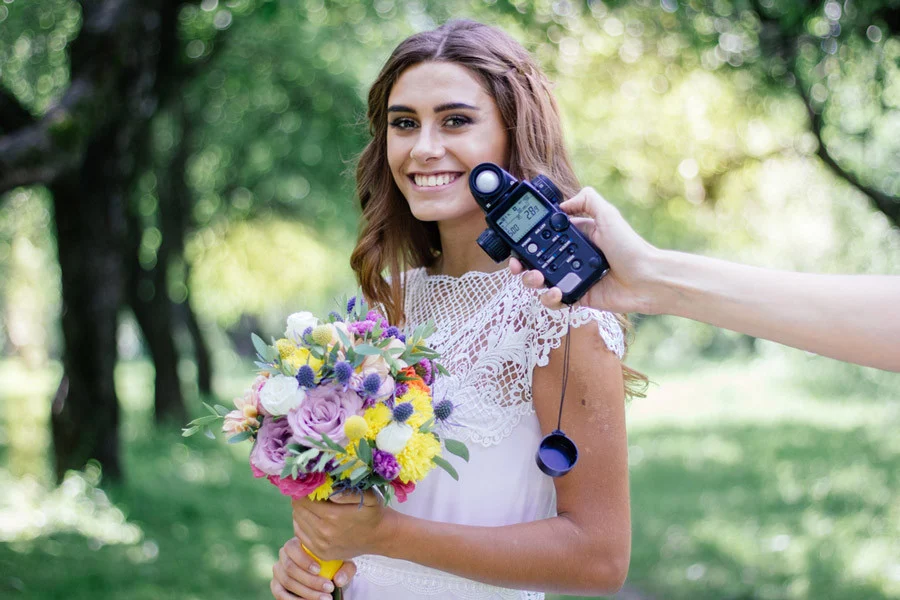
External Light Meter Photography

An external light meter lets you measure the light falling on the subject independently of the camera’s built-in metering system. It provides more precise exposure recommendations, which can help you achieve accurate exposure for a black background. You should experiment with different lighting conditions, metering modes, and adjustments to achieve the desired effect.

Thus, you can get rid of black backgrounds looking gray. Professional photographers use handheld incident light meters to determine exposure accurately.  

Blacken The Backdrop Using Flags
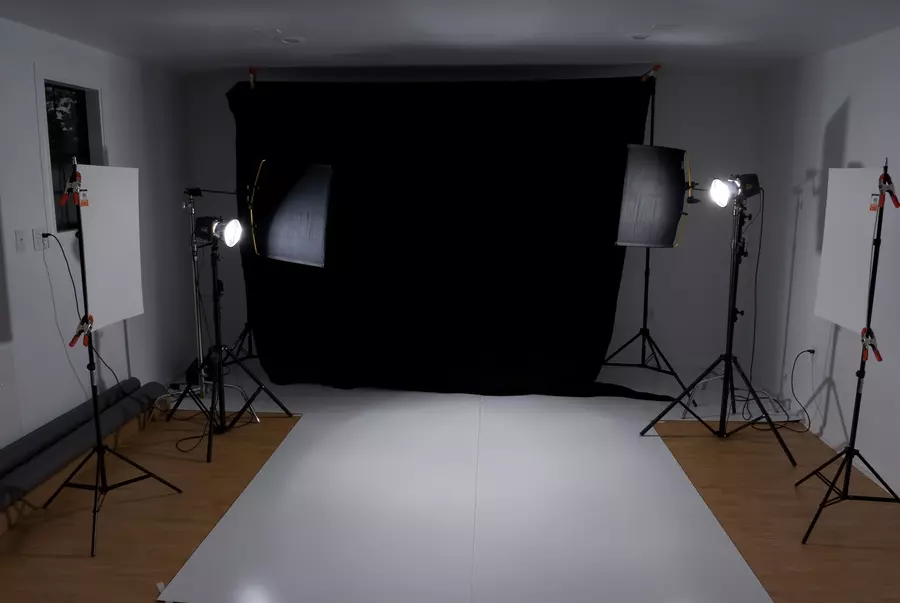
Blacken The Backdrop Using Flags

You can transform any backdrop into the black by controlling the falling of light on it. However, it is not easy because light splits on the background, making it gray. That’s why professional photographers utilize flags to block light completely. 

You can use large flags bigger than the light source to ensure adequate light control. This helps create a clean separation between the subject and the black backdrop. Now position the flags on the sides or above the light source. This will block any light that may spill onto the backdrop. You can use C-stands or clamps to hold the flags in place. 

Furthermore, experiment with the positioning of the flags to achieve the desired effect. Move them closer or further away from the light source, angle them, or use multiple flags to shape the light and prevent it from reaching the backdrop.

Use A Speedlight | Black Background Texture
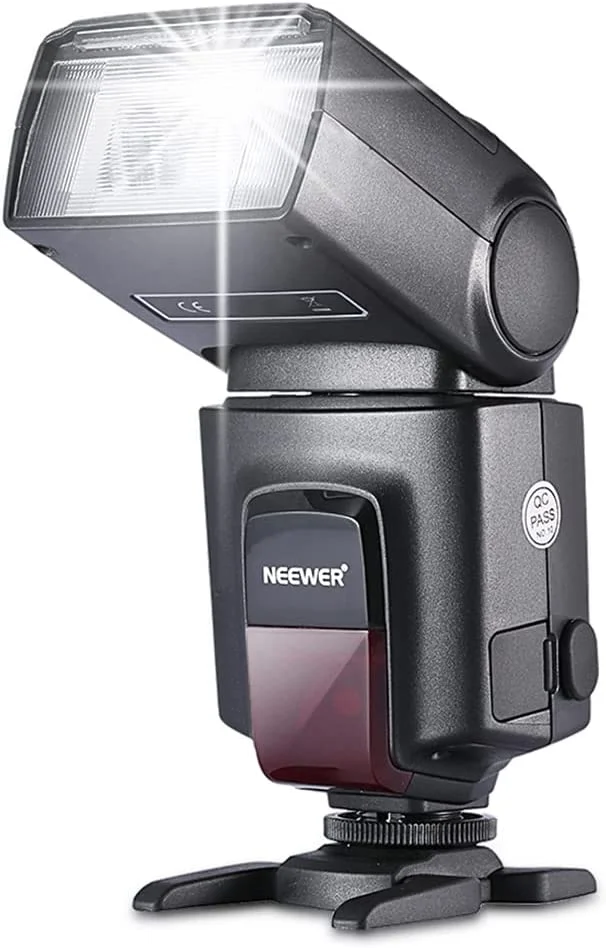
Speedlight Flash

You can also use a Speedlight to create a black background for the photoshoot. Professionals have termed this process of creating a background as an “invisible background.” The mechanism is simple. You must utilize the speed light’s full power to illuminate the subject. Thus, the background will remain in complete darkness. 

You may also need a light modifier, such as a softbox or umbrella. Professional photographers thus eliminate light spilling in the background. 

Utilizing A Small Light Source | Textured Black Background
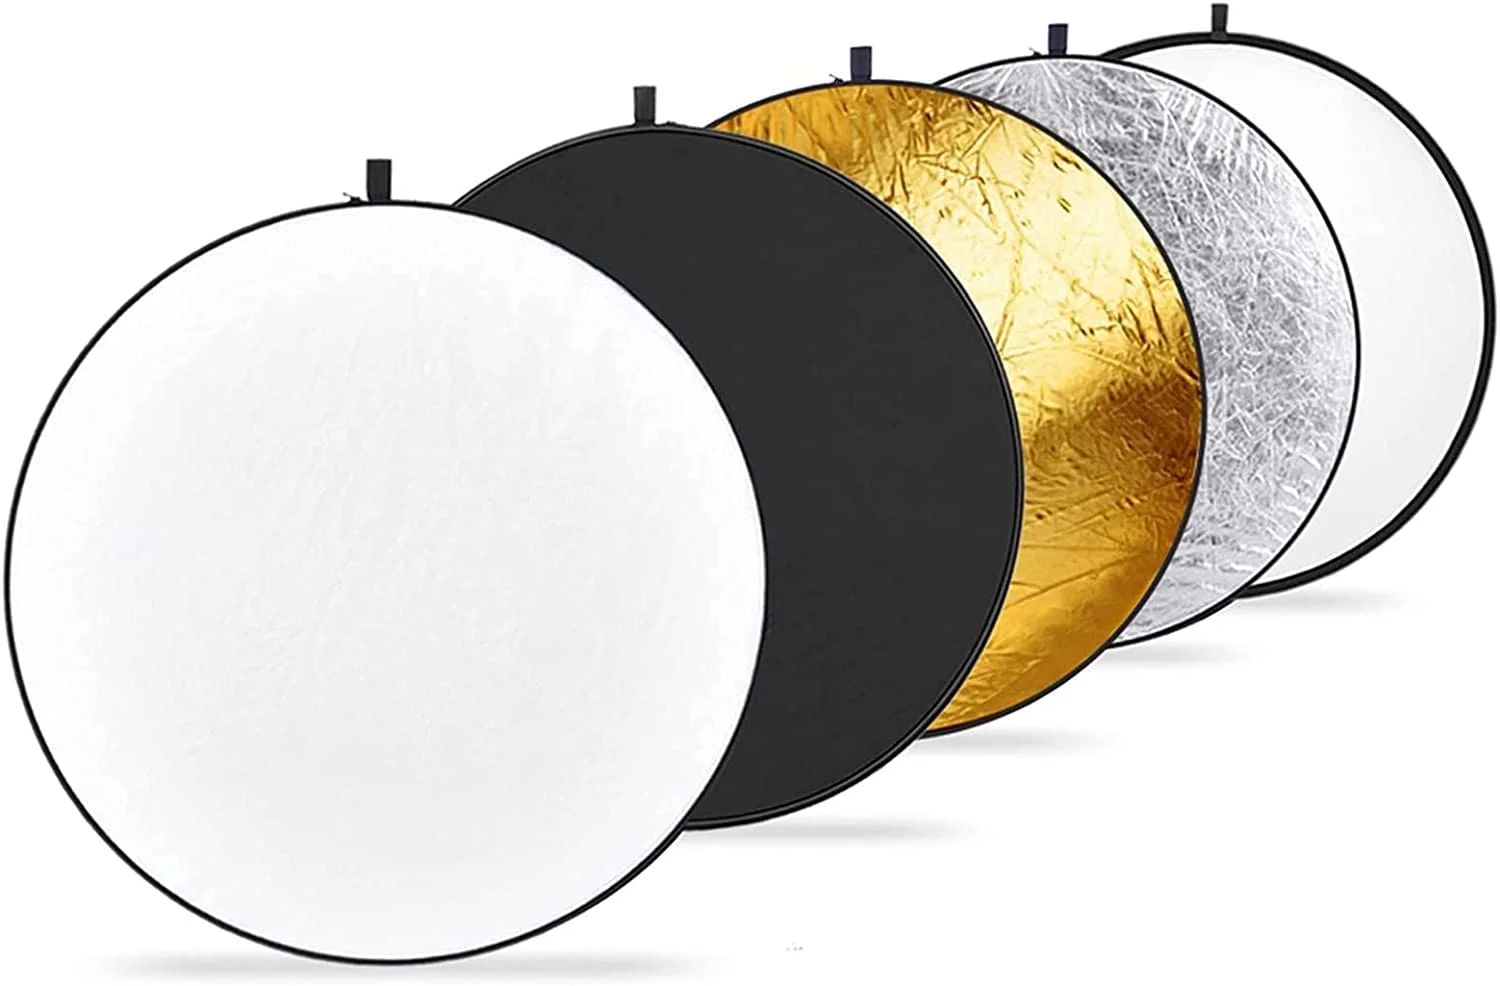
Light Blocker

A small light source is necessary to get light directly on the subject. So you can get more contrast to isolate the subject from the background. You can use an external lamp or flash as the light source. However, you must still use a light blocker to prevent light from spilling onto the backdrop. 

Look For Shadow Areas In Outdoor Shooting

Take a moment to assess the lighting conditions during outdoor shooting. Now understand how the sun casts shadows. In outdoor shooting, you can not control lighting. That’s why you must look for shadow areas to get high-contrast photos. 

Look for areas that are likely to be in shadow based on the position of the light source. For example, you can place the subject in front of a dark area, such as a doorway or a tunnel. Buildings, trees, or other elements obstructing the direct light path can create shadowed regions.

Use A Black Photo Booth | Red and Black Background
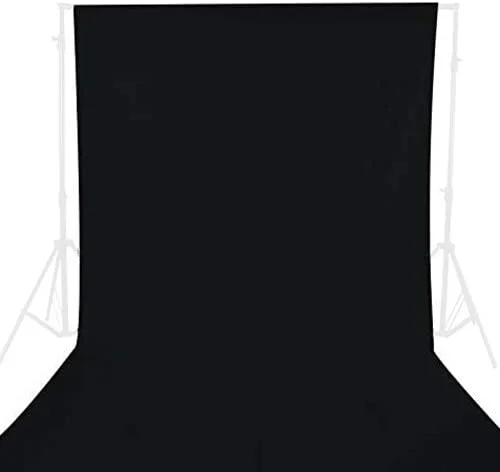
Black Photo Booth, Black Background

If you can access a photo booth, use the black backdrop option. Photo booths often provide a controlled environment for achieving consistent results. You can attach a black fabric or black backdrop curtain to the photo booth frame. Ensure the backdrop covers the entire area where the photos will be taken.

Use Photoshop To Create Images With Black Background
Adobe Photoshop 

Well, I do not like to recommend this. But you can use Photoshop as a second chance to fix the gray color in the background. Moreover, you can use Photoshop to create artificial experiences. 

You can create a black background for Photoshop by selecting “File” and selecting “New” to create a new document. Enter the desired dimensions for your image and set the background contents to “Black.” Click “OK” to create the new record.

Use distinct layers and a non-destructive approach to prevent damaging the source image and get the desired results.

Final Thoughts | Cool Black Background

Black background plays an essential role in portrait photography and creates a mysterious look. Following the above-mentioned methods, you can also create perfectly-looking black backgrounds. Try to practice more and more until you get the desired result. 

Latest Articles-

FAQ | Black Background With Heart

What app makes the background of the photo black?

There are several options to make the background of your photos black. However, Photoshop is the first choice for professionals. Also, you can use Fotor, lightroom, GIMP, and other programs. 

How can I change my photo background? 

First, you need to select the subject using a selection tool. Then take the subject to a new layer. You can take a unique background and place the cutout subject on it.  
Show your love

Top 10 Yoga Poses for Beginners in 2024

Yoga Poses For Beginners

Are you a beginner looking to start your yoga poses journey? Look no further! This blog will introduce you to 10 Yoga Poses specifically designed for beginners in 2024. Yoga Poses offers numerous benefits, including improved flexibility, reduced stress, and enhanced overall well-being.

Whether you’re seeking physical fitness or mental relaxation, these yoga poses are perfect. We’ll provide step-by-step instructions, modifications, and key points to remember for each pose. Get ready to experience the excellent benefits of Yoga Poses for beginners.

Best 10 Yoga Poses for Beginners in 2024

Discover the best 10 Yoga Poses for beginners in 2024. Enhance your flexibility, reduce stress, and improve your overall well-being with these easy-to-follow yoga poses. Start your yoga journey today and experience the transformative benefits of the following Yoga Poses.

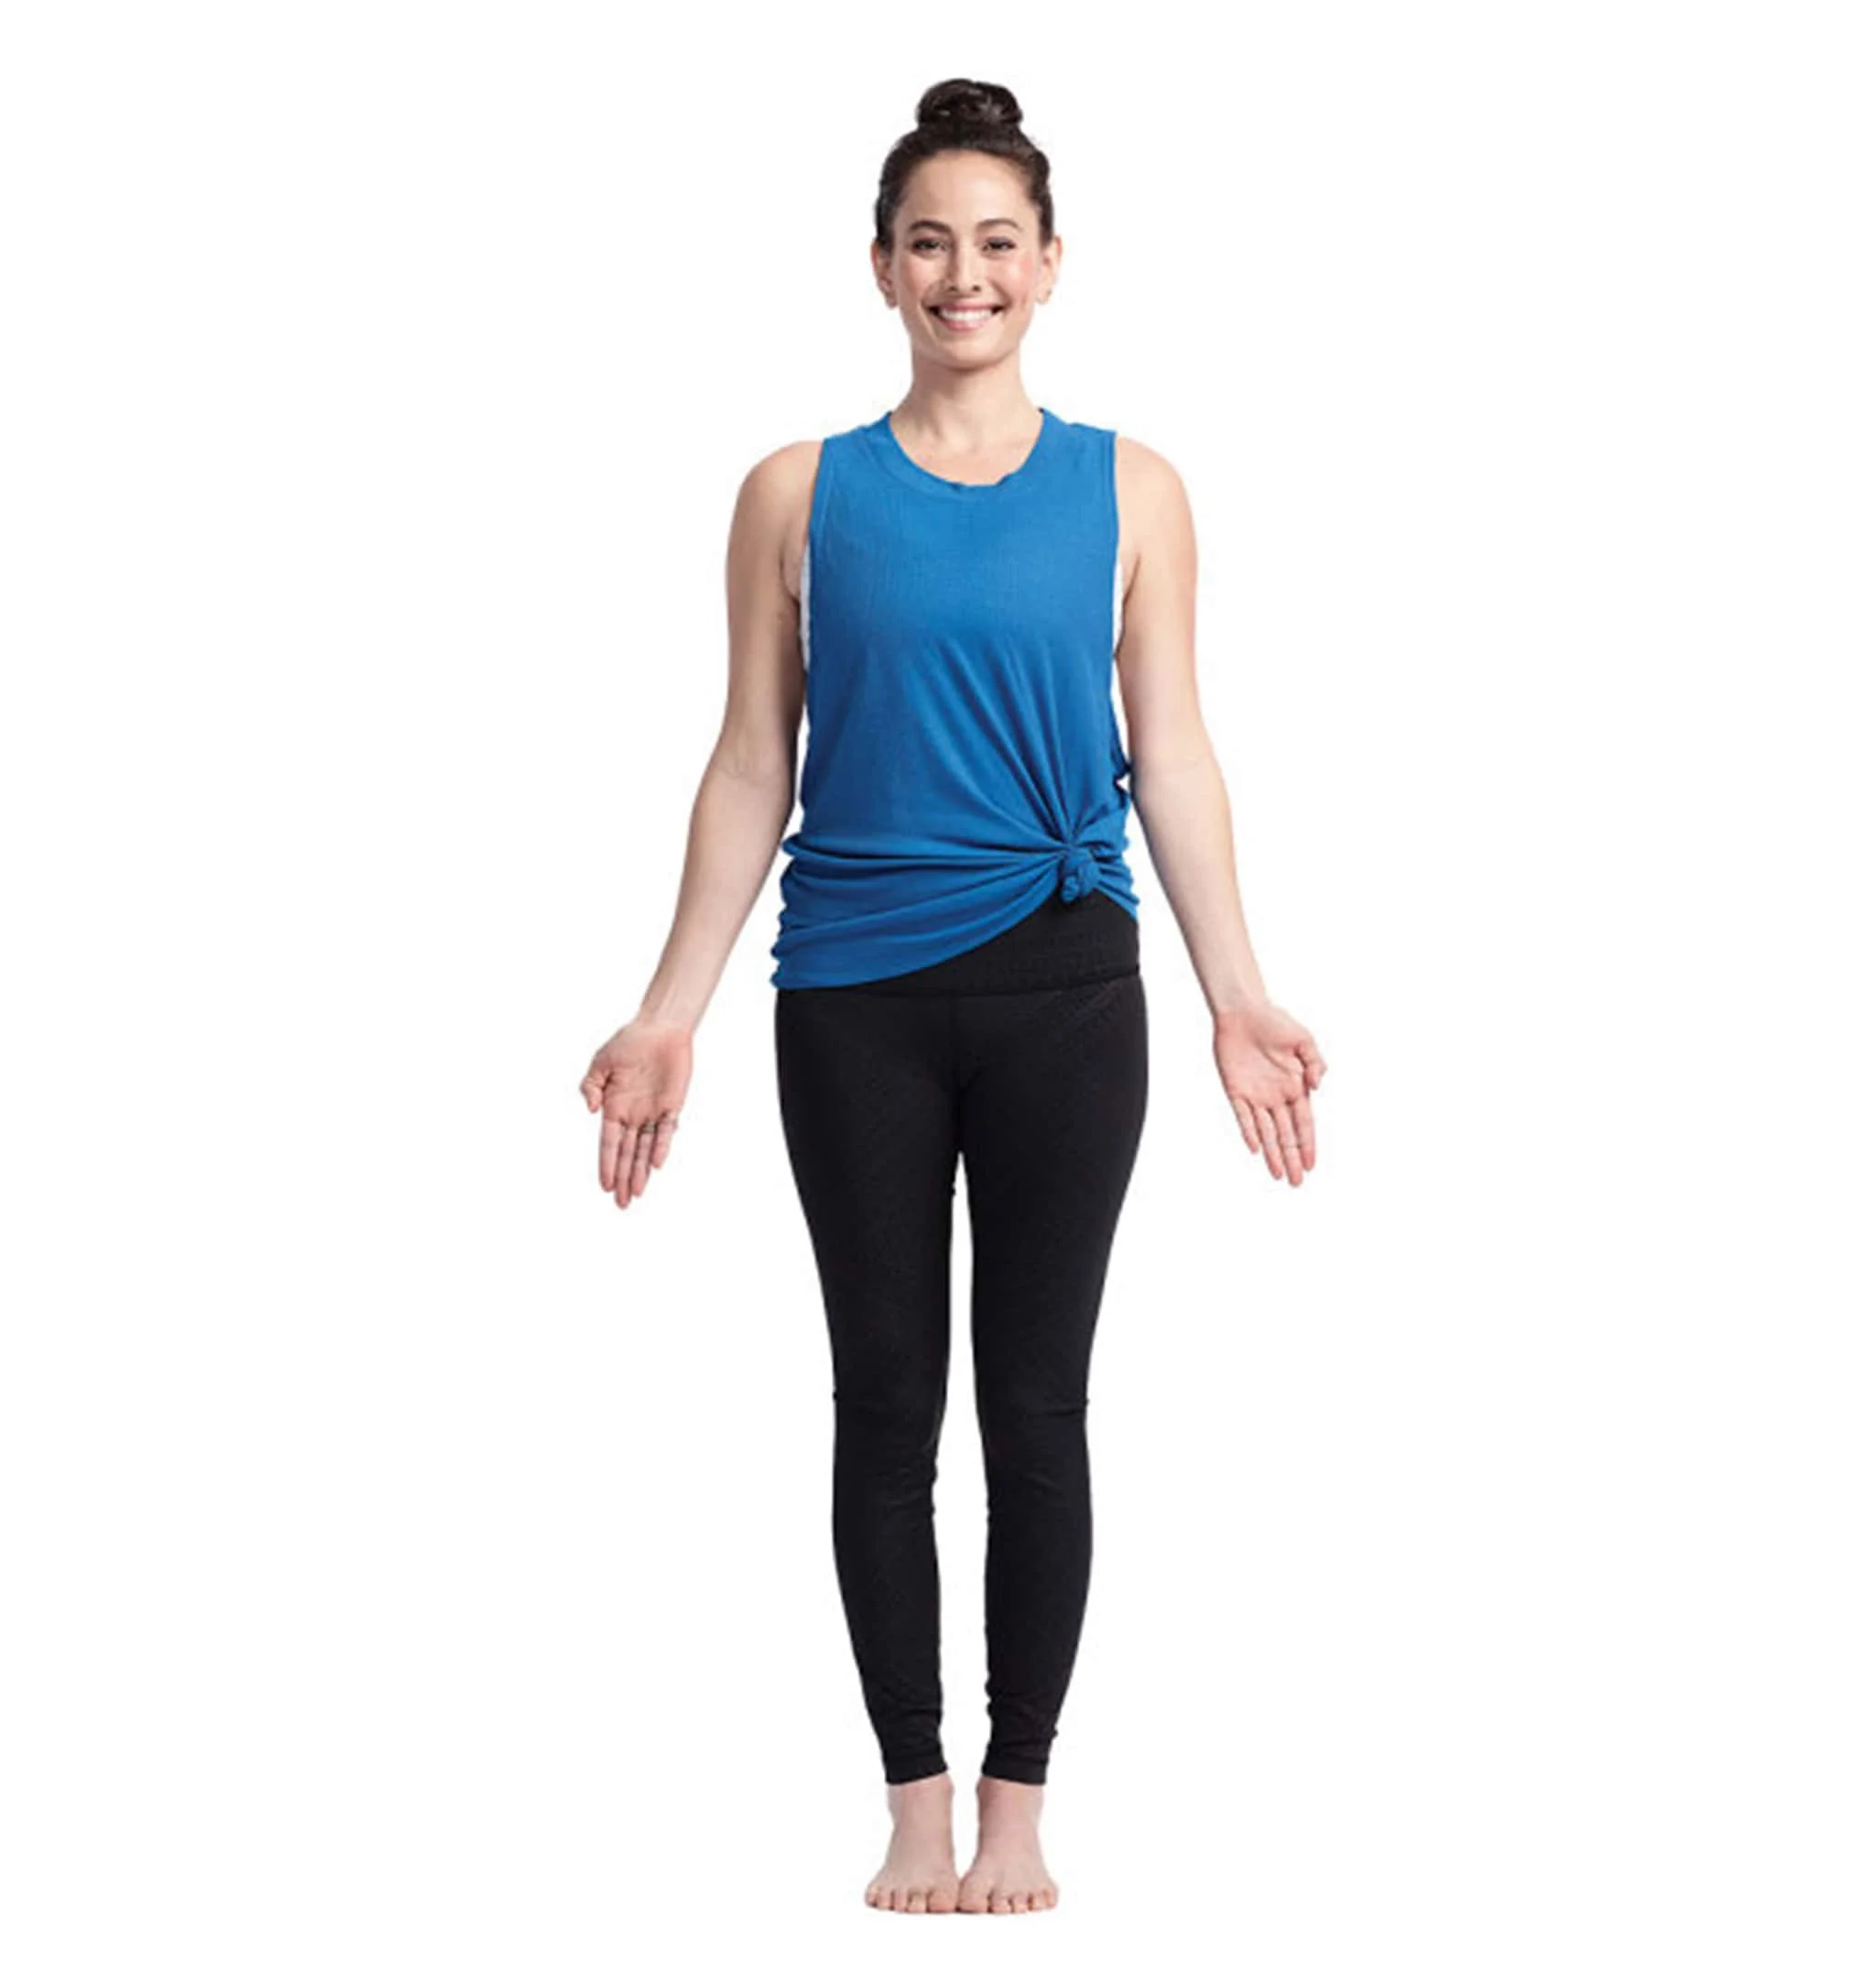
Mountain Pose (Tadasana) | Yoga Poses Ideas

Mountain Yoga Pose, Yoga Poses

Are you a beginner looking for the best yoga poses to start your practice? Look no further than the Mountain Pose (Tadasana). This foundational yoga pose is not only simple to perform but also offers a wide range of benefits for both the body and mind. Let’s dive into the details of the Mountain Yoga Pose, including its benefits and instructions for beginners.

Benefits

  • By aligning your spine, shoulders, and hips, the Mountain Pose helps improve your overall posture.
  •  This pose encourages you to be mindful of your body’s alignment and sensations, promoting a deeper mind-body connection.
  • The Mountain Pose cultivates mental clarity and focus.
  • Holding the pose requires engaging your leg muscles and core, which helps build strength and stability.
  • Tadasana Yoga Poses allow for deep, conscious breathing, promoting relaxation and stress reduction.

Instructions

  • Stand tall with your feet hip-width apart and parallel to each other.
  • Distribute your weight evenly between both feet, grounding them firmly into the ground.
  • Engage your leg muscles, lift your kneecaps, and lengthen your spine.
  • Roll your shoulders back and down, allowing your chest to open.
  • Relax your arms by your sides, with your palms facing forward.
  • Gently lengthen your neck and lift the crown of your head towards the ceiling.
  • Maintain a steady, relaxed breath and hold the pose for several breaths or as long as comfortable.

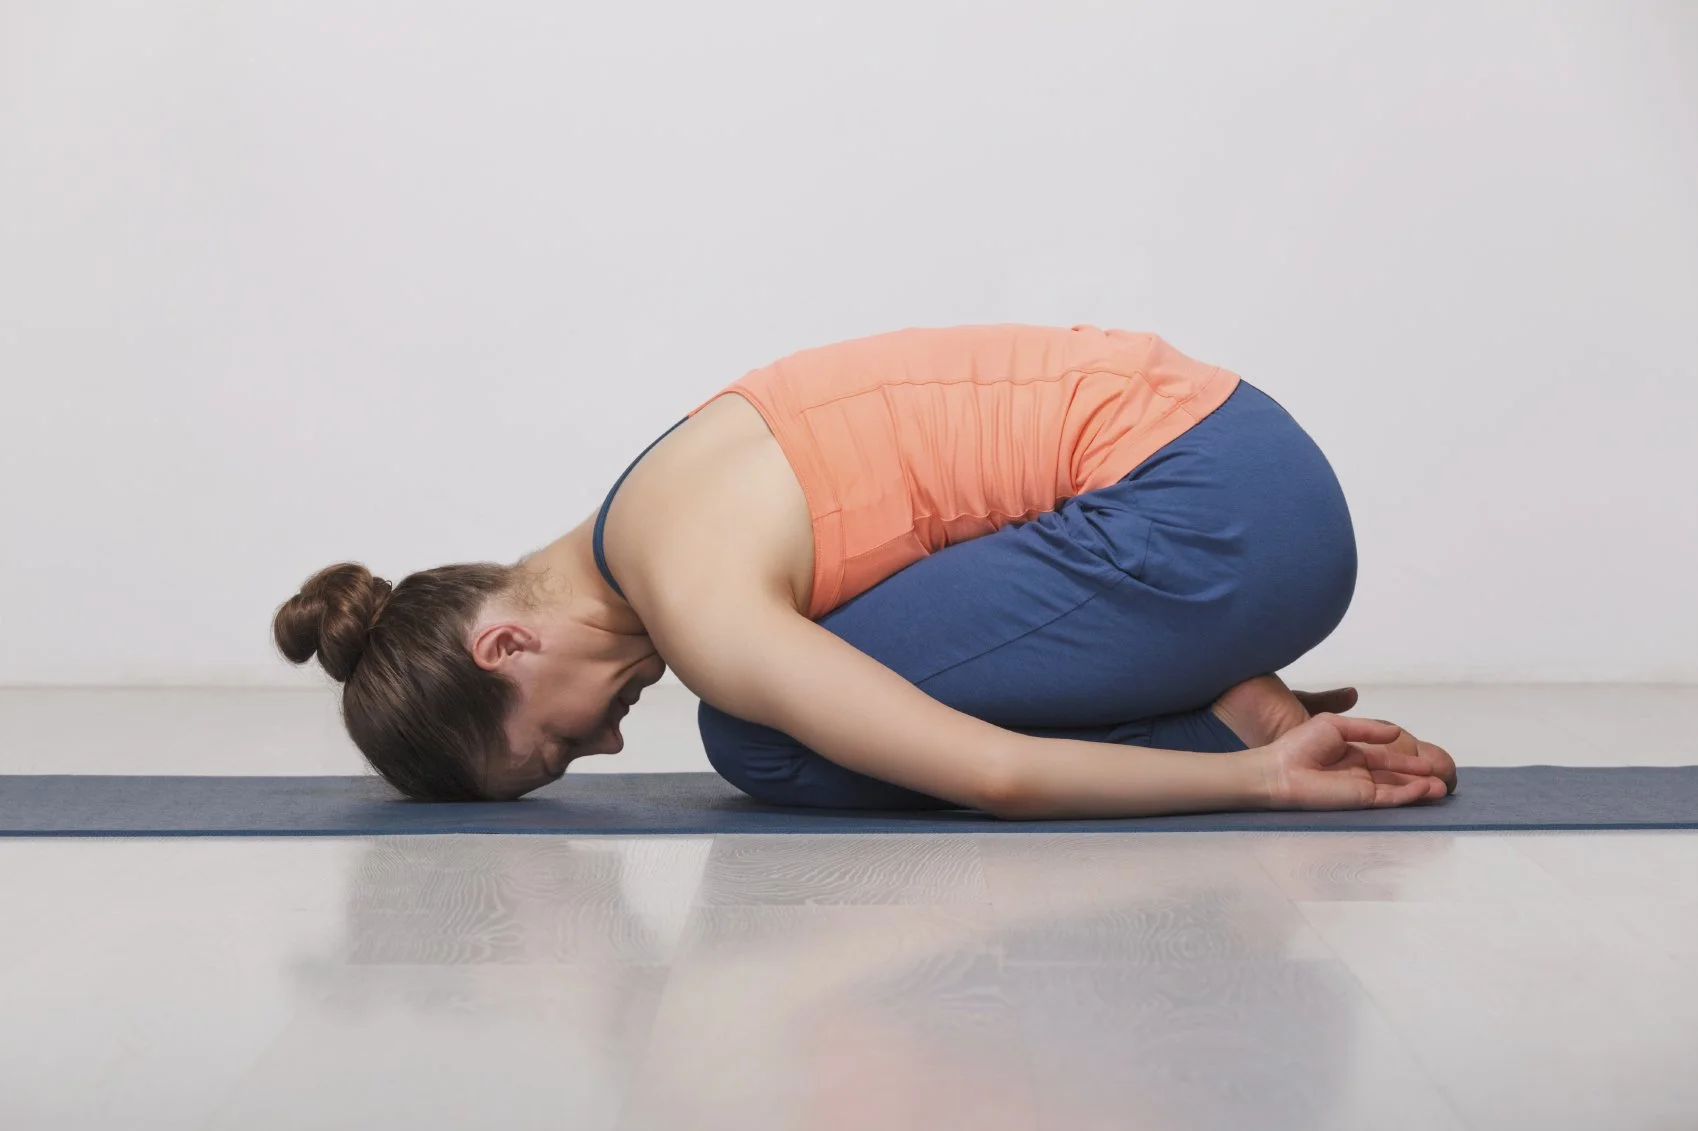
Child’s Pose (Balasana) | Balasana Yoga Poses

Child's Pose (Balasana), Yoga Pose Ideas

Are you looking for calming and restorative yoga poses? Look no further than Child’s Pose (Balasana). This gentle and accessible pose is perfect for finding relaxation and comfort during your yoga practice. Let’s explore the benefits and instructions of Child’s Pose.

Benefits

  • Relaxation and stress relief.
  • Gentle stretch for the back.
  • Hip and thigh opening.
  • Deep breathing and mindfulness.

Instructions

To practice Child’s Pose, follow these simple instructions:

  • Begin by kneeling on the floor.
  • Bring your big toes together and separate your knees to hip-width distance.
  • Lower your hips towards your heels and rest your buttocks on your heels.
  • Exhale as you gently fold your torso forward, bringing your chest towards your thighs.
  • Rest your forehead on the mat or a bolster if comfortable.
  • Extend your arms forward or alongside your body, palms facing up.
  • Allow your shoulders to relax and sink toward the ground.
  • Stay in this pose for several breaths or as long as desired, focusing on deep, slow breaths and a relaxed body.

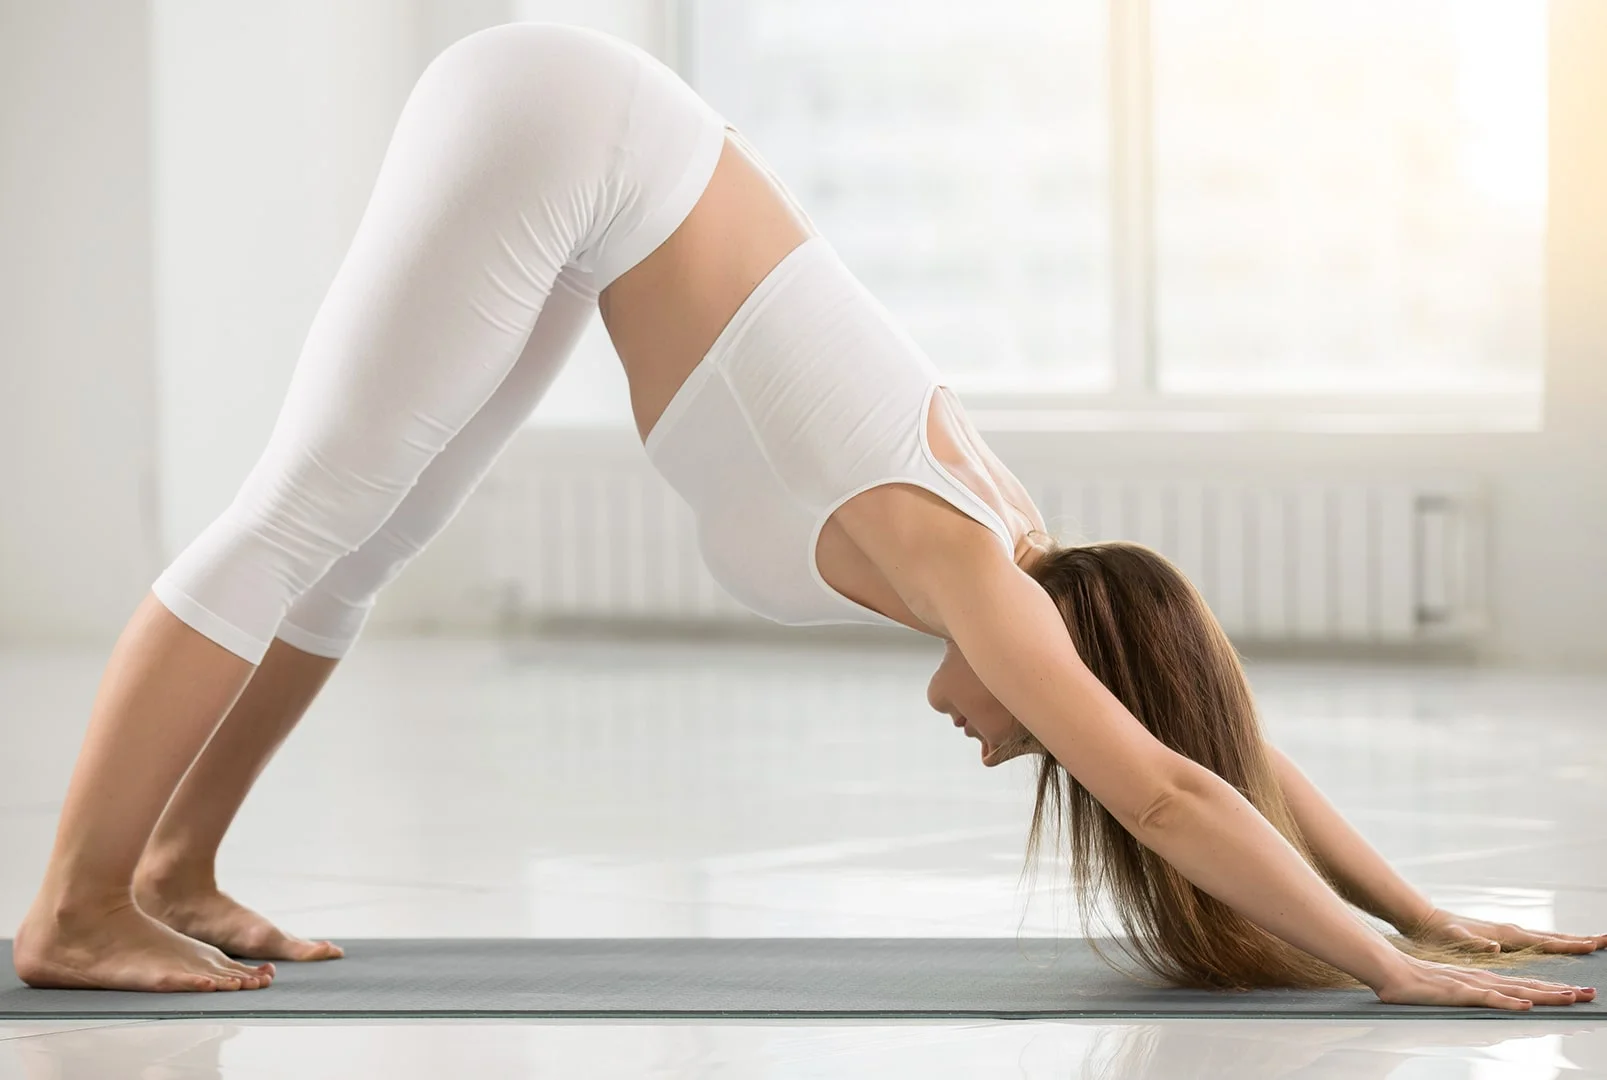
Downward-Facing Dog (Adho Mukha Svanasana)

Downward-Facing Dog

Are you a beginner looking for effective and accessible yoga pose Ideas? Look no further than Downward-Facing Dog (Adho Mukha Svanasana). This popular pose is not only beginner-friendly but also offers many benefits for both the body and mind.

Benefits

  • Strengthens the upper body.
  • Stretches the hamstrings and calves.
  • Lengthens the spine.
  • Relieves tension.
  • Energizes the body.

Instructions

To practice Downward-Facing Dog:

  • Start on your hands and knees, with your hands slightly forward of your shoulders and your knees directly below your hips.
  • Spread your fingers wide and press your palms into the mat.
  • Tuck your toes under, lift your knees off the ground, and begin to straighten your legs, pushing your hips up and back.
  • Lengthen your spine, keeping it long and straight.
  • Press your heels toward the floor, but if they don’t reach, it’s okay to keep a slight bend in your knees.
  • Engage your core muscles and relax your neck, allowing your head to hang freely.
  • Breathe deeply and hold the pose for several breaths or as long as comfortable.

Warrior I (Virabhadrasana I)

Warrior I (Virabhadrasana I)

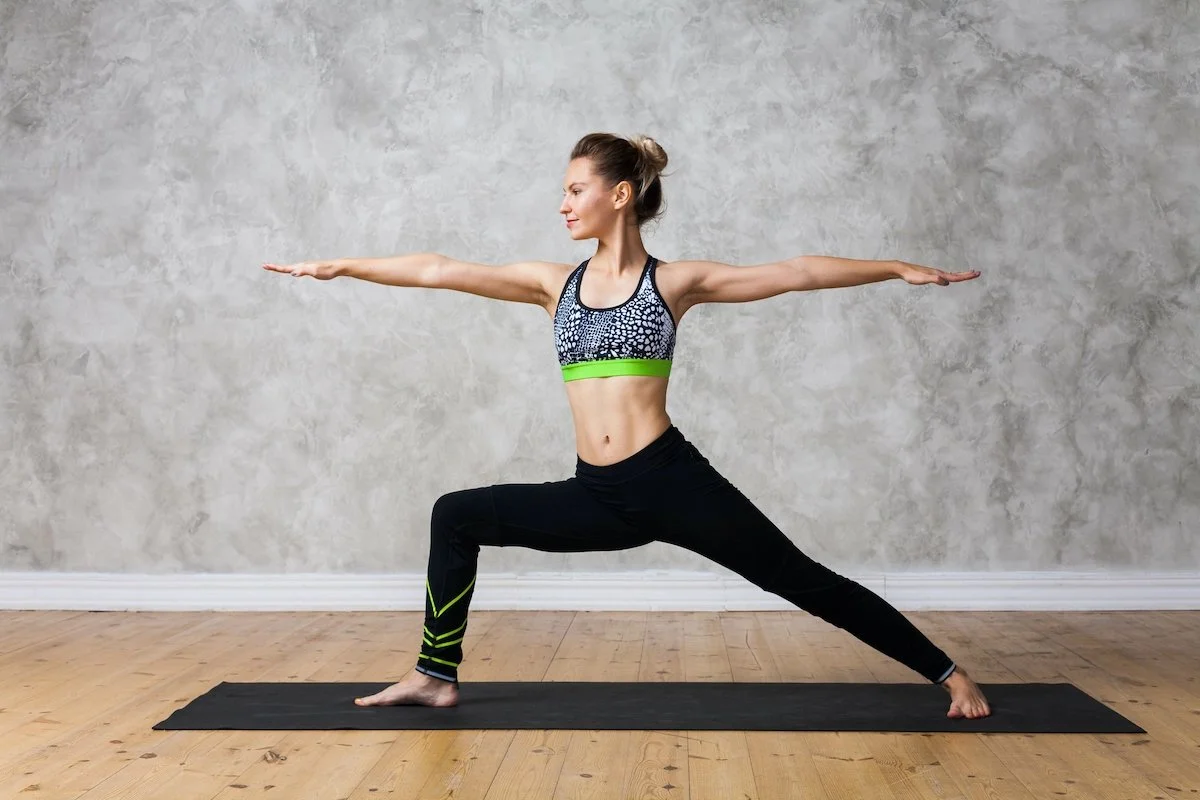
Are you ready to channel your inner warrior and strengthen your body and mind? Look no further than Warrior I (Virabhadrasana I). These empowering yoga poses offer a multitude of benefits and are accessible to practitioners of all levels. Let’s explore the benefits and instructions of Warrior I.

Benefits

  • Strengthens the legs and core.
  • Stretches the chest and shoulders.
  • Builds focus and concentration.
  • Promotes balance and stability.
  • Boosts confidence and empowerment.

Instructions

To practice Warrior I:

  • Begin in a standing position with your feet hip-width apart.
  • Take a step back with your left foot, turning it slightly outwards at a 45-degree angle.
  • Bend your right knee, aligning it directly over your ankle. Your thigh should be parallel to the floor.
  • Ground your left foot firmly into the mat, pressing through the outer edge.
  • Square your hips and shoulders towards the front of the mat.
  • Inhale as you raise both arms overhead, reaching towards the sky with your fingertips.
  • Gently tilt your head back, keeping your gaze focused on a point in front of you.
  • Hold the pose for several breaths, feeling the strength and stability in your body.
  • Repeat the pose on the opposite side.

Triangle Pose (Trikonasana)

Triangle Pose (Trikonasana)

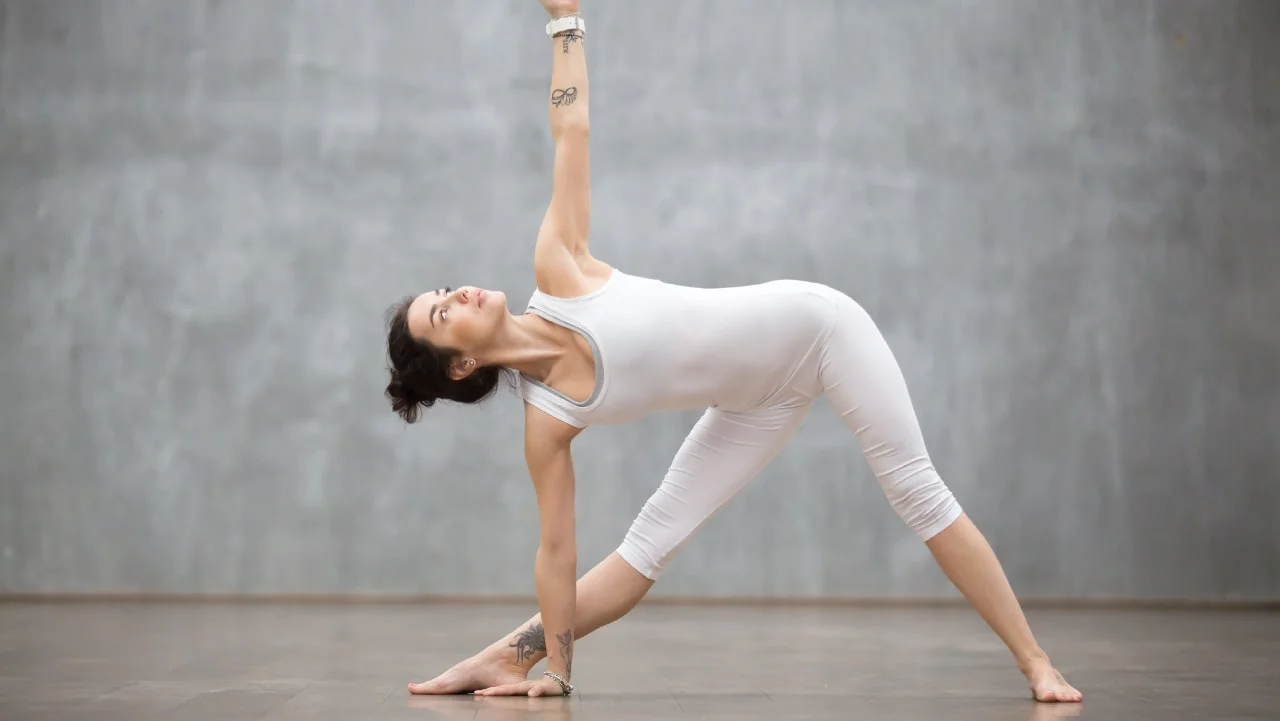
 Are you searching for a yoga pose that promotes strength, flexibility, and balance? Look no further than Triangle Pose (Trikonasana). This popular asana offers many benefits for both the body and mind. Let’s explore the benefits and instructions of Triangle Pose.

Benefits

  • Stretches and strengthens the legs.
  • Opens the hips and chest.
  • Lengthens the spine.
  • Stimulates digestion and aids in detoxification.
  • Improves balance and concentration.

Instructions

To practice Triangle Pose:

  • Begin in a standing position with your feet about three to four feet apart.
  • Turn your right foot out to a 90-degree angle and pivot your left foot slightly inward.
  • Extend your arms out to the sides, parallel to the floor, with your palms facing down.
  • Inhale & reach your right arm forward, hinging from your hip, and tilt your torso to the right.
  • Exhale as you lower your right hand down, either to your shin, ankle, or the floor, while extending your left arm towards the ceiling.
  • Gaze upward, or if it strains your neck, look straight ahead or downward.
  • Keep your body in one plane, with your shoulders and hips stacked on top of each other.
  • Maintain a steady breath and hold the pose for several breaths.
  • Repeat the pose on the opposite side.

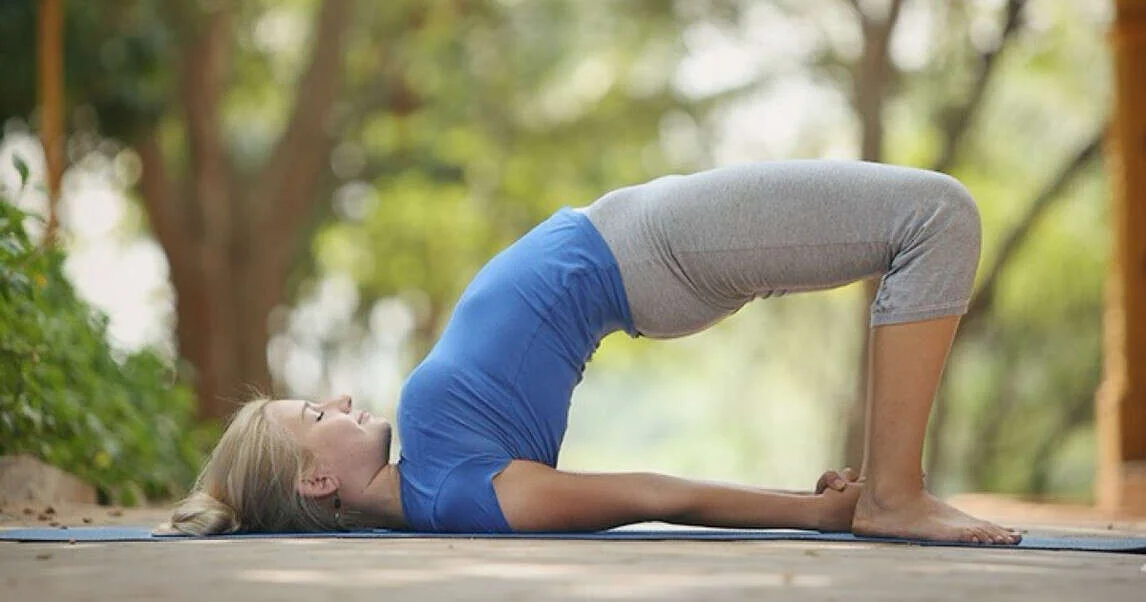
Bridge Pose (Setu Bandhasana)

Bridge Pose (Setu Bandhasana)

Are you looking to strengthen your back, open your chest, and energize your body? Look no further than Bridge Pose (Setu Bandhasana). This rejuvenating yoga pose offers a range of benefits for both the body and mind. Let’s explore the benefits and instructions of Bridge Pose.

Benefits

Bridge Pose provides numerous benefits that promote overall well-being:

  • Strengthens the back and core.
  • Stretches the chest and shoulders.
  • Increases spinal flexibility.
  • Stimulates the thyroid and energizes the body.
  • Relieves stress and calms the mind.

Instructions

To practice Bridge Pose:

  • Lie on your back with your knees bent and feet hip-width apart, flat on the ground.
  • Place your arms alongside your body, palms facing down.
  • Inhale, press your feet firmly into the mat, & lift your hips off the ground while keeping your knees directly over your ankles.
  • Roll your shoulders back and underneath your body, interlacing your fingers or keeping your palms flat on the ground for support.
  • Lift your chest towards your chin, keeping the neck long.
  • Engage your glutes and thighs as you continue to lift your hips higher.
  • Hold the pose for several breaths, feeling the stretch in the front of your body and the strength in your back.
  • Exhale, slowly release the pose and lower your spine, vertebra by vertebra, back to the mat.

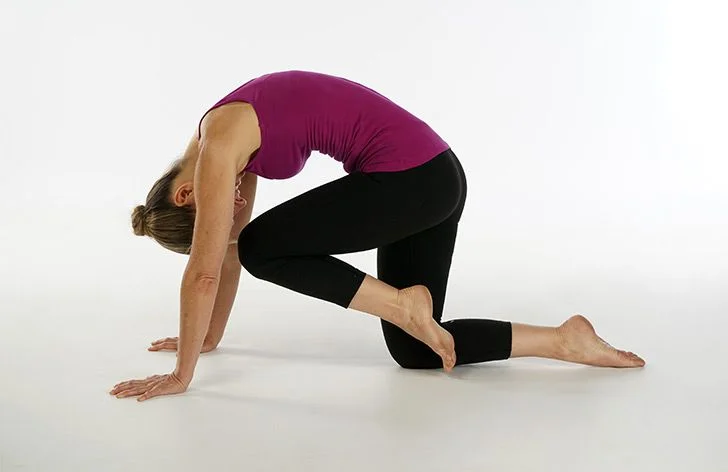
Cat-Cow Pose (Marjaryasana-Bitilasana)

Cat-Cow Pose (Marjaryasana-Bitilasana)

The Cat-Cow Pose, also known as Marjaryasana-Bitilasana, is a popular yoga pose that offers numerous benefits for the body and mind. It is a gentle exercise that can be practiced by people of all ages and fitness levels. Let’s explore the benefits and instructions for performing this yoga pose.

Benefits

  • Cat-Cow Pose helps to improve the flexibility and mobility of the spine.
  • Regular practice of the Cat-Cow Pose can aid in correcting poor posture. 
  • Helping to build strength and stability in the midsection. 
  • Cat-Cow Pose is a great way to relax and relieve stress. 

Instructions

  • Start on your hands and knees, aligning your wrists directly under your shoulders and your knees under your hips.
  • Keep your fingers spread wide for stability.
  • Inhale deeply and gently drop your belly towards the floor, lifting your head and tailbone. 
  • As you exhale, round your spine upwards, like a cat stretching its back, tucking your chin towards your chest. 
  • Repeat the sequence, smoothly transitioning from Cow Pose on the inhale to Cat Pose on the exhale. Move with your breath, allowing the movement of your spine to guide you.
  • Continue this flow for several rounds, syncing your breath with the movement.
  • Remember to inhale when moving into Cow Pose and exhale when moving into Cat Pose.
  • Practice Cat-Cow Pose for about 5-10 rounds or as long as it feels comfortable.
  • Pay attention to the sensations in your body and make gentle adjustments to find the most beneficial stretch for you.
  • Finally, when you are ready to finish, come back to a neutral tabletop position and rest in Child’s Pose or any other comfortable resting pose of your choice.

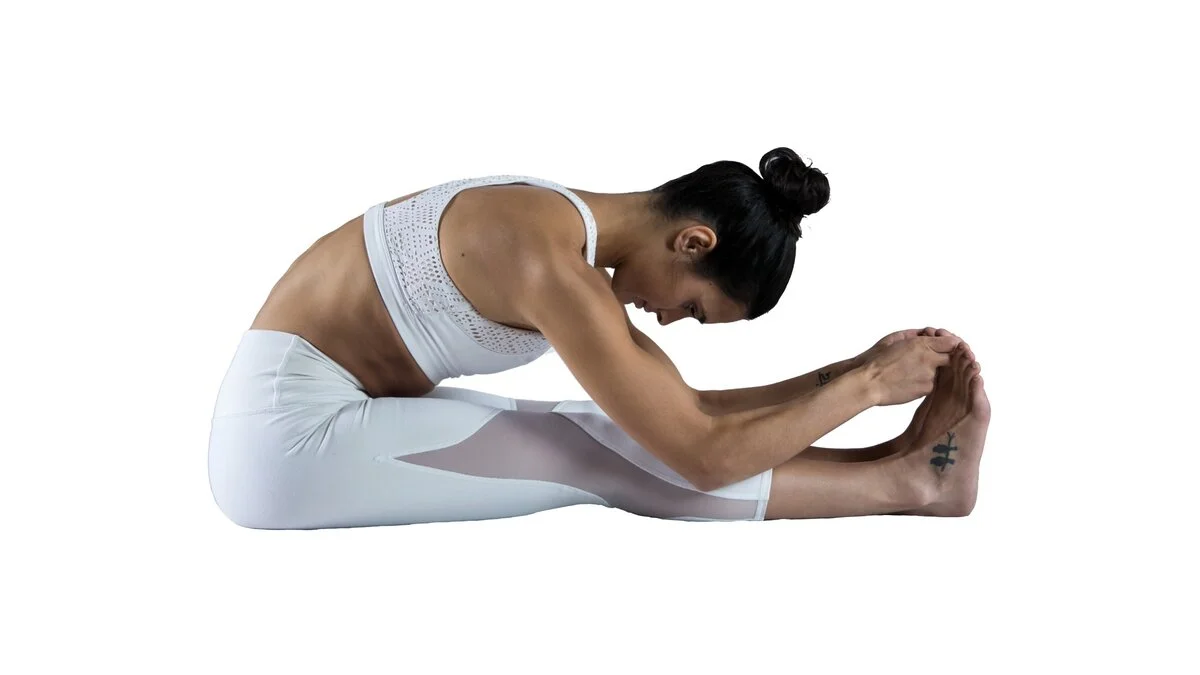
Seated Forward Bend (Paschimottanasana)

Seated Forward Bend (Paschimottanasana), Yoga Poses

The Seated Forward Bend, also known as Paschimottanasana, is a calming yoga pose that provides various benefits for the body and mind. It is a seated posture that gently stretches the back of the body, promoting flexibility and relaxation. Let’s explore the benefits and instructions for performing this pose.

Benefits

  • Paschimottanasana helps to lengthen and stretch the spine from the tailbone to the back of the neck. 
  • This pose targets the hamstrings and calves, helping to increase their flexibility and reduce tightness. 
  • A seated Forward Bend is soothing to the nervous system. 
  • The gentle compression of the abdomen in this pose stimulates the digestive organs, improving digestion and promoting better nutrient absorption. 

Instructions for Seated Forward Bend:

  • Begin by sitting on the floor with your legs extended in front of you.
  • Sit up tall, lengthening your spine, and engage your core muscles.
  • Inhale deeply, and as you exhale, slowly begin to fold forward from the hips.
  • Keep your spine long and lead with your chest rather than rounding your back.
  • Reach your hands forward and place them on your legs, ankles, or feet. If you cannot reach your feet comfortably, you can use a strap or a folded towel around the soles of your feet and hold onto it.
  • As you fold forward, continue to breathe deeply and relax into the stretch. With each inhalation, lengthen your spine a little more, and with each exhalation, allow yourself to release deeper into the pose.
  • Focus on keeping your neck relaxed and your shoulders away from your ears. Avoid straining or pulling yourself forcefully into the stretch. The aim is to find a gentle stretch without discomfort.
  • Hold the pose for 30 seconds to 1 minute or as long as feels comfortable for you. With regular practice, you can gradually increase the duration.
  • To come out of the pose, slowly inhale and lift your torso back up, maintaining the length of your spine.

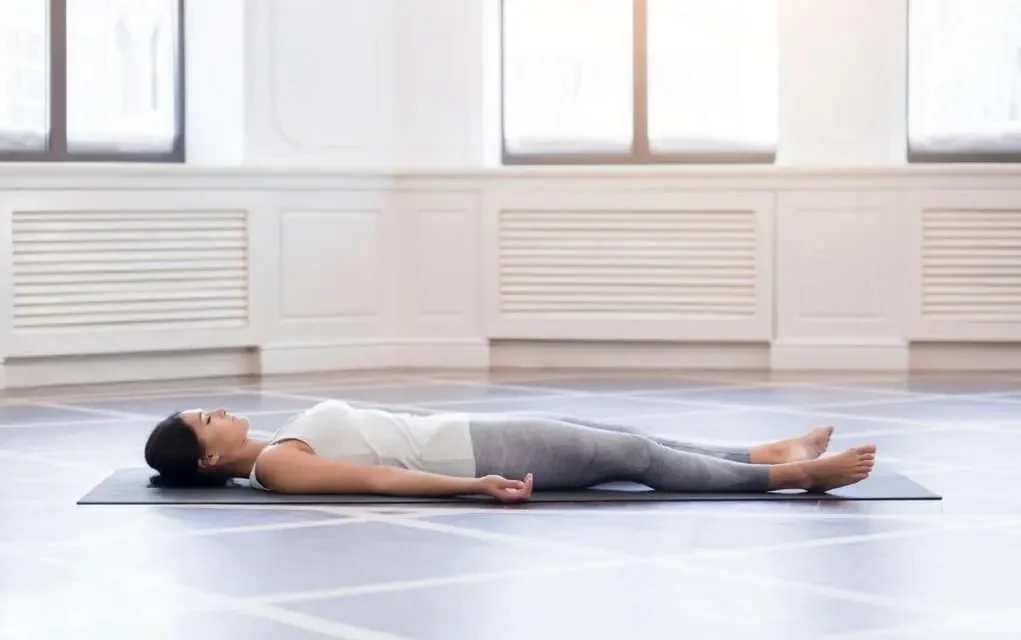
Corpse Pose (Savasana)

Corpse Pose (Savasana)

The Corpse Pose, also known as Savasana, is a deeply relaxing and restorative yoga pose that is often practiced at the end of a yoga session. Savasana offers numerous benefits for the body and mind. Let’s explore the benefits and instructions for practicing this pose.

Benefits

  • Deep Relaxation.
  • Stress Reduction.
  • Restoration and Rejuvenation.
  • Body Awareness.

Instructions

  • Find a quiet and comfortable space where you can lie down flat on your back.
  • Use a yoga mat or a soft blanket to provide some cushioning.
  • Lie down with your legs extended comfortably, slightly apart, and your arms resting alongside your body, palms facing upwards. 
  • Close your eyes and bring your attention to your breath.
  • Take a few deep breaths to relax your body and calm your mind.
  • Gradually release any tension you may be holding in your body.
  • Starting from your toes, consciously relax each part of your body, moving upwards to your ankles, calves, knees, thighs, hips, abdomen, chest, shoulders, arms, and finally, your face and head.
  • Allow your entire body to become heavy and sink into the floor beneath you. Surrender to gravity and let go of any effort or control.
  • Remain in Savasana for a minimum of 5 to 10 minutes or longer if you have the time. Use this time to focus on your breath, letting it flow naturally without any force or manipulation.
  • When you are ready to come out of the pose, begin by slowly wiggling your fingers and toes, gently awakening your body. Stretch your arms overhead and take a full-body stretch to reawaken your muscles.
  • Roll onto your right side, using your arm as a pillow, and take a few moments to rest in a fetal position.
  • Finally, use your hands to gently push yourself up to a seated position, taking your time to transition mindfully.

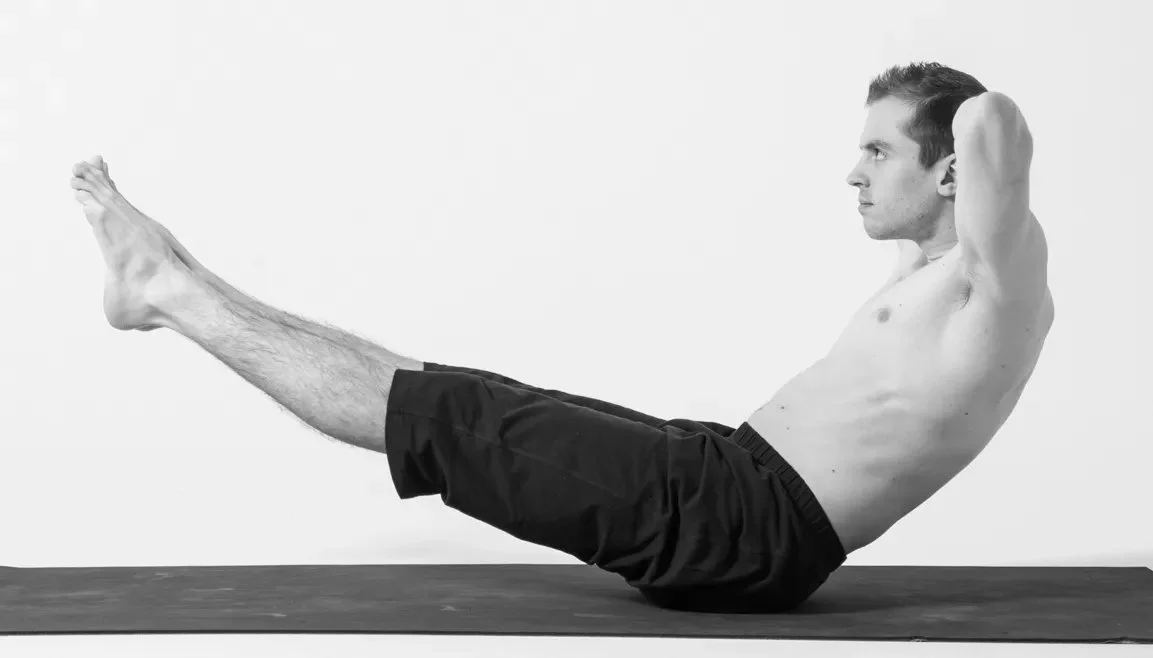
Modified Boat Pose (Ardha Navasana)

Modified Boat Pose (Ardha Navasana)

The Modified Boat Pose, also known as Ardha Navasana, is a modified version of the traditional Boat Pose. It is a challenging yet effective yoga pose that offers several benefits for the body and core strength. Let’s explore the benefits and instructions for practicing this pose.

Benefits

  • Core Strengthening.
  • Improved Digestion.
  • Spinal Flexibility.
  • Increased Stamina.

Instructions

  • Start by sitting on a yoga mat with your knees bent and your feet flat on the floor.
  • Keep your hands resting on the mat beside your hips, fingers pointing forward.
  • Lean back slightly, engaging your core muscles.
  • Lift one foot off the ground, straightening the leg and balancing on the other foot.
  • Slowly lift the other foot off the ground, straightening the leg as well.
  • Keep your torso and legs forming a V shape. 
  • Find your balance and focus on keeping your spine straight and your chest lifted.
  • Engage your abdominal muscles to support your lower back.
  • Extend your arms forward, parallel to the ground, with your palms facing each other. Maintain a relaxed and steady breath.
  • Hold the pose for 10 to 20 seconds initially, gradually increasing the duration as you build strength and stability.
  • To release the pose, gently lower your feet back to the ground and return to a seated position with your knees bent.

Conclusion | Yoga Poses For Beginners

In conclusion, practicing these 10 beginner-friendly yoga poses in 2024 can offer a variety of physical and mental benefits. Start your yoga poses journey with these poses and enjoy the positive impact they can have on your well-being.

Read Also Our Latest Articles

FAQs | Best Yoga Poses

What Is The Most Common Yoga Poses?

Downward-facing dog is the most common yoga pose.

Which Yoga Is Best For Exercise?

Power Yoga is best for exercise.

Show your love

How to Convert YouTube to MP3: 10 Best Easy Methods

YouTube to Mp3

You are here as you are looking for the safest YouTube to MP3 converter. This article will introduce you to the 10 best platforms to convert YouTube videos into MP3. These platforms have straightforward interfaces, and I have provided step-by-step guidelines so you can quickly get your MP3 file. 

You can use the websites for installing these reliable YouTube to MP3 converters on Windows, Linux, macOS, and smartphones. Also, you can use the tools through your browser.

Here you will get the safest and easy to use converters for iPhone, Android, and desktop. So, whatever the type of device you are using, you can always use these programs to convert YouTube videos to MP3. 

10 Best Easy Methods To Convert YouTube to MP3

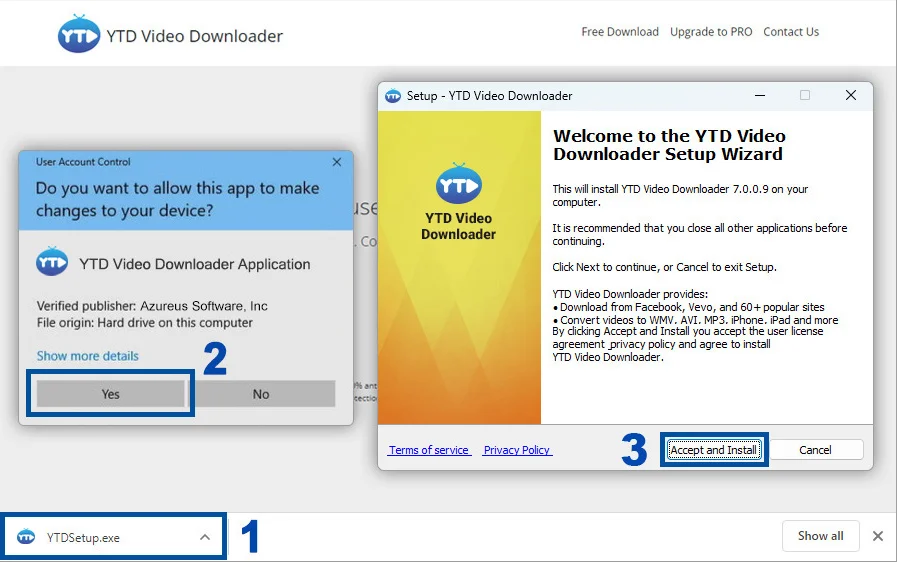
1. YTD Video Downloader & Converter


YTD Video Downloader & Converter, YouTube to MP3


YTD Video Downloader is the best program to download and convert videos from YouTube, Facebook, Vimeo, and other platforms. Only needs a few clicks to convert the videos to MP3. This program is available for both Windows and macOS devices. 

These are the features you will get from YTD: 

  • Free video downloading capability from 50+ sites. 
  • Can convert videos to different formats ( MP3, MP4, WMV, FLV, MOV, 3gp, AVI.)
  • It has an integrated video player to watch the downloaded videos
  • Super easy and safe in comparison to other devices. 

Process To Use This Program

  • Click the download bar in the screen’s bottom left corner. The YTDSetup.exe item must be clicked.
  • After that Click Yes to begin the installation.
  • To successfully install the application, follow the instructions provided in the installer.
  • Into the YTD Video Downloader program, paste the video URL you wish to download.
  • Choose the video format and quality you wish to convert before downloading: MP4, MOV, WMV, AVI, AAC, MP3, and 3GP.
  • Click “Download” after choosing where to store your video.

2. EaseUS Video Downloader


EaseUS Video Downloader


EaseUS Video Downloader is best suited if you need to convert a bulk number of YouTube videos into MP3 on your Android phone. It is the most reliable video downloader that you can correct and download high-quality MP3 files with the super easy method. 

Process To Use This Program

  • Double-click the EaseUS Video Downloader icon to launch the program. Copy the URL of a video and paste it into the box on the home page. To continue, click “Search.”
  • A built-in video play page with a download option will be shown. To download the video, click “Download.”
  • Click “Video to MP3” and then “Browse” to upload the video after downloading it. The downloaded video will then be converted to MP3 by clicking the “Convert” button.
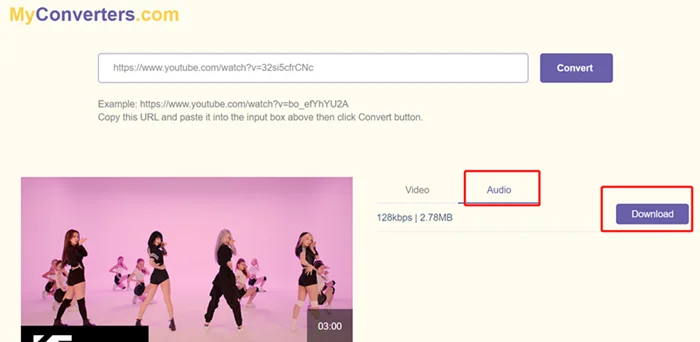
3. MyConverters | YouTube to MP3


MyConverters


Myconverters is another easy-to-use YouTube to MP3 platform popular among people looking for reliable web-based programs. You can save your YouTube podcasts and music videos as MP3 files and listen to them offline.

Process To Convert YouTube Videos In Mp3 Format

  • Visit MyConverters.com now. The YouTube URL of the music or video you wish to download as an MP3 has to be copied and pasted into the box. Select “Convert” from the menu.
  • Go to the Audio tab and select the “Download” option to download the Audio (only the song, podcast, or audiobook). Please be aware that your download may take some time, depending on your file size and internet speed.
  • You’ll get a pop-up notification when your download is prepared. To save the file to your computer, click the “Download” option immediately.

4. YTMp3 | YouTube to MP3 Converter


YTMp3, YouTube to MP3


YTMp3 features a clear, straightforward UI and is one of the most accessible online YouTube to MP3 converters. This MP3 converter allows you to convert 90-minute movies for free.

Here’s How To Use YTMp3 To Convert Your YouTube Videos to MP3

  • Visit YTMp3. Make sure the MP3 option is chosen in the blue bar below.
  • The YouTube URL you wish to download and convert to MP3 should be copied and pasted into the white area.
  • Now select “Convert” from the menu.
  • To obtain the converted MP3 file, click the “Download” option.

5. VidMate | Reliable App For Videos


vidmate, YouTube to MP3


VidMate is a reliable app for videos from different platforms. Also, it is the best way to convert YouTube to MP3 from your Android phone. 

Process

  • Download and set up VidMate on your device.
  • Launch VidMate and find the YouTube video you wish to download.
  • Tap the “Download” button at the bottom of the screen.
  • Pick the “Audio” tab from the menu that appears.
  • Select the MP3 file quality you like and press the “Download” button.
  • Hold off till the download is finished.

6. Y2Mate | Fast MP3 Converter


Y2Mate

Y2Mate has a straightforward interface to download YouTube videos and convert them into MP3s. It is a super easy-to-use and fast MP3 converter. It is compatible with all types of browsers, both Android and PC. Y2Mate will convert YT videos to MP3 music with a bitrate of up to 320kbps. 

Steps To Convert Video Into Mp3

  • To download a video in MP3, open YouTube and copy the URL.
  • Paste a video URL into the search box, and the tool will get video information.
  •  Click the “Convert” button after choosing the necessary audio quality.
  • Click “Download” once the conversion has been correctly finished.

7. SnapDownloader | Reliable YouTube Downloader and Converter


SnapDownloader


SnapDownloader is also a reliable YouTube downloader and converter. However, the problem is that it has no free version. But its subscription fees are affordable, and you can get high-quality Audio from this video downloader app, which is available for Windows and macOS. 

It supports over 900 websites. You can save videos from several streaming platforms like Instagram, Vimeo, Facebook, Twitter, and TikTok. 

Process

  • Download and install the app from the website. 
  • Enter the URL of the link you wish to download and convert.
  • Set the output quality and MP3 converter format you like for immediate downloads. 
Its batch processing is fantastic if you must convert numerous movies simultaneously. You may use the application to download many files simultaneously from different websites. However, it would help if you were careful not to overcrowd the panel. If you add fewer jobs, the pace increases.

8. Wondershare Uniconverter | Trustable YouTube to MP3 Converter


Wondershare Uniconverter


Wondershare Uniconverter is a trustable YouTube to MP3 converter. Though it doesn’t have a free version, it has various tools worth the subscription fee.

Steps To Use Wondershare Uniconverter

  • On its Downloader section, paste the video URL
  • Choose the output format from the audio options before hitting the Download button.
  • Choose from three bitrates based on your preferred speed and quality. 

9. 4K YouTube to MP3 | Youtube Videos into MP3


4K Youtube to MP3


Using this program, you are just one click away from converting your YouTube videos into MP3. It is a cross-platform software that you can use for Windows, macOS, and Android. 

Steps To Use This MP3 Converter

  • Download from the website to use the YouTube converter app on your Windows or Mac. 
  • Copy the URL and click the blue Paste Link button.
  • The download starts automatically, and you’ll find the file on your computer shortly. 

Using the built-in media browser, you can quickly search the internet for your desired videos. When you click the magnifying glass icon, a search window opens where you may enter the video’s title or other pertinent phrases.

10. OnlyMP3 | Website-based MP4 to MP3 Converter

OnlyMP3

OnlyMP3 is a website-based mp4 to MP3 converter online. You can quickly convert YouTube videos to MP3 files with only one click using the web tool OnlyMP3. Installation or registration is not necessary.

You may store the converted files on your device or in Dropbox after conversion. Copy and paste the video URL into our YouTube MP3 converter to start using the service, and it will instantly turn the video into an Audio file. 

Final Thoughts | YouTube to MP3

Here I have provided the simplest methods to convert YouTube videos into MP3. There are also several others available, but these are the safest. You can use these super-easy methods to download YouTube videos and convert them into Audio. 

Checkout Our Latest Articles:

FAQ | YouTube to MP3

How do I download MP3 from YouTube to my phone?

You can use the YTD Video Downloader for Android. It is super easy and safe to operate. Copy and paste the YouTube video’s URL into the search field of the YTD Video Downloader. When you select the “download” option, your file will begin to convert.

Is all video downloader apps safe?

No, all video downloaders are not safe. Some of them contain dangerous malware. You need to find a trustable site to be safe from malware.

However, the proven YouTube to MP3 converts list is safe and reliable. Some apps may contain malware. You need to ensure you are using a reliable site for downloading videos.

Show your love

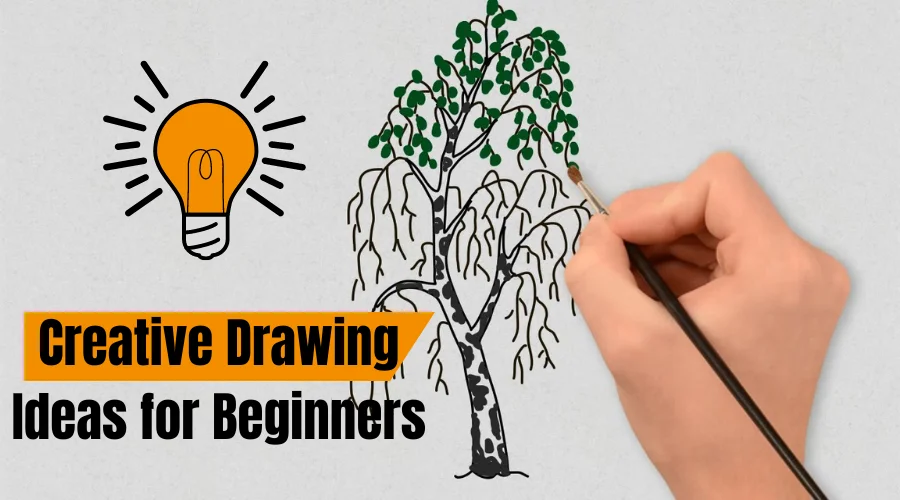
Creative Drawing Ideas for Beginners Step by Step

Creative Drawing Ideas for Beginners

The best way to understand your drawing skill is to observe everything precisely. Then start with the basics to overcome your fear. It would help if you kept drawing without thinking about perfection. Your dedication, passion, and practice will make you perfect. 

If you want to learn creative drawing ideas, then you are at the right place. Read through the article and practice the mentioned ideas to enjoy the essence of art. 

Things to Consider as a Beginner

Starting a creative drawing can be an exciting and rewarding experience. Here are some things to consider as you begin:

Firstly, you’ll need to gather the necessary supplies. It may include paper, pencils, erasers, and any other materials you want to use, such as charcoal, ink, or paint.

Secondly, Consider what you want to draw and why. It could be something you see in nature, a character from a book, or a scene from your imagination. Finding inspiration can be as simple as walking outside or browsing art books or websites.

Thirdly, Start sketching to work out the details of your drawing. Sketching helps you get a feel for your subject’s composition, shape, and form before diving into the final picture.

Fourthly, Be open to trying different techniques and styles. Experiment with shading techniques, line weights, and color combinations to find the best work for your piece.

 Drawing can take time and practice to master, so be patient with yourself. Remember that mistakes are a part of the learning process, and don’t be afraid to start over if something doesn’t work out.

Most importantly, remember to have fun! Drawing should be a creative outlet you enjoy, so embrace your unique style and let your creativity flow for drawing ideas.

How to Start Creative Drawing?

Creative Drawing

Starting a creative drawing can be a fun and rewarding experience. Here are some steps you can take to get started:

In the beginning, choose your materials. Decide what materials you want for your drawing ideas. You may use traditional materials like pencils, pens, or markers, or you may prefer digital tools like a drawing tablet and software.

After that, Look for inspiration around you. This can be anything from nature, people, animals, or objects. You can also browse online for inspiration on art websites or social media platforms like Pinterest or Instagram.

Then, Start with some rough sketches to work out your ideas. This can help you to plan the composition, the shapes, and the proportions of your drawing.

Once you have a rough sketch, you can refine it. Add details and shading to give your drawing depth and dimension.  After sketching, Try different designs and styles to find what works best for your piece. This can include different line weights, shading techniques, or color palettes.

Drawing is a skill that requires training to improve. Set aside time each day or week to work on drawing ideas for skills. Feel free to try new things, even if your drawing turns out differently than you envisioned. Keep practicing and have fun with it!

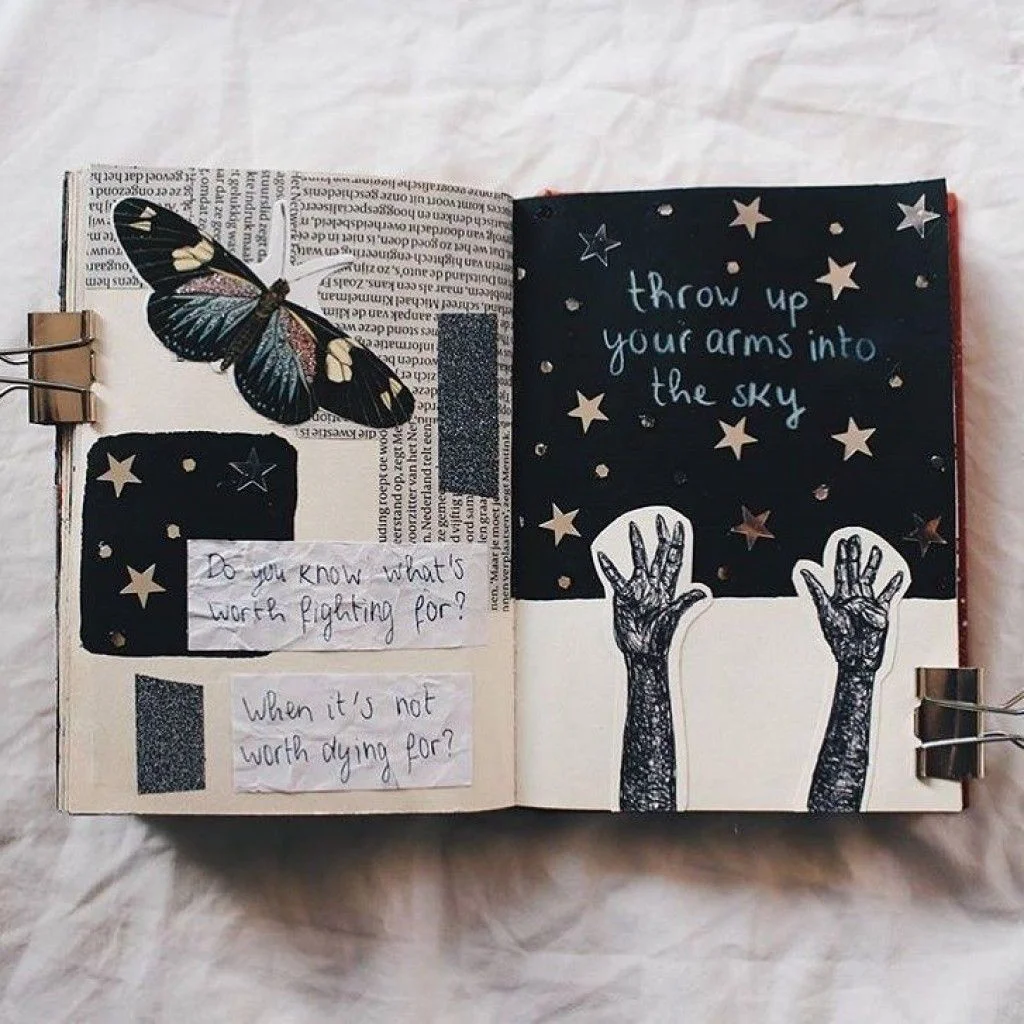
Creative Diary Drawing 

Creative Diary Drawing, Drawing Ideas

Here are some creative drawing ideas for the diary:

  • Sketch the view from your window: Draw what you see when you look out. Add details like clouds, trees, or buildings.
  • Draw a self-portrait: Create a drawing of yourself, including details like your hair, clothes, and facial features.
  • Illustrate your dreams: Draw scenes from your dreams, including any people or objects that stood out to you.
  • Draw your favorite food: Create a drawing, including any details like texture or toppings.
  • Create a nature scene: Draw a landscape or nature scene, including trees, plants, and animals.
  • Draw a portrait of a friend or family member: Create a drawing of someone you know well, including any unique features or details that make them stand out.
  • Illustrate a quote or song lyric: Draw a scene representing a quote or song lyric that is meaningful to you.
  • Draw a fantasy world: Create a drawing of a magical or imaginary world, including creatures or characters that you invent.
  • Create a mandala: Draw a circular mandala with intricate details and patterns.
  • Draw a memory: Create a drawing of a significant moment or memory in your life, including any people, places, or emotions involved.

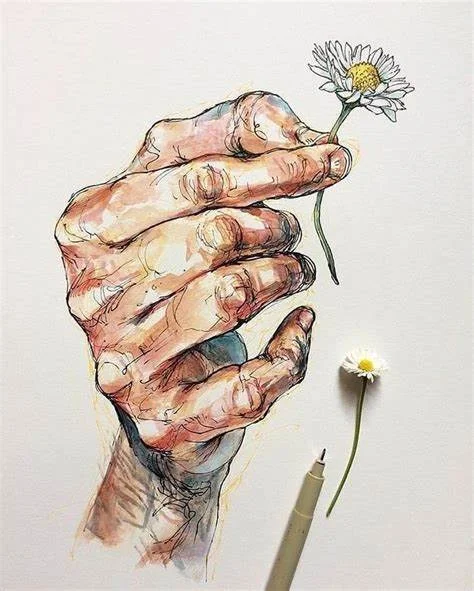
Creative Hand Drawing 

Creative Hand Drawing 

Here are some creative hand-drawing ideas:

  • Zentangle Art: Zentangle is a form of drawing that involves creating intricate patterns and designs using simple shapes and lines.
  • Hand-lettering: Practice your handwriting skills and create beautiful hand-lettered quotes, phrases, or words.
  • Doodle Art: Let your imagination run wild and create a drawing using random doodles, shapes, and lines.
  • Abstract Art: Experiment with colors, shapes, and textures to create a unique and abstract piece of art.
  • Landscape Art: Draw a scenic view, including mountains, trees, and water bodies.
  • Portrait Art: Draw a person’s portrait using pencils, pens, or charcoal.
  • Animal Art: Create a drawing of an animal, including details like fur, scales, or feathers.
  • Still life Art: Draw a scene, including objects like fruits, flowers, or books.
  • Comic Art: Create a comic strip or comic book using hand-drawn illustrations.
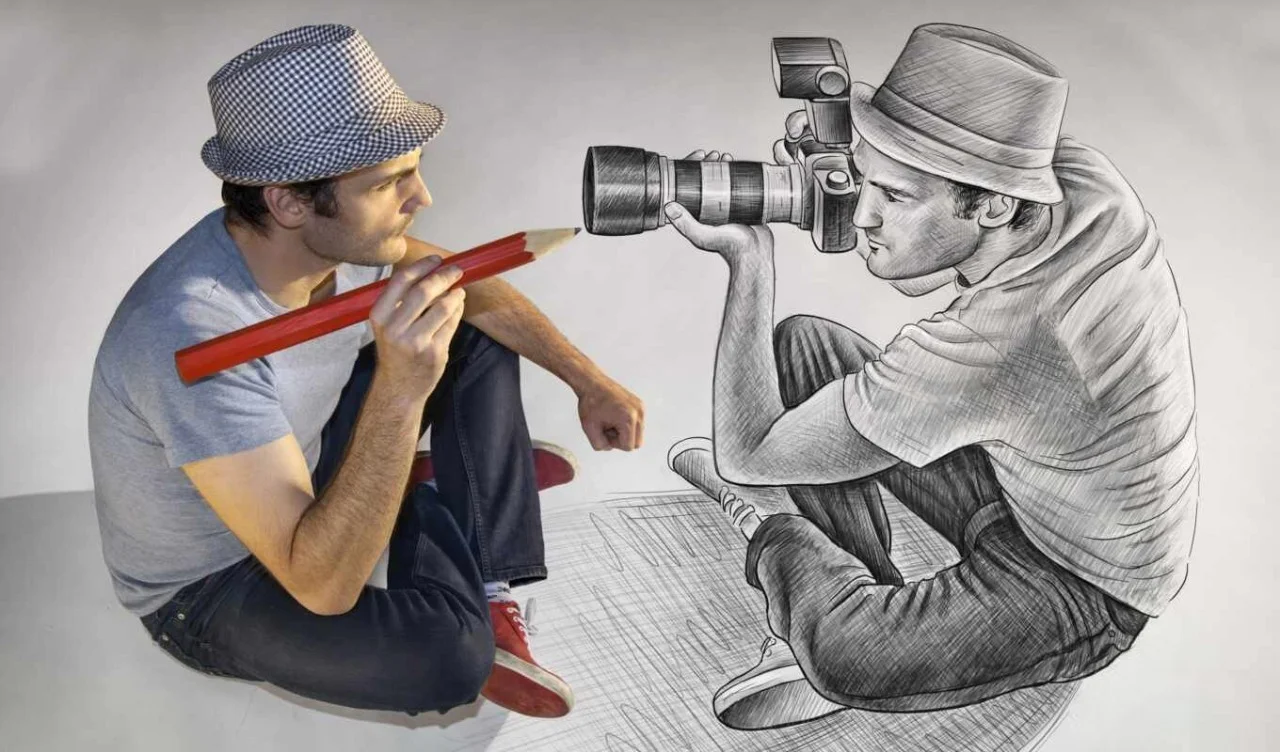
  • 3D Hand Art: Draw an illusion that looks like your hand is popping out of the paper, or create a 3D effect by shading and coloring.

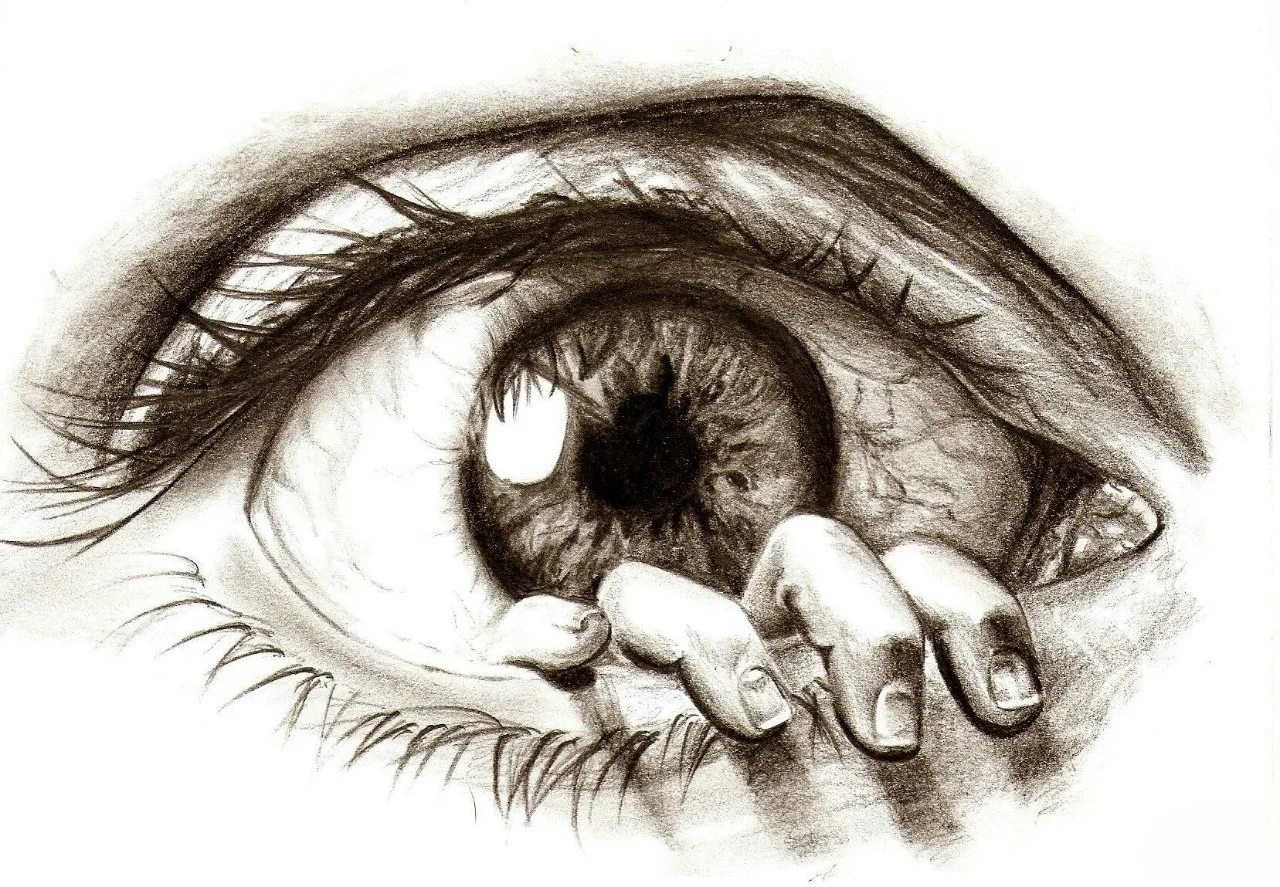
Creative Eye Drawing Ideas

Creative Eye Drawing Ideas

Here are some creative eye-drawing ideas:

  • Realistic Eyes: Create a realistic drawing of an eye, including details like the iris, pupil, eyelashes, and reflections.
  • Animal Eyes: Draw the eyes of an animal, including details like fur, scales, or feathers.
  • Fantasy Eyes: Create a drawing of a mythical creature, including its unique and imaginative visions.
  • Eye in Nature: Draw an eye naturally, like a tree bark, flower petals, or a rock.
  • The Eye as a Window: Draw an eye that serves as a window to another world, like a galaxy or a dreamland.
  • Eye with Emotion: Draw an eye that conveys a feeling, like sadness, happiness, or anger.
  • Eye with a Message: Draw an eye that communicates a letter or a theme, like peace, unity, or hope.
  • Eye with a Reflection: Draw an eye with a review that shows the environment or the person looking at it.
  • Eye in Abstract Form: Draw an eye using abstract shapes and lines to create a unique and artistic piece.
  • The Eye as a Part of a Larger Artwork: Use an eye as a part of a larger drawing, like a face, a landscape, or an object.

Christmas Drawing Ideas

Creative Christmas Drawing

Here are some creative Christmas drawing ideas:

  1. Christmas Tree: Draw a beautifully decorated Christmas tree with ornaments, lights, and a star on top with Christmas family outfits Ideas.
  2. Santa Claus: Create a drawing of Santa Claus, including details like his red suit, hat, and white beard.
  3. Snowman: Draw a snowman with a carrot nose, a top hat, and a scarf.
  4. Reindeer: Draw a reindeer, including details like antlers, hooves, and a red nose.
  5. Christmas Lights: Create a drawing of Christmas lights hanging on a tree or a house.
  6. Nativity Scene: Draw a nativity scene, including characters like baby Jesus, Mary, Joseph, and the three wise men.
  7. Gingerbread House: Create a drawing of a house with candy canes, gumdrops, and frosting.
  8. Winter Landscape: Draw a winter landscape with snow-covered trees, mountains, and a frozen lake.
  9. Christmas Presents: Create a drawing of Christmas presents wrapped in colorful paper with ribbons and bows.
  10. Christmas Cookies: Draw a plate of Christmas cookies, including shapes like snowflakes, stars, and reindeer.

Fun Creative Drawing Ideas

Fun Creative Drawing

Here are some fun, creative drawing ideas:

  • Monsters: Create a drawing of a fun, silly, or scary monster with unique features like horns, fur, or multiple eyes.
  • Superheroes: Draw your superhero character, including their extraordinary powers, costume, and weapons.
  • Underwater World: Create a drawing of an underwater world, including fish, coral, and other sea creatures.
  • Food Art: Draw your favorite food in a fun and creative way, including details like texture, color, and ingredients.
  • Dreamland: Draw a scene from your dreamland, including any imaginary creatures or objects you remember.
  • Vehicles: Create a drawing of your favorite vehicle, including cars, planes, or boats.
  • Space Exploration: Draw a scene from space, including planets, stars, and spacecraft.
  • Pet portraits: Draw a picture of your pet or someone else’s pet, including details like fur, eyes, and expression.
  • Futuristic Cities: Create a drawing of a futuristic city with unique buildings, transportation, and technology.
  • Optical Illusions: Draw an optical illusion that tricks the eye, such as a 3D cube or a moving spiral.

Final Thoughts 

Practicing art drawing can have several positive impacts on the human mind. Drawing can be a calming activity that helps individuals relax and unwind, reducing feelings of stress and anxiety.

Moreover, drawing requires a certain level of focus and concentration, which can help improve these skills over time.

I have introduced you to the basic drawing ideas, but all your focus and practice must be executed. So, keep practicing and learning more about creating aesthetic designs. 

Checkout Our Relevant Tutorials:

FAQ

What are the primary drawing ideas for a beginner?

Understanding edges, spaces, light and shadow, relationships, and the whole, or gestalt. These 5 basic drawing skills comprise the components of a finished work of art.

What are some simple but creative ideas for drawing?

If you’re new to the world of drawing, it can be helpful to begin with, circles, squares, and triangles. Those shapes can provide a faster way for you to master the craft of drawing.

Show your love