


Table of Contents
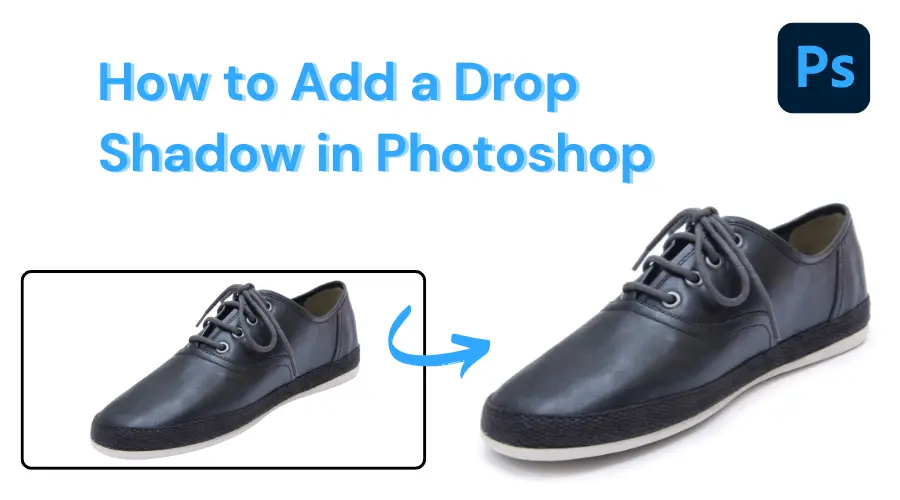
A perfectly created drop shadow gives the product photo a realistic look. You can turn your raw photo into a professional one by applying a drop shadow. But the question is “How to add a drop shadow in Photoshop”.
Well, here you will get a step-by-step guide on creating high-quality drop shadows. We will explain the whole process with examples to help you understand the shadow creation accurately.
A drop shadow is a dark area behind an object in the photo. Naturally, it is created due to the light source. This effect makes the object appear lifted off the background.
The drop shadow in a photo ensures that the object is not just floating in the background. It has some thickness that adds depth to it. Thus a well-placed drop shadow makes the image look more professional. As a result, it looks more appealing to the viewers.
Drop shadow is essential for product photos. The product photos should look eye-catching to generate sales. The shadow effects give the photo a professional look and make it believable. Thus a shadow helps create credibility for the brand. That’s why, the demand for this photo editing service is also high.
In this post, we will use different Photoshop tools to create a drop shadow effect. We are going to give you the easiest techniques to learn this professional photo editing technique.
Types of Shadows | Drop Shadow in Photoshop
Shadows result from the obstruction of light by an object. There are several types of shadows, each with distinct characteristics based on the light source. Understanding these types helps to create a more perfect shadow in Photoshop.
A. Cast Shadow
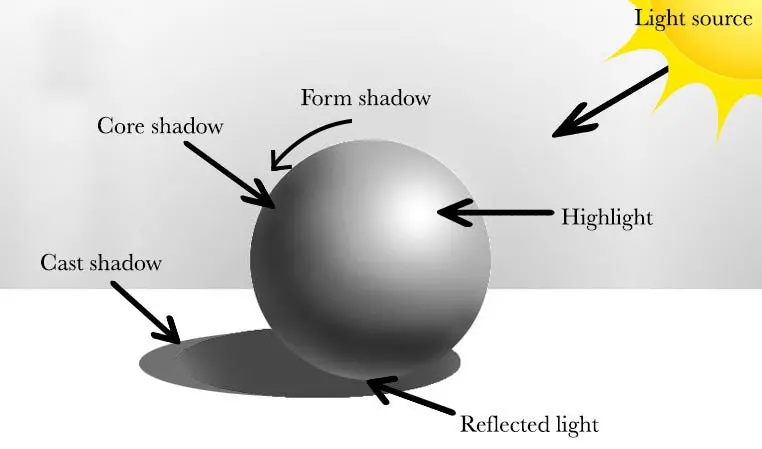
It is the most common type of shadow. formed when an object blocks light from reaching a surface. As a result, it creates a dark area behind the object. The cast shadow’s shape is a distorted projection of the object.
Drop shadow is a cast shadow used in graphic design and digital imagery to give the illusion of depth. Drop shadow in Photoshop is typically a blurred shadow that appears to be cast by an object.
B. Hard and Soft Shadow
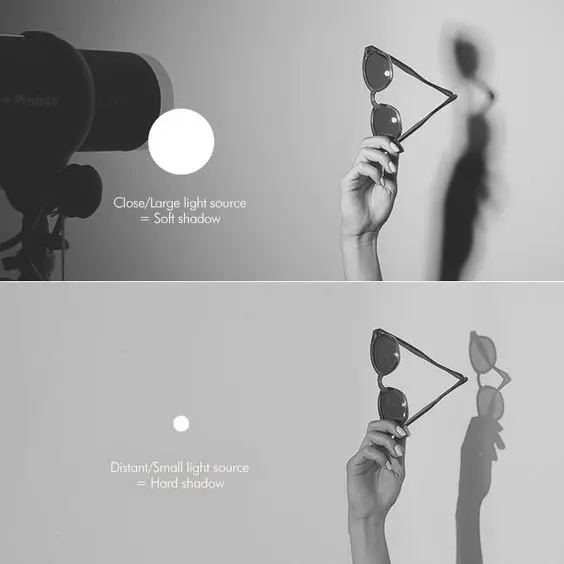
Hard shadows have sharp, well-defined edges. They are produced by a small or point-like light source that creates clear outlines.
Meanwhile, soft shadows have blurred and diffuse edges. They are created by a larger or diffused light source. It leads to a gradual transition between light and shadow.
C. Reflection Shadow
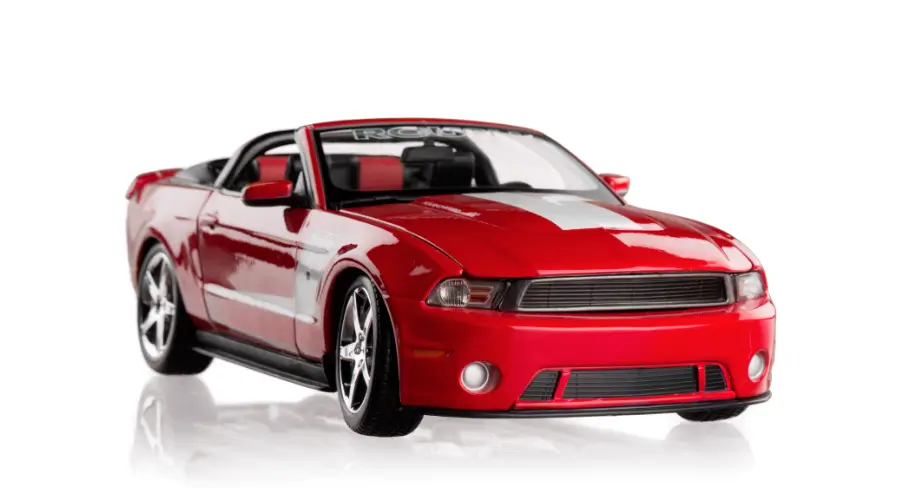
It is like a mirror effect. It results from light bouncing off surrounding surfaces. They are lit by light that has reflected off other surfaces nearby. The reflected image appears reversed and behind the original object.
How To Add a Drop Shadow in Photoshop
Here are the steps we are going to follow to create a drop shadow in Photoshop.
Steps-01: Remove the Background of the Photo
The first step of adding a drop shadow is removing the background from the image. So, open your image in Photoshop. Then duplicate the background layer by pressing ctrl+j. Thus the original image will remain unaffected.
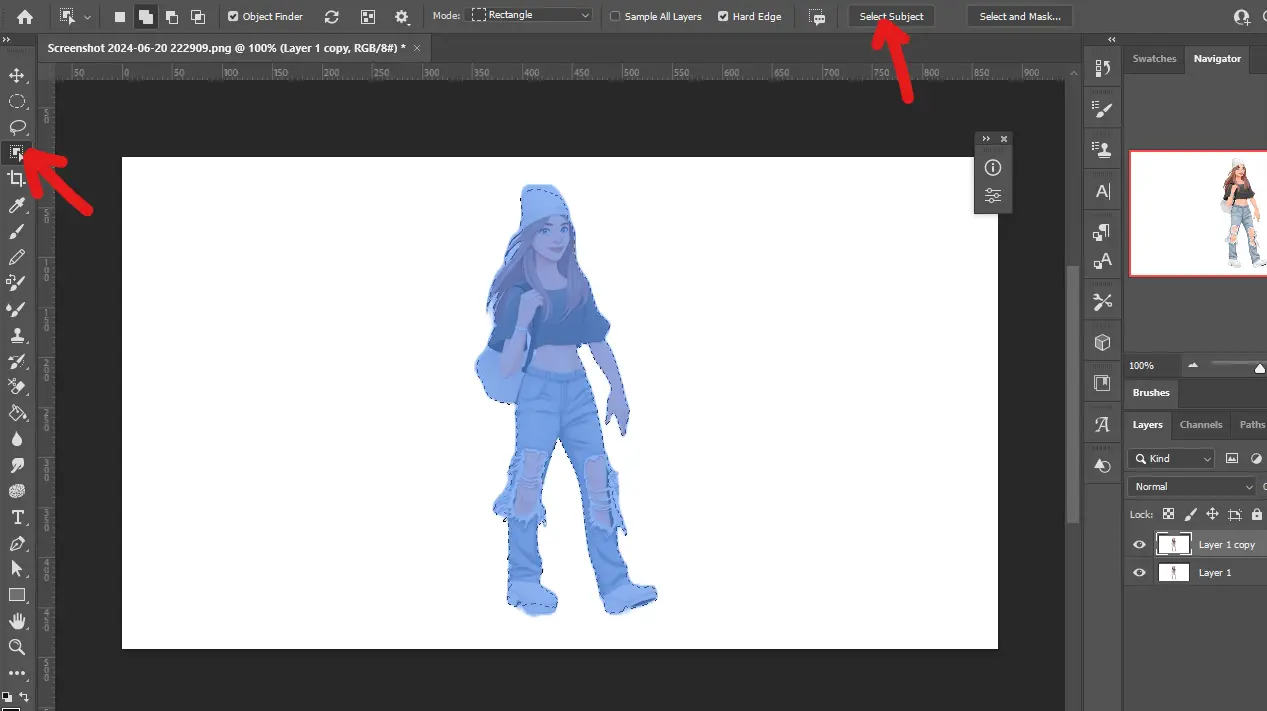
Now make a selection of your subject in the image using an image selection tool. There are different tools available in Photoshop to select the subject. Or you can simply click on the “Select Subject” option.
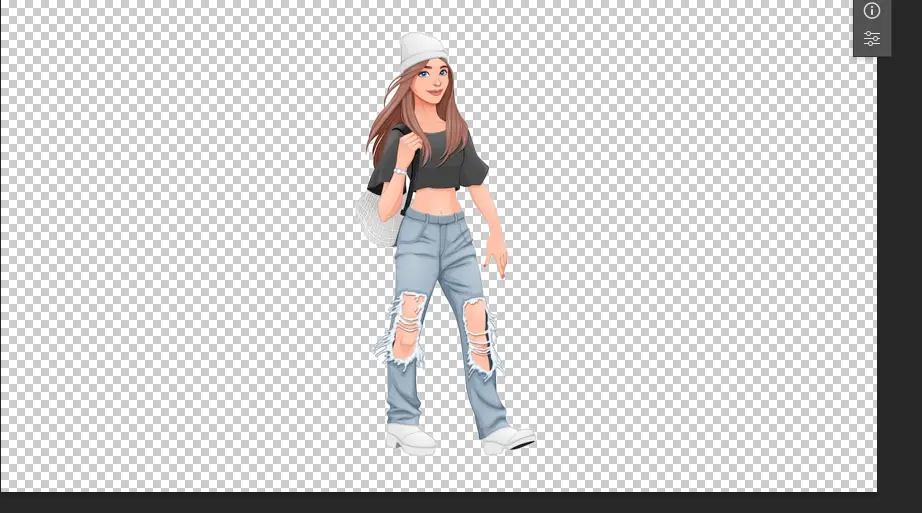
Then take the selection to a new layer. You can simply copy the selection and take it to a new layer. Now rename the new layer. It is essential to work on the photo non-destructively.
Now uncheck the eye icon of the original background layer and the duplicated background layer. Thus you can hide these layers while working on the isolated layer.
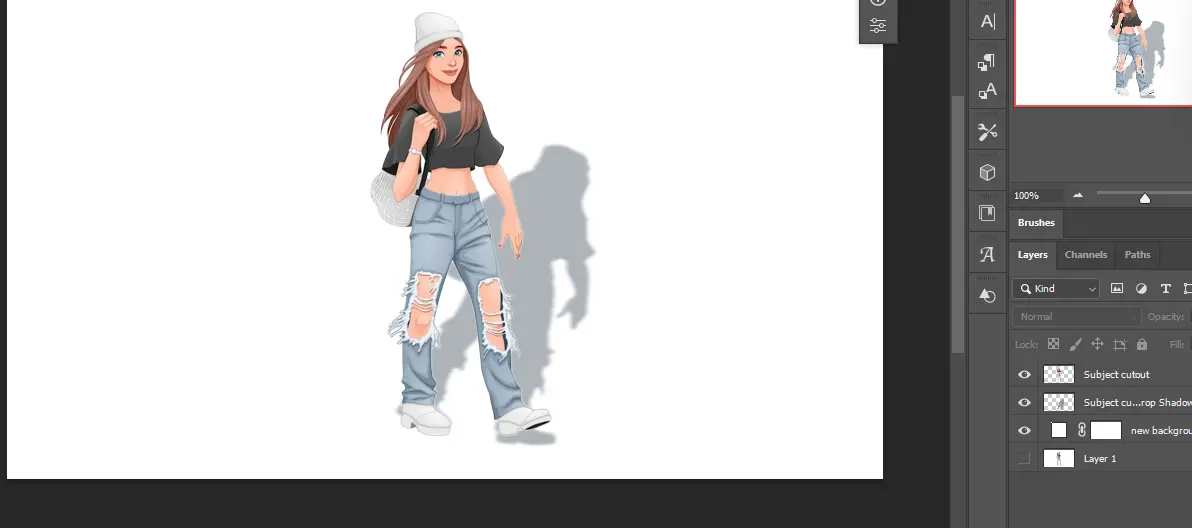
Steps-02: Create a New Layer and Change the Background to a Solid Color
Now we will create a new background layer and place it behind our subject cutout layer. Click on the “+” icon from your layer panel to open a new layer. Then click on the adjustment layer icon and select solid color to change the background color of the layer.
We will go with a white color for this tutorial. So, select the white color and hit ok. No name the layer to “new background.” No drag this layer and place it beneath the subject cutout.
Steps-03: Choose the Shadow Color
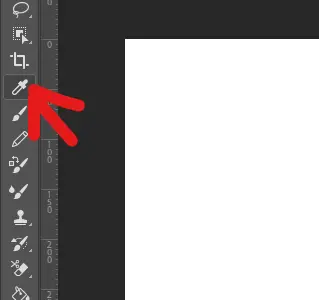
You can choose a particular shadow color that suits your image. You need you use the Photoshop Eyedropper tool to choose the color. The eye dropper tool sets the selected color as the foreground color.
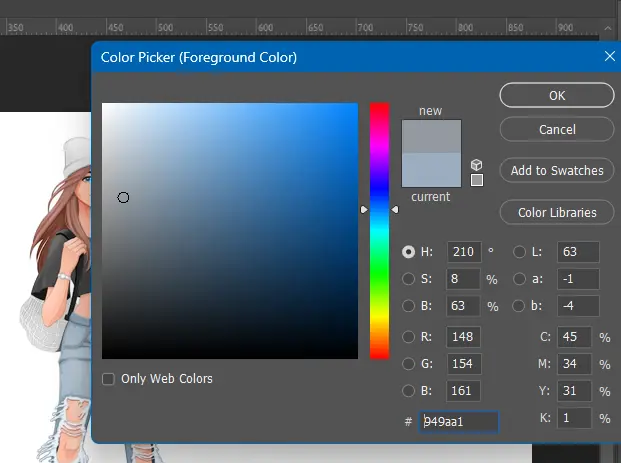
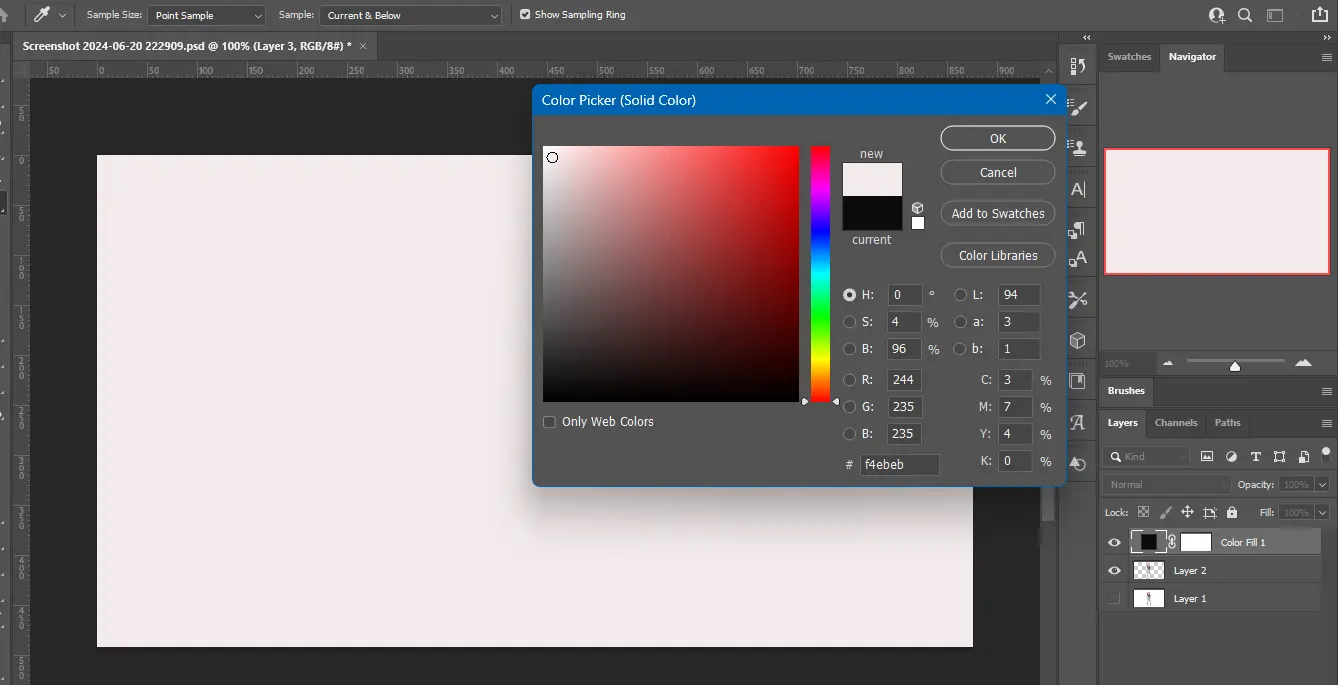
However, you need a less saturated color for the shadow effect. You can make further adjustments to the color from the Color Picker of Photoshop.
Steps-04: Create a Drop Shadow

Now it is time to create a drop shadow. We will create a drop shadow using the fx button which is located at the bottom of the layer panel. So, click on the f button and select drop shadow.
A new dialog box will appear. You can make the necessary adjustments from this dialog box. However, you can change those values later according to your requirements. Now hit okay if you think the values are good for now.
Steps-05: Create a Layer From the Drop Shadow
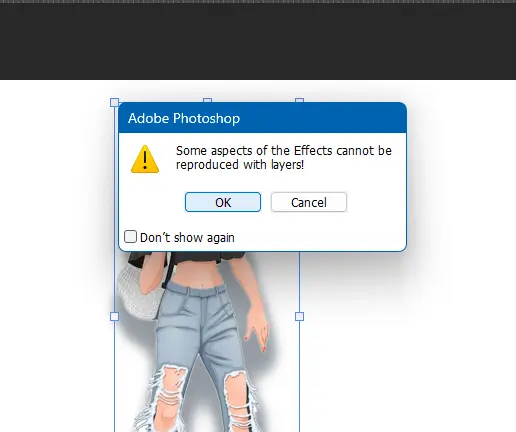
After that click on the layer option from the optionbar of Photoshop. Then select layer style and select create layer. It will separate the drop shadow from the layer. So, you can make further adjustments to the shadow. Click OK on the warning box.
Steps-06: Distort the Shadow
Now it is time to distort the shadow to create an artistic effect. Select the drop shadow layer and activate the transform tool. You can also go to the Edit option from the optionbar then select Transform and select Distort. Now select the right direction of your shadow and place it accordingly.
Steps-07: Create an Alpha Channel
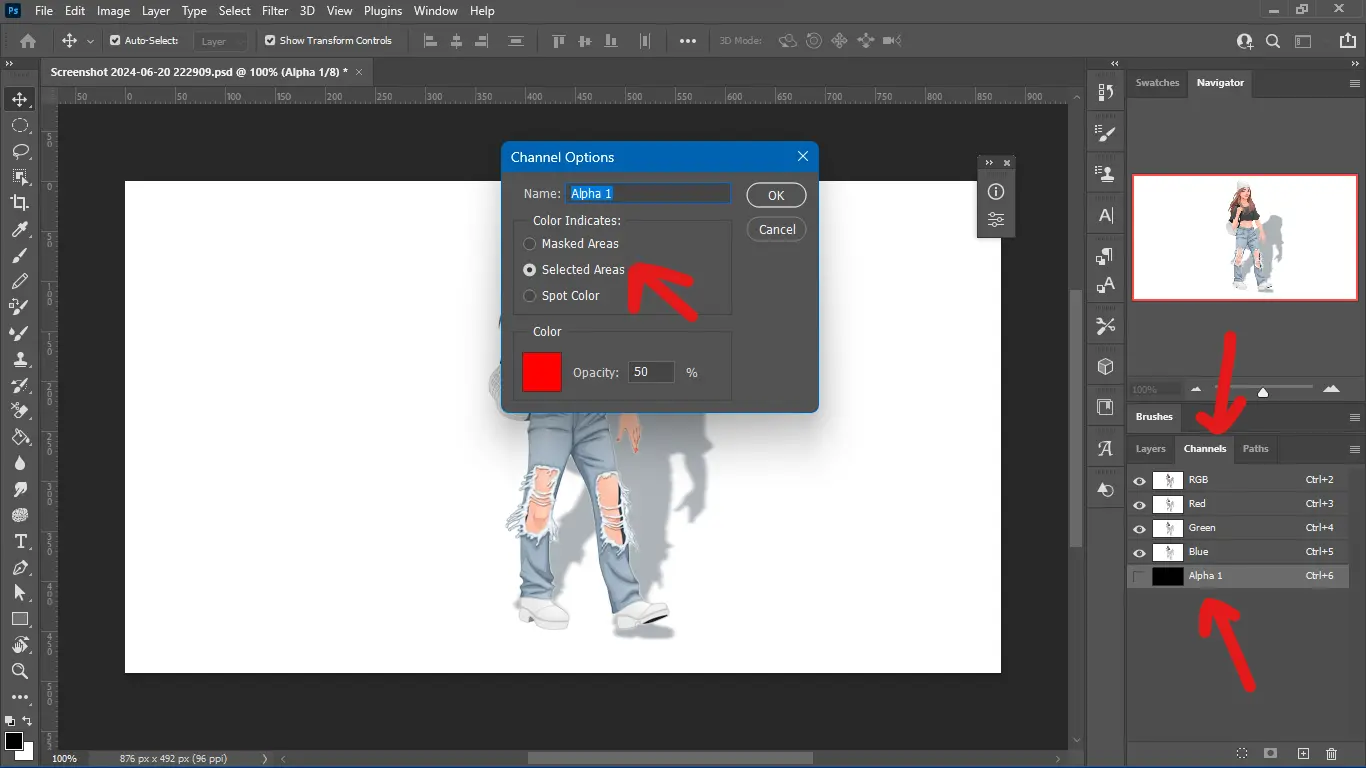
It already looks good, isn’t it? Now it is time to make it a bit more realistic. A shadow usually looks blurrier. We can achieve it by creating an alpha channel. It will allow us to adjust the area of the shadow. Thus we can make it lighter and blurry.
So, go the the channel panel from the windows or will get the option in the layer panel. Then click on the channel menu and select a new channel. You can rename it or leave it as default. From the channel options make sure the selected areas button is active.
Steps-08: Create a Gradient Within the Alpha Channel
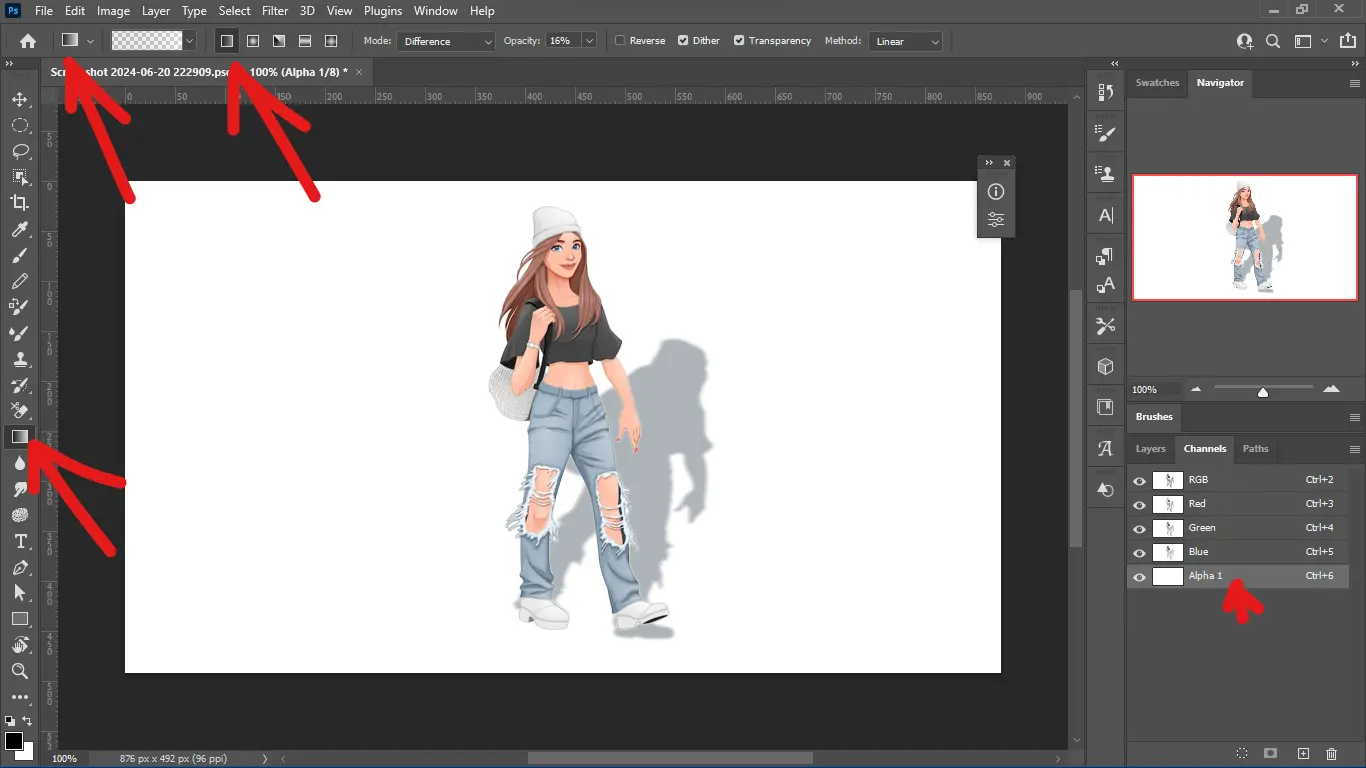
Now select the alpha channel that you have just created. Toggle the eye button of the channel that you will get on the left of the channel. Click on the gradient tool from the Photoshop toolbar. Set the background to white and the foreground to black.
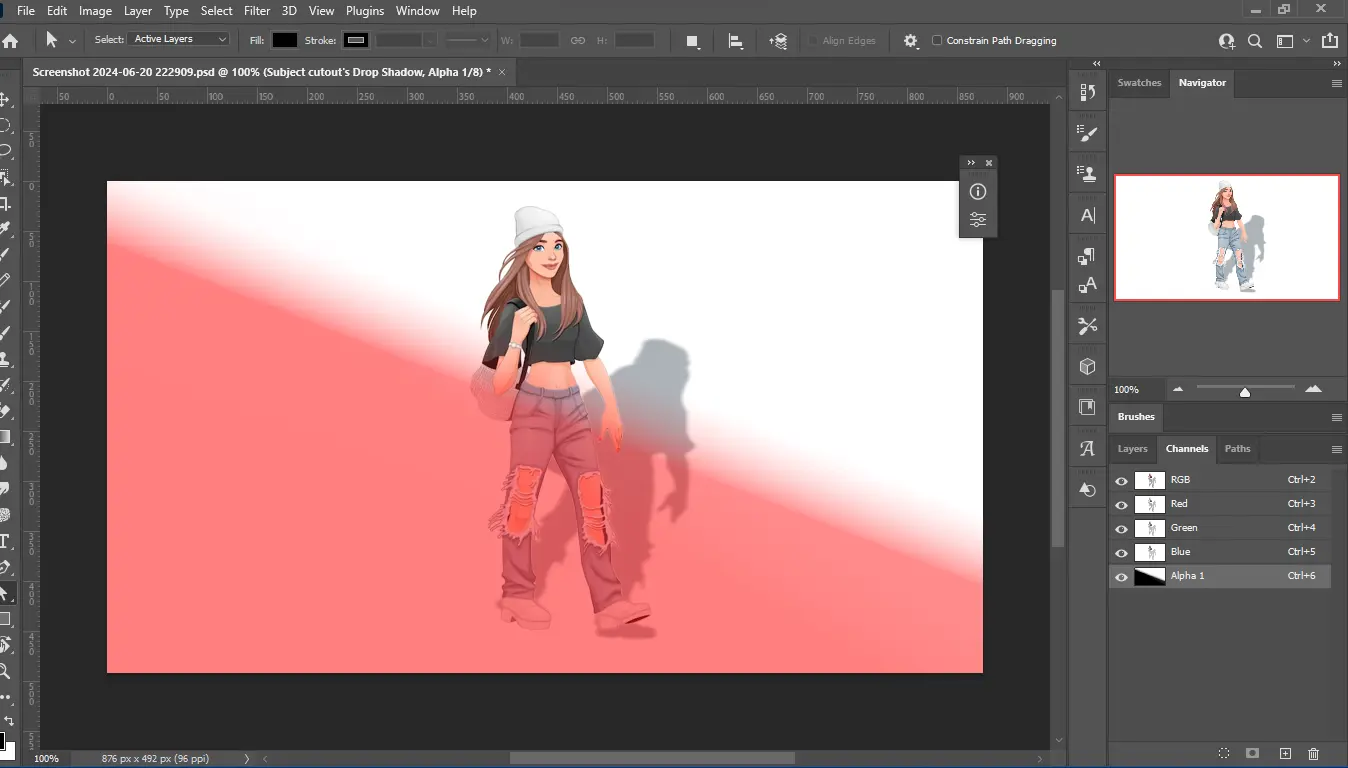
You will get some options in the option bar. Then set the tool from black to white from the options. Make sure the type is set to linear. Now using your cursor draw the gradient on your shadow.
Here you will get a red gradient. You can toggle the eye button to get rid of the red distractions. Select any of the channels on your channel panel. It will deselect alpha 1.
Steps-09: Blur the Shadow
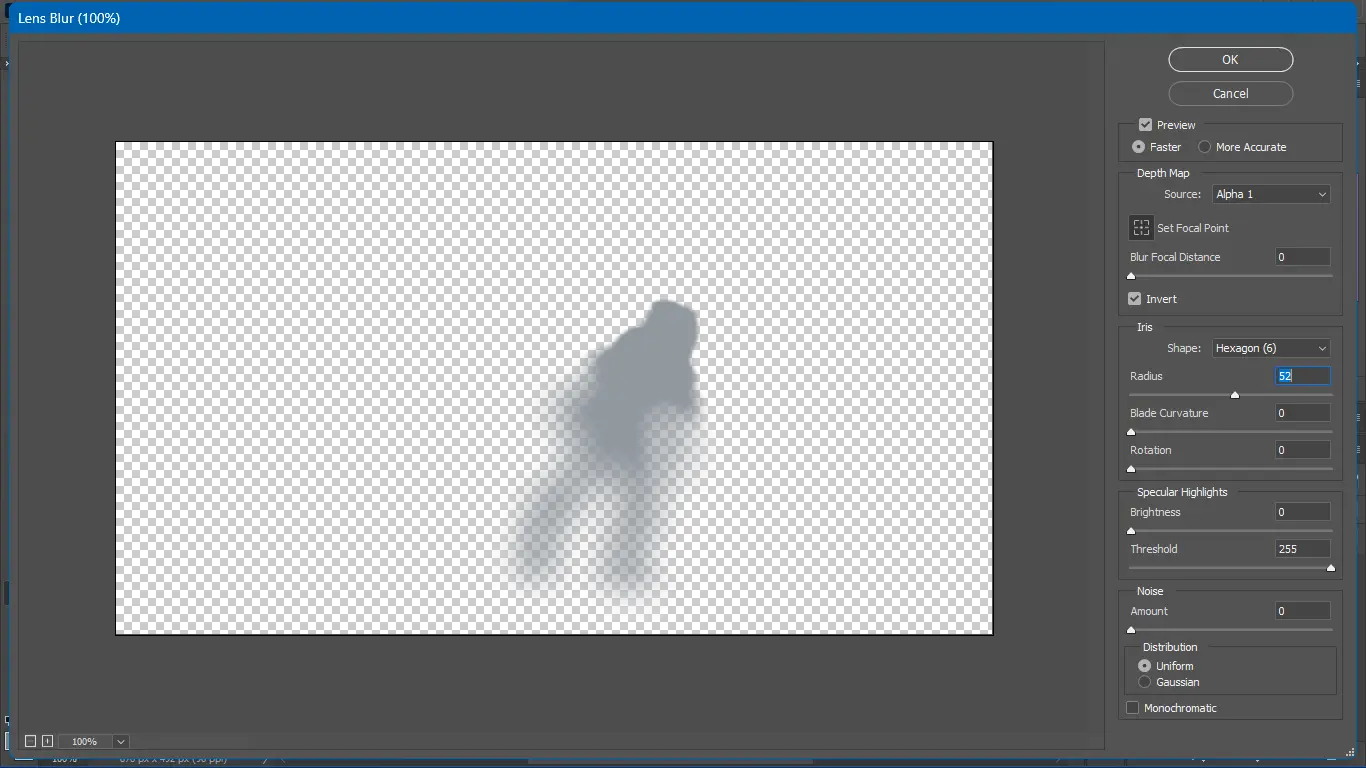
Go back to the layer panel. Now select the drop shadow layer to apply the filter. Then go to the filter option from the option bar select blur and again select lens blur. From the options of the lens blur, you can make the necessary adjustments.
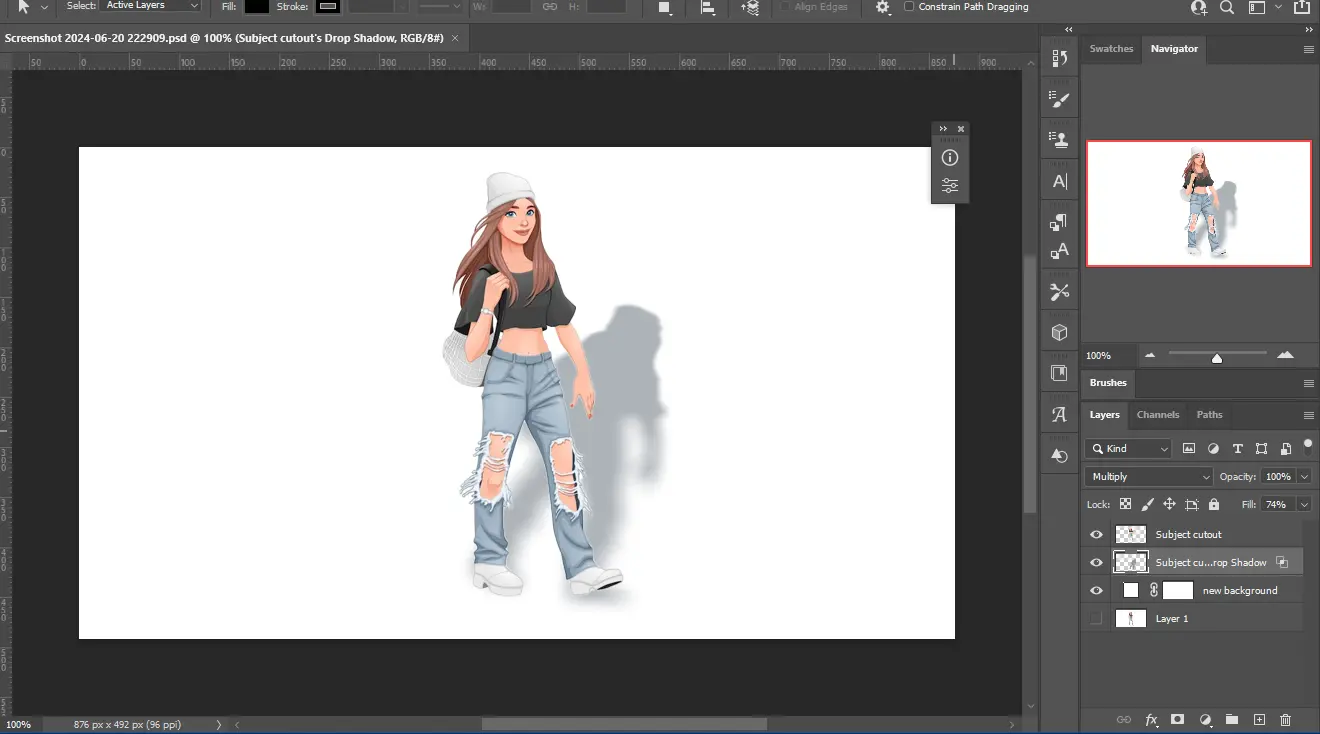
Steps-10: Create a Layer Mask
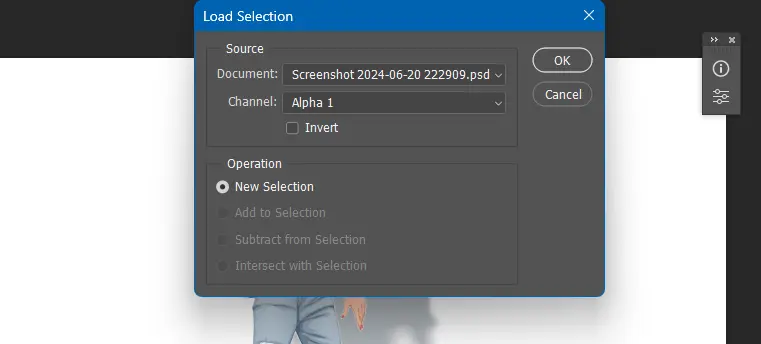
Again go to Select from the option bar and select Load selection option. Make sure the Alpha 1 channel is selected from the dropdown. Then hit ok if the new selection radius button is active.
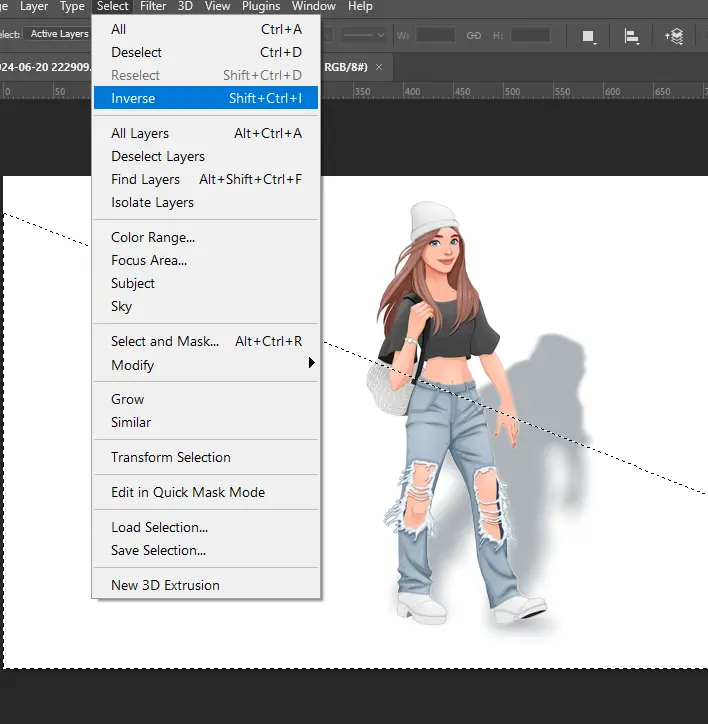
After that go to Select again and select inverse. Now from the bottom of the layers plane select the layer mask icon.
Steps-11: Final Touch
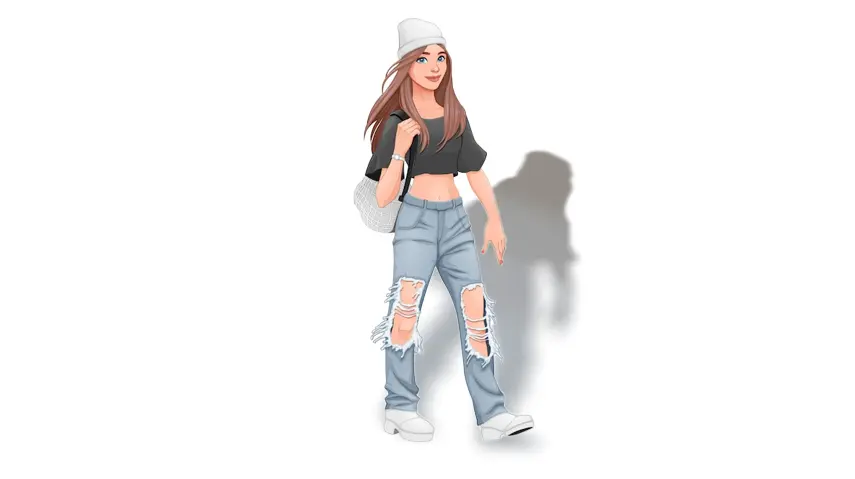
Finally, make sure everything in the image looks great. If it is okay then you can save the image. Now select all the layers and merge them. This is how you can add a drop shadow in Photoshop. Then go to File>Export and export the image to the desired format.
Things To Consider To Create a Shadow Effect
Shadows add depth and realism to your images! Here are the key things to consider when creating them: light source, object shape, blur, color, and distance. Let’s dive in!
- The light source is the first thing to consider in a shadow effect. The direction of light determines where the shadow will fall.
- Consider the shape of the object. It influences the shape of the shadow it casts. Transparent objects cast weaker, more diffused shadows. Completely opaque objects will cast darker, more defined shadows.
- Adjust the blurriness of the shadow accurately. It impacts its realism. A perfectly sharp shadow can look unnatural, while a very soft shadow may lose definition.
- Shadows are not always pure black. Depending on the light source and environment, shadows can have a hint of color.
- Consider the distance between the object and the surface receiving the shadow. It affects the size and softness of the shadow.
Importance of Shadow Effect for E-Commerce
The shadow effect plays a vital role for e-commerce businesses. Such as,
- Customers can’t physically touch the products. That’s why, high-quality images are crucial for driving sales.
- The shadow effects help create realistic photos. A well-placed drop shadow simulates a natural shadow. It makes the product appear three-dimensional. Thus e-commerce businesses get better marketing material by hiring a shadow creation expert.
- Drop shadows separate the product from the background. It is effective for the backgrounds commonly used in e-commerce photography. This ensures the product is the main focus point of the image. And the professional product images attract more customers.
- When customers can see the product’s dimensions and details, they’re more likely to feel comfortable making a purchase. Consider A/B testing your product images with and without shadows to see what resonates best with your audience.
Checkout Our Latest Articles
- Rule of Thirds | A Complete Guide for Beginners
- How To Create Pokemon Text Effects in Photoshop
- How To Make A Transparent Background [5 Easy Ways]
Frequently Asked Question
What is the Cost of a Shadow Adding Service?
The cost of a shadow-adding service depends on the type of shadow and the expertise of image editors. However, the average pricing of a shadow-adding service starts at $0.30 per image.
How To Create Drop Shadows Using Layer Style?
Double-click on the layer of Photoshop. It will pop up with a layer-style dialogue box. Go to the drop shadow option. Here you will get different adjustment options to create a drop shadow.
Final Thoughts
So, this is how to add a drop shadow in Photoshop. Here we have tried to give you an insight into the shadow effect creation process, You may not get the result at the initial attempts. So, practice more and more to create high-quality shadow effects.
Again, the shadow is important for e-commerce product photos. However, handling a large volume of photos is not an easy task. A professional photo editing agency can help you in this situation.
So, hire an expert photo editing company who has a good review of this service. The experts of the company will deliver your products in time and you can set a better marketing strategy.