Table of Contents
Are you a beginner looking to start your yoga poses journey? Look no further! This blog will introduce you to 10 Yoga Poses specifically designed for beginners in 2024. Yoga Poses offers numerous benefits, including improved flexibility, reduced stress, and enhanced overall well-being.
Whether you’re seeking physical fitness or mental relaxation, these yoga poses are perfect. We’ll provide step-by-step instructions, modifications, and key points to remember for each pose. Get ready to experience the excellent benefits of Yoga Poses for beginners.
Best 10 Yoga Poses for Beginners in 2024
Discover the best 10 Yoga Poses for beginners in 2024. Enhance your flexibility, reduce stress, and improve your overall well-being with these easy-to-follow yoga poses. Start your yoga journey today and experience the transformative benefits of the following Yoga Poses.
Mountain Pose (Tadasana) | Yoga Poses Ideas
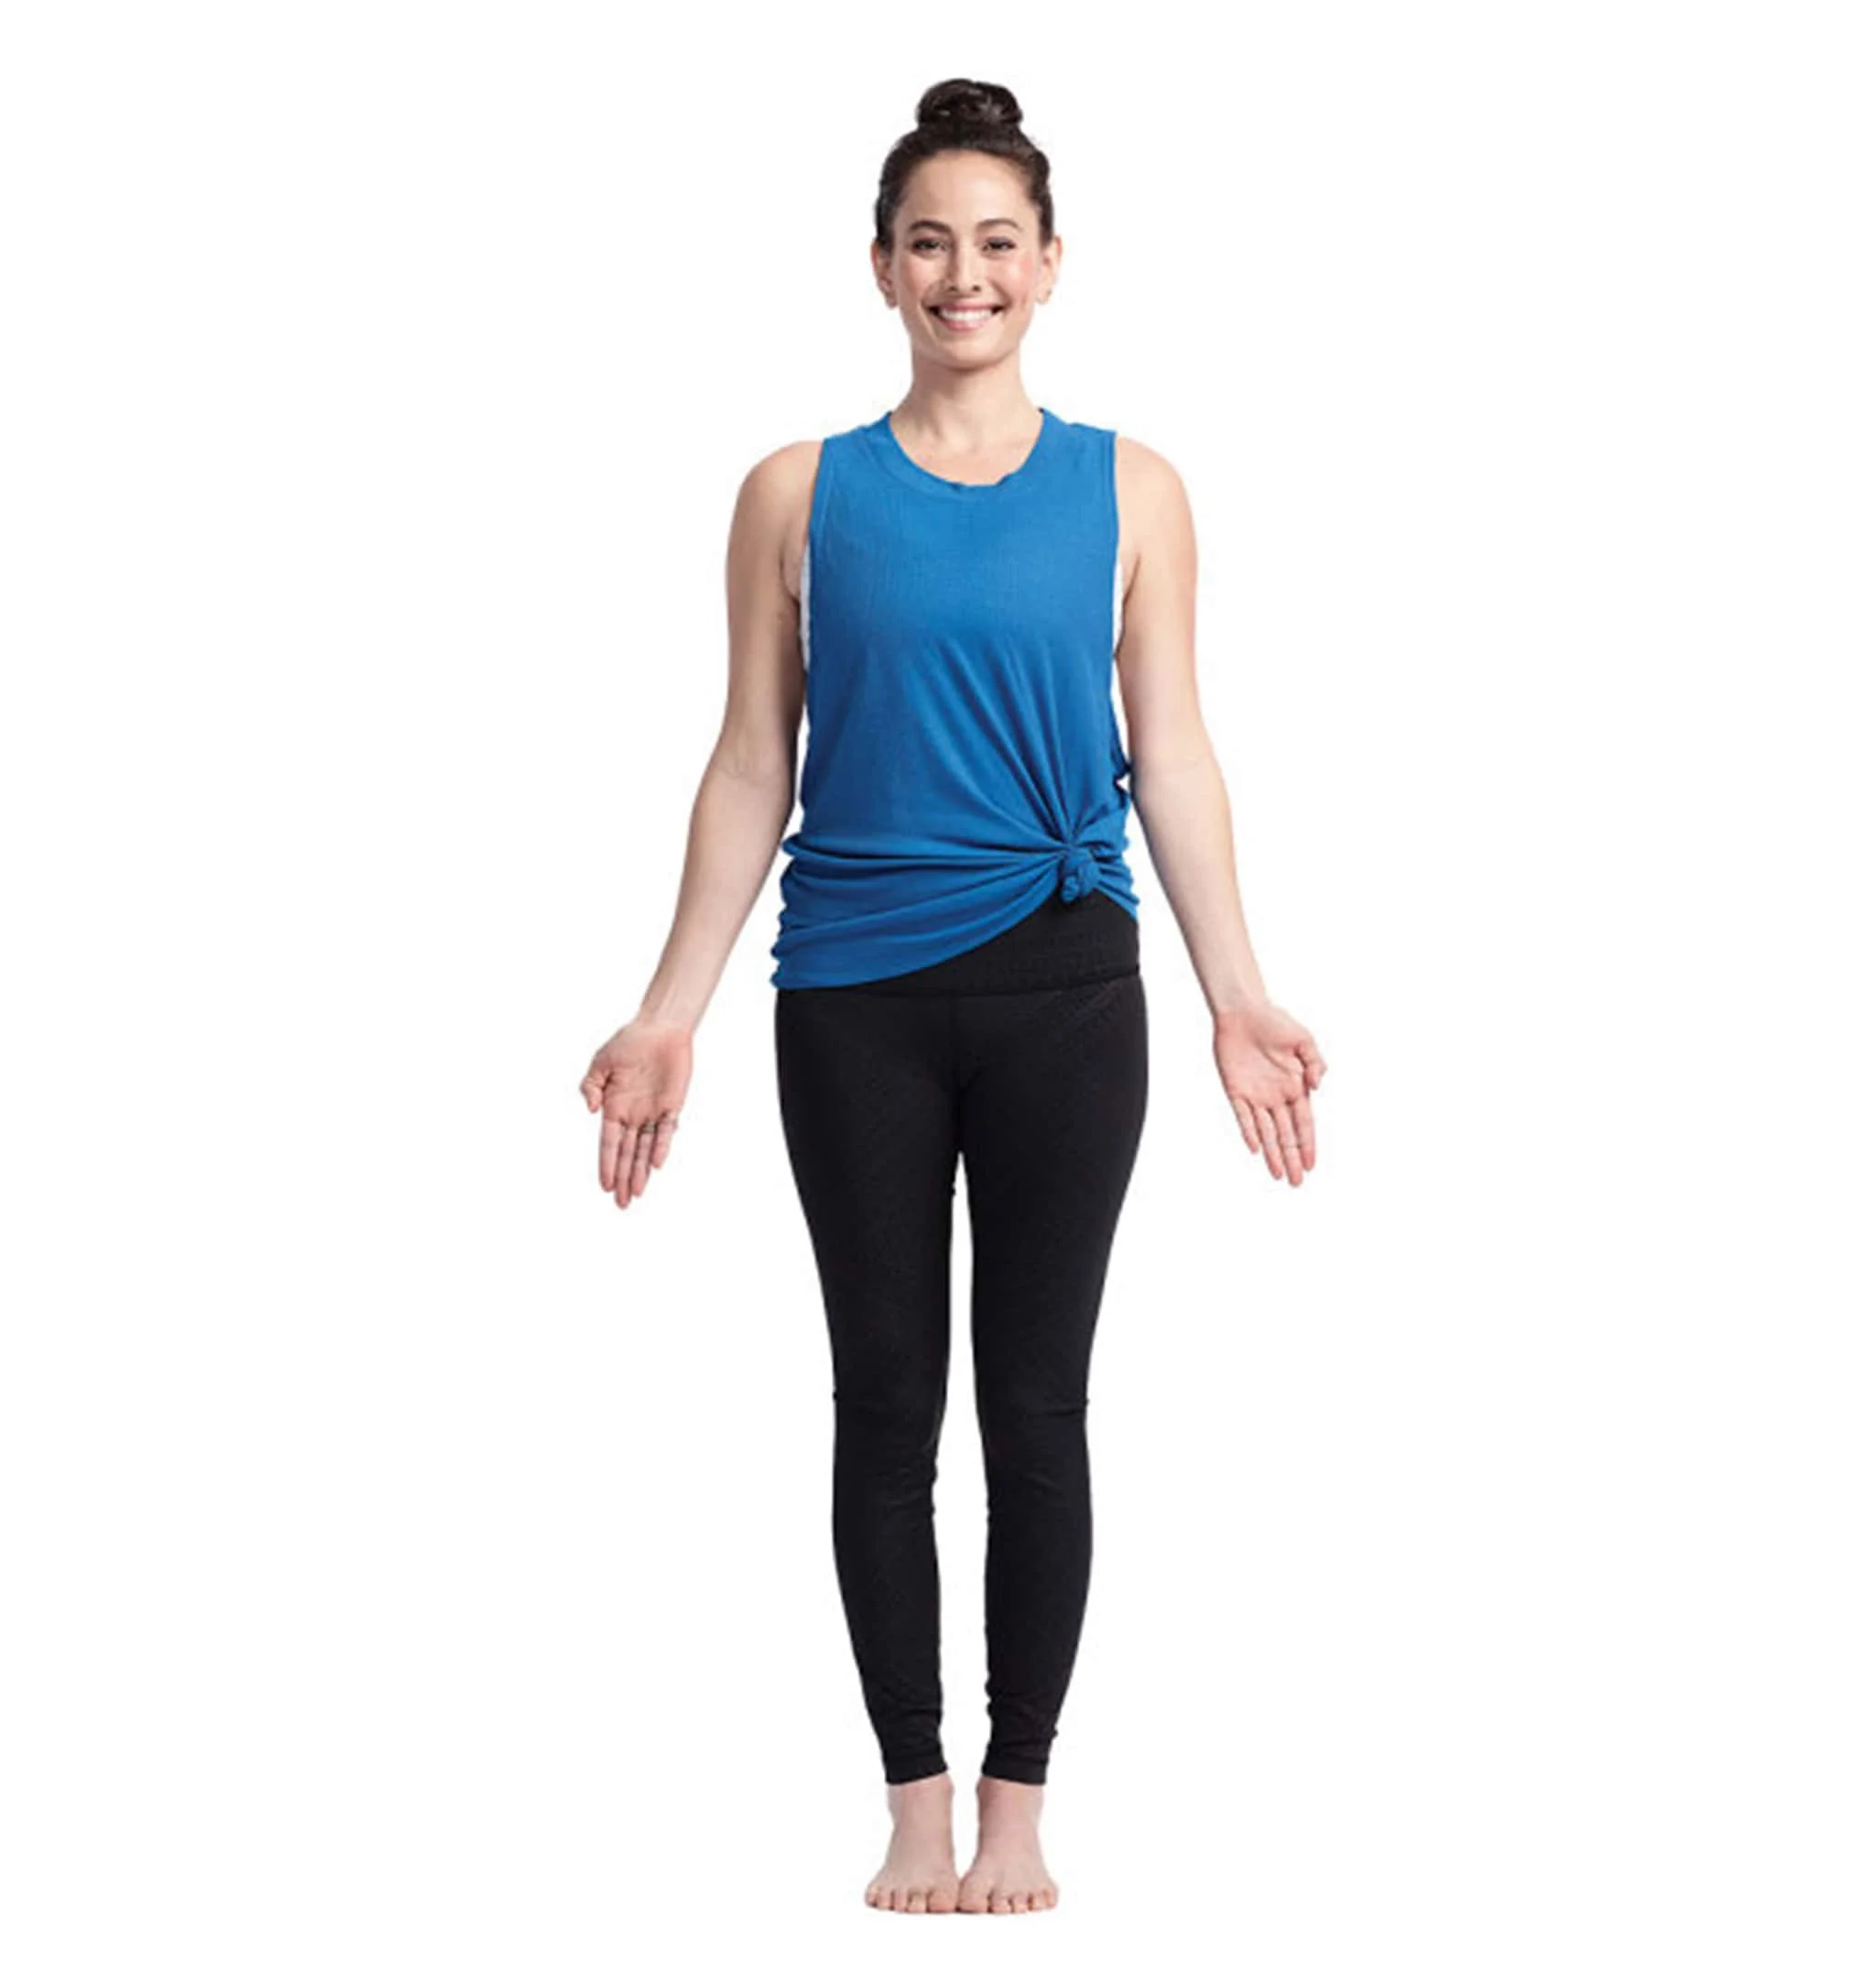
Are you a beginner looking for the best yoga poses to start your practice? Look no further than the Mountain Pose (Tadasana). This foundational yoga pose is not only simple to perform but also offers a wide range of benefits for both the body and mind. Let’s dive into the details of the Mountain Yoga Pose, including its benefits and instructions for beginners.
Benefits
- By aligning your spine, shoulders, and hips, the Mountain Pose helps improve your overall posture.
- This pose encourages you to be mindful of your body’s alignment and sensations, promoting a deeper mind-body connection.
- The Mountain Pose cultivates mental clarity and focus.
- Holding the pose requires engaging your leg muscles and core, which helps build strength and stability.
- Tadasana Yoga Poses allow for deep, conscious breathing, promoting relaxation and stress reduction.
Instructions
- Stand tall with your feet hip-width apart and parallel to each other.
- Distribute your weight evenly between both feet, grounding them firmly into the ground.
- Engage your leg muscles, lift your kneecaps, and lengthen your spine.
- Roll your shoulders back and down, allowing your chest to open.
- Relax your arms by your sides, with your palms facing forward.
- Gently lengthen your neck and lift the crown of your head towards the ceiling.
- Maintain a steady, relaxed breath and hold the pose for several breaths or as long as comfortable.
Child’s Pose (Balasana) | Balasana Yoga Poses
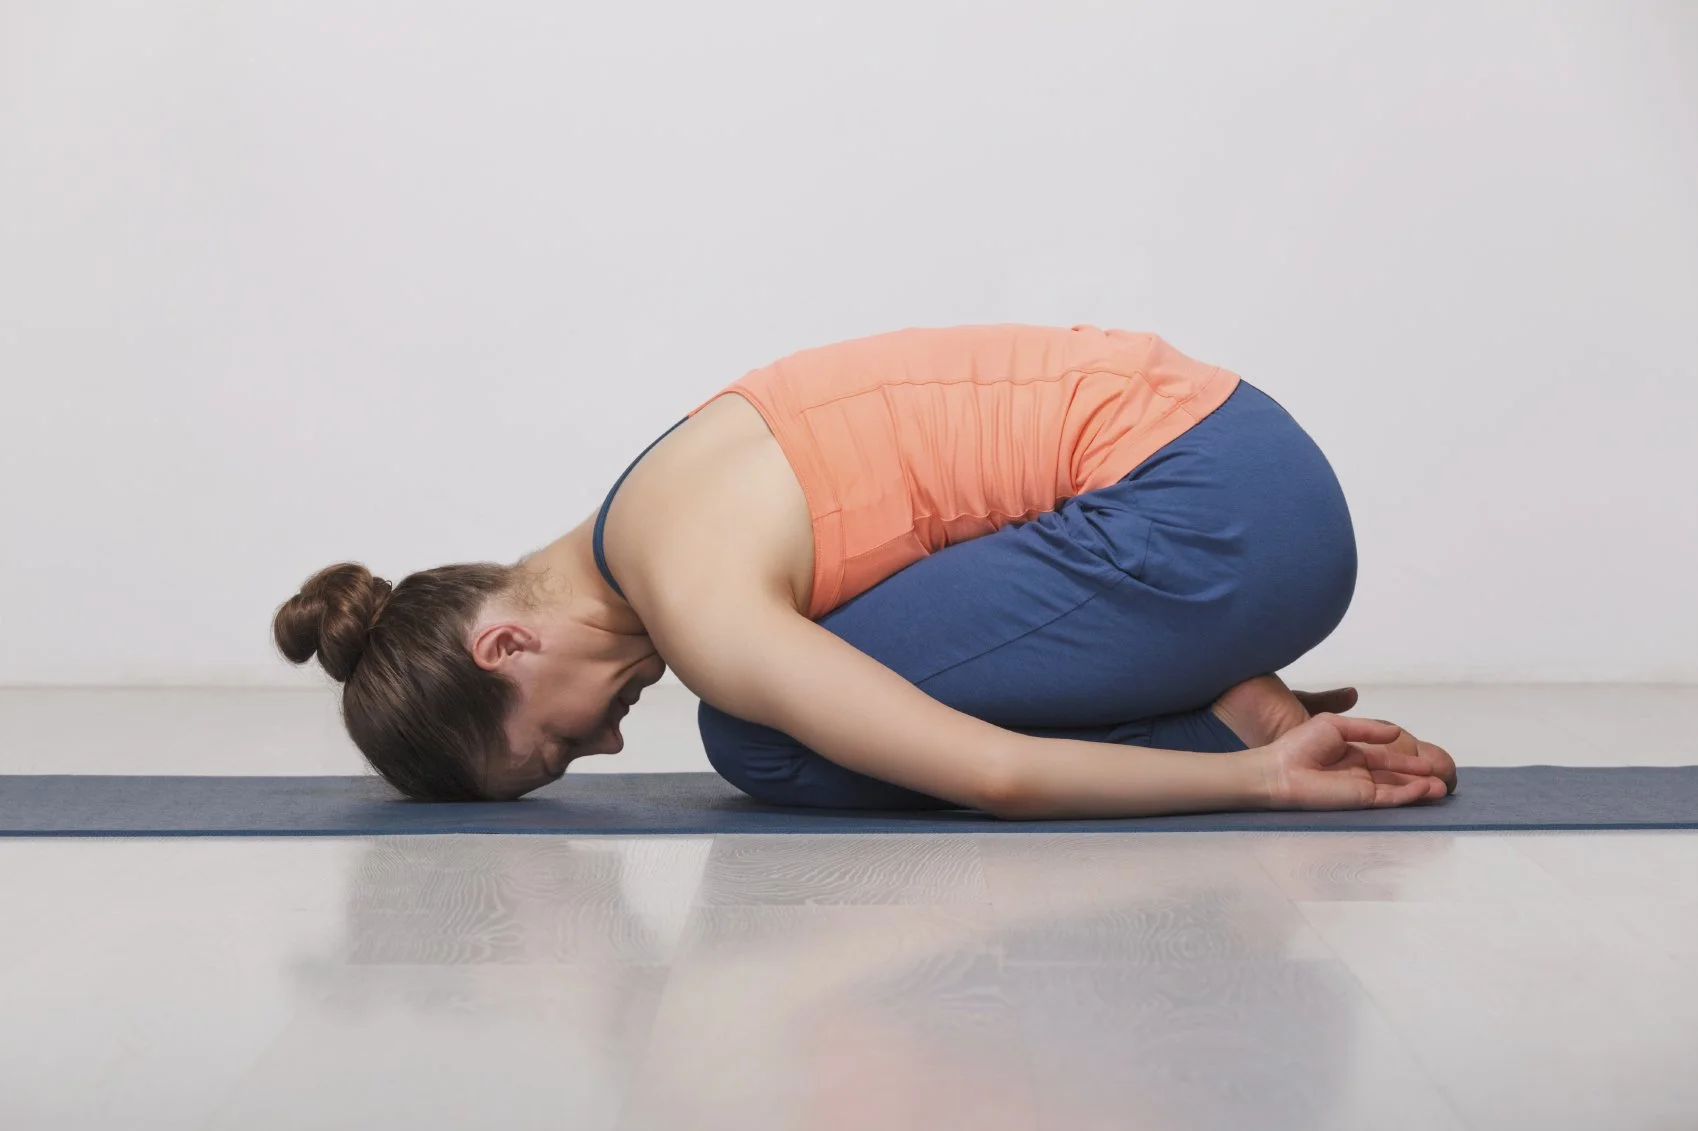
Are you looking for calming and restorative yoga poses? Look no further than Child’s Pose (Balasana). This gentle and accessible pose is perfect for finding relaxation and comfort during your yoga practice. Let’s explore the benefits and instructions of Child’s Pose.
Benefits
- Relaxation and stress relief.
- Gentle stretch for the back.
- Hip and thigh opening.
- Deep breathing and mindfulness.
Instructions
To practice Child’s Pose, follow these simple instructions:
- Begin by kneeling on the floor.
- Bring your big toes together and separate your knees to hip-width distance.
- Lower your hips towards your heels and rest your buttocks on your heels.
- Exhale as you gently fold your torso forward, bringing your chest towards your thighs.
- Rest your forehead on the mat or a bolster if comfortable.
- Extend your arms forward or alongside your body, palms facing up.
- Allow your shoulders to relax and sink toward the ground.
- Stay in this pose for several breaths or as long as desired, focusing on deep, slow breaths and a relaxed body.
Downward-Facing Dog (Adho Mukha Svanasana)
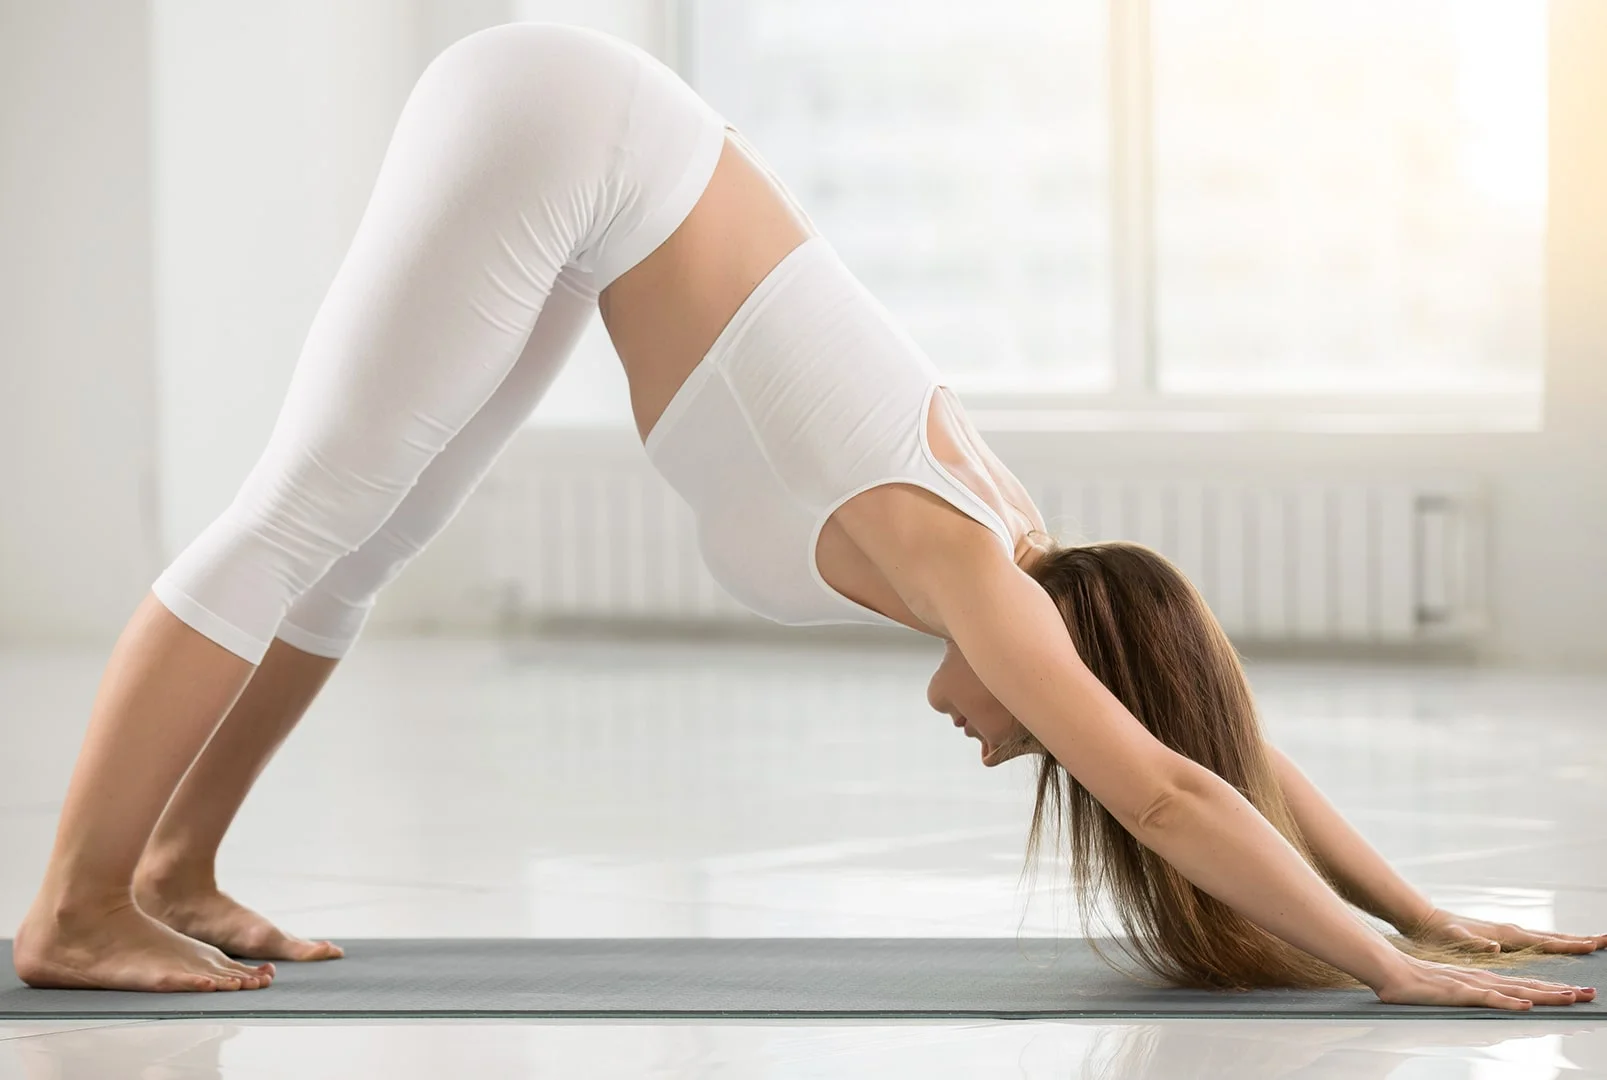
Are you a beginner looking for effective and accessible yoga pose Ideas? Look no further than Downward-Facing Dog (Adho Mukha Svanasana). This popular pose is not only beginner-friendly but also offers many benefits for both the body and mind.
Benefits
- Strengthens the upper body.
- Stretches the hamstrings and calves.
- Lengthens the spine.
- Relieves tension.
- Energizes the body.
Instructions
To practice Downward-Facing Dog:
- Start on your hands and knees, with your hands slightly forward of your shoulders and your knees directly below your hips.
- Spread your fingers wide and press your palms into the mat.
- Tuck your toes under, lift your knees off the ground, and begin to straighten your legs, pushing your hips up and back.
- Lengthen your spine, keeping it long and straight.
- Press your heels toward the floor, but if they don’t reach, it’s okay to keep a slight bend in your knees.
- Engage your core muscles and relax your neck, allowing your head to hang freely.
- Breathe deeply and hold the pose for several breaths or as long as comfortable.
Warrior I (Virabhadrasana I)
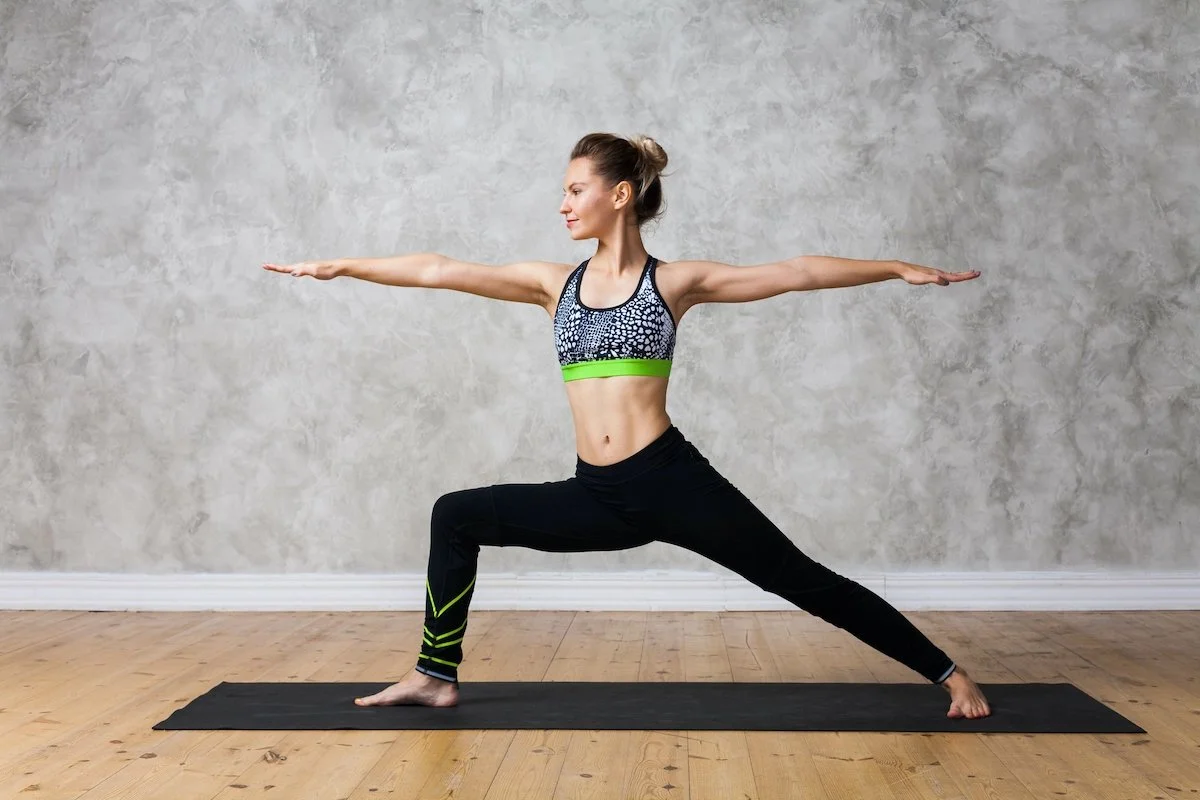
Are you ready to channel your inner warrior and strengthen your body and mind? Look no further than Warrior I (Virabhadrasana I). These empowering yoga poses offer a multitude of benefits and are accessible to practitioners of all levels. Let’s explore the benefits and instructions of Warrior I.
Benefits
- Strengthens the legs and core.
- Stretches the chest and shoulders.
- Builds focus and concentration.
- Promotes balance and stability.
- Boosts confidence and empowerment.
Instructions
To practice Warrior I:
- Begin in a standing position with your feet hip-width apart.
- Take a step back with your left foot, turning it slightly outwards at a 45-degree angle.
- Bend your right knee, aligning it directly over your ankle. Your thigh should be parallel to the floor.
- Ground your left foot firmly into the mat, pressing through the outer edge.
- Square your hips and shoulders towards the front of the mat.
- Inhale as you raise both arms overhead, reaching towards the sky with your fingertips.
- Gently tilt your head back, keeping your gaze focused on a point in front of you.
- Hold the pose for several breaths, feeling the strength and stability in your body.
- Repeat the pose on the opposite side.
Triangle Pose (Trikonasana)
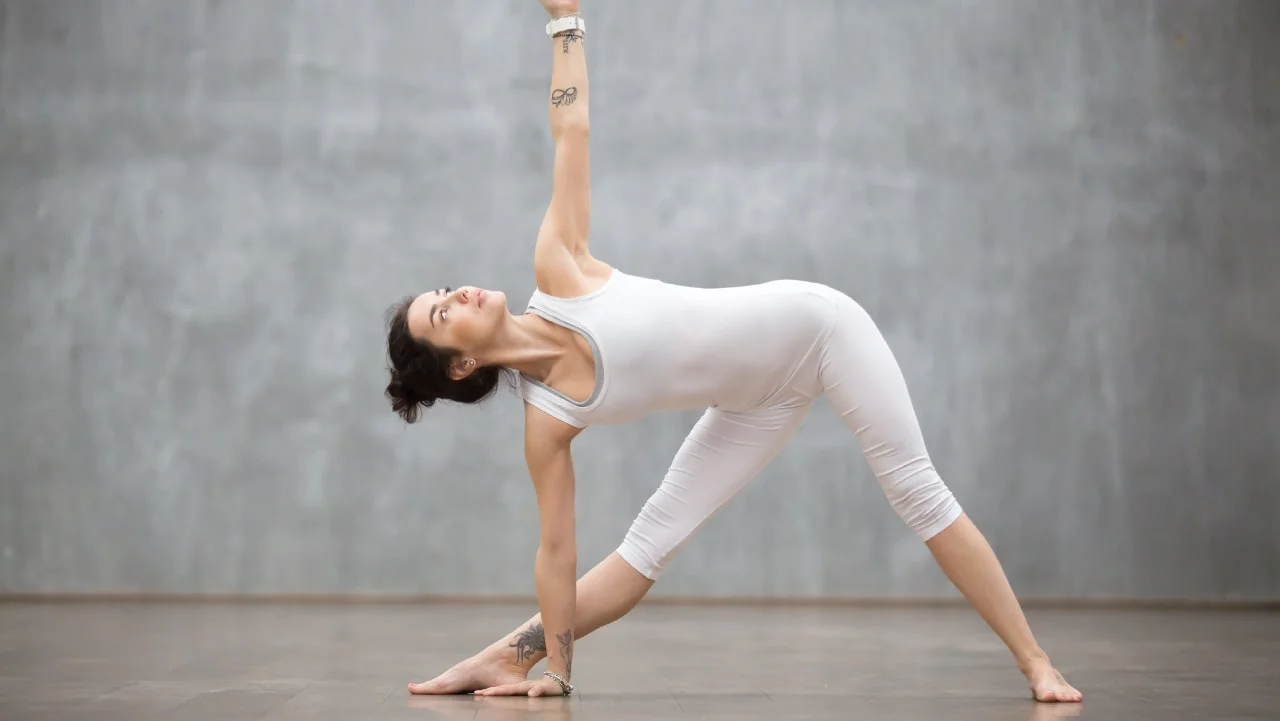
Are you searching for a yoga pose that promotes strength, flexibility, and balance? Look no further than Triangle Pose (Trikonasana). This popular asana offers many benefits for both the body and mind. Let’s explore the benefits and instructions of Triangle Pose.
Benefits
- Stretches and strengthens the legs.
- Opens the hips and chest.
- Lengthens the spine.
- Stimulates digestion and aids in detoxification.
- Improves balance and concentration.
Instructions
To practice Triangle Pose:
- Begin in a standing position with your feet about three to four feet apart.
- Turn your right foot out to a 90-degree angle and pivot your left foot slightly inward.
- Extend your arms out to the sides, parallel to the floor, with your palms facing down.
- Inhale & reach your right arm forward, hinging from your hip, and tilt your torso to the right.
- Exhale as you lower your right hand down, either to your shin, ankle, or the floor, while extending your left arm towards the ceiling.
- Gaze upward, or if it strains your neck, look straight ahead or downward.
- Keep your body in one plane, with your shoulders and hips stacked on top of each other.
- Maintain a steady breath and hold the pose for several breaths.
- Repeat the pose on the opposite side.
Bridge Pose (Setu Bandhasana)
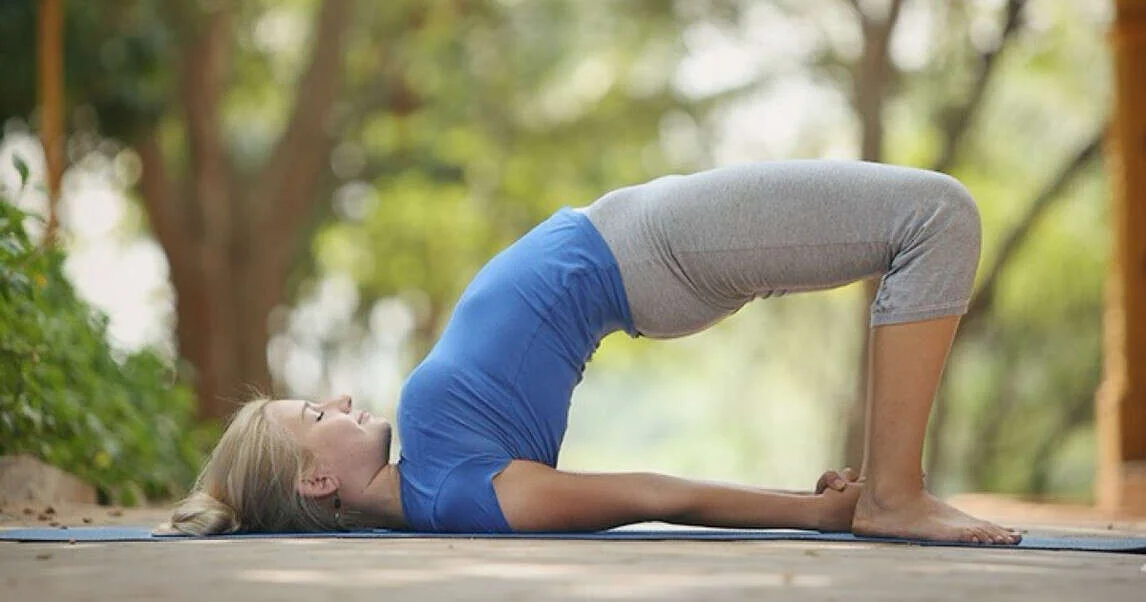
Are you looking to strengthen your back, open your chest, and energize your body? Look no further than Bridge Pose (Setu Bandhasana). This rejuvenating yoga pose offers a range of benefits for both the body and mind. Let’s explore the benefits and instructions of Bridge Pose.
Benefits
Bridge Pose provides numerous benefits that promote overall well-being:
- Strengthens the back and core.
- Stretches the chest and shoulders.
- Increases spinal flexibility.
- Stimulates the thyroid and energizes the body.
- Relieves stress and calms the mind.
Instructions
To practice Bridge Pose:
- Lie on your back with your knees bent and feet hip-width apart, flat on the ground.
- Place your arms alongside your body, palms facing down.
- Inhale, press your feet firmly into the mat, & lift your hips off the ground while keeping your knees directly over your ankles.
- Roll your shoulders back and underneath your body, interlacing your fingers or keeping your palms flat on the ground for support.
- Lift your chest towards your chin, keeping the neck long.
- Engage your glutes and thighs as you continue to lift your hips higher.
- Hold the pose for several breaths, feeling the stretch in the front of your body and the strength in your back.
- Exhale, slowly release the pose and lower your spine, vertebra by vertebra, back to the mat.
Cat-Cow Pose (Marjaryasana-Bitilasana)
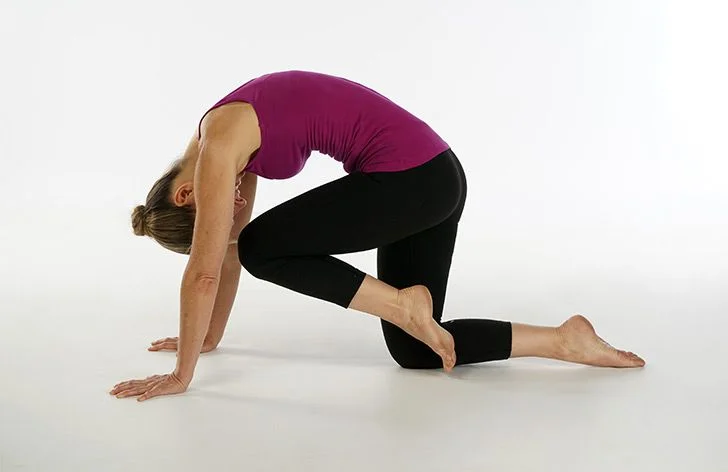
The Cat-Cow Pose, also known as Marjaryasana-Bitilasana, is a popular yoga pose that offers numerous benefits for the body and mind. It is a gentle exercise that can be practiced by people of all ages and fitness levels. Let’s explore the benefits and instructions for performing this yoga pose.
Benefits
- Cat-Cow Pose helps to improve the flexibility and mobility of the spine.
- Regular practice of the Cat-Cow Pose can aid in correcting poor posture.
- Helping to build strength and stability in the midsection.
- Cat-Cow Pose is a great way to relax and relieve stress.
Instructions
- Start on your hands and knees, aligning your wrists directly under your shoulders and your knees under your hips.
- Keep your fingers spread wide for stability.
- Inhale deeply and gently drop your belly towards the floor, lifting your head and tailbone.
- As you exhale, round your spine upwards, like a cat stretching its back, tucking your chin towards your chest.
- Repeat the sequence, smoothly transitioning from Cow Pose on the inhale to Cat Pose on the exhale. Move with your breath, allowing the movement of your spine to guide you.
- Continue this flow for several rounds, syncing your breath with the movement.
- Remember to inhale when moving into Cow Pose and exhale when moving into Cat Pose.
- Practice Cat-Cow Pose for about 5-10 rounds or as long as it feels comfortable.
- Pay attention to the sensations in your body and make gentle adjustments to find the most beneficial stretch for you.
- Finally, when you are ready to finish, come back to a neutral tabletop position and rest in Child’s Pose or any other comfortable resting pose of your choice.
Seated Forward Bend (Paschimottanasana)
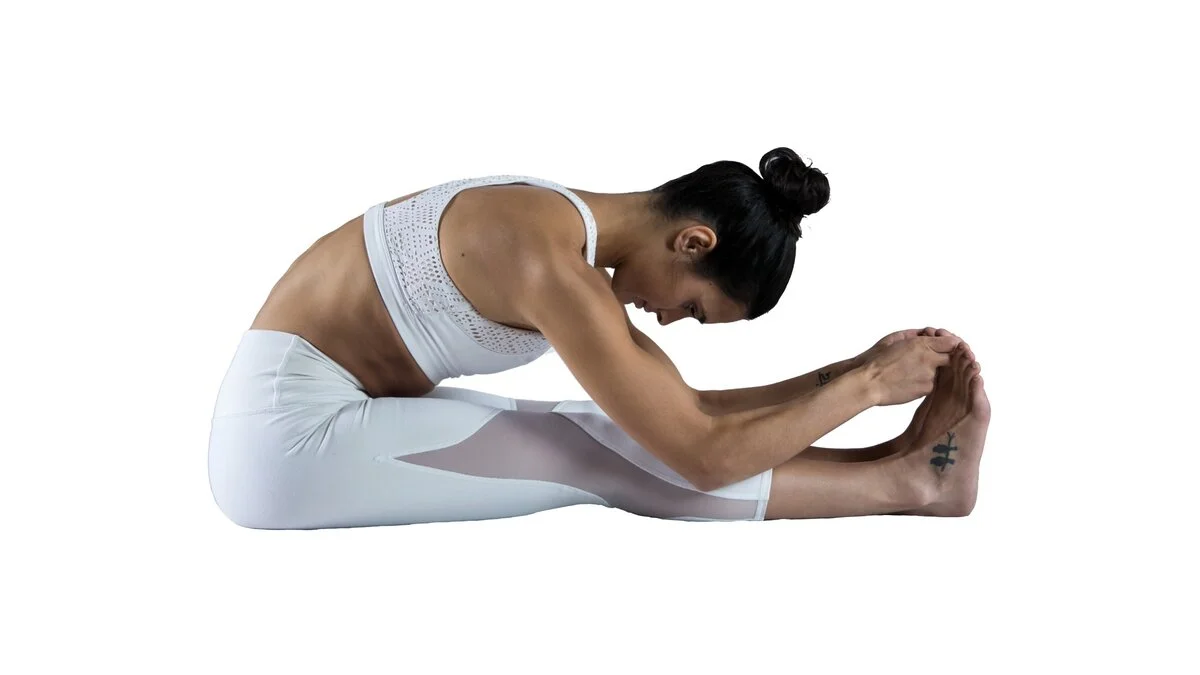
The Seated Forward Bend, also known as Paschimottanasana, is a calming yoga pose that provides various benefits for the body and mind. It is a seated posture that gently stretches the back of the body, promoting flexibility and relaxation. Let’s explore the benefits and instructions for performing this pose.
Benefits
- Paschimottanasana helps to lengthen and stretch the spine from the tailbone to the back of the neck.
- This pose targets the hamstrings and calves, helping to increase their flexibility and reduce tightness.
- A seated Forward Bend is soothing to the nervous system.
- The gentle compression of the abdomen in this pose stimulates the digestive organs, improving digestion and promoting better nutrient absorption.
Instructions for Seated Forward Bend:
- Begin by sitting on the floor with your legs extended in front of you.
- Sit up tall, lengthening your spine, and engage your core muscles.
- Inhale deeply, and as you exhale, slowly begin to fold forward from the hips.
- Keep your spine long and lead with your chest rather than rounding your back.
- Reach your hands forward and place them on your legs, ankles, or feet. If you cannot reach your feet comfortably, you can use a strap or a folded towel around the soles of your feet and hold onto it.
- As you fold forward, continue to breathe deeply and relax into the stretch. With each inhalation, lengthen your spine a little more, and with each exhalation, allow yourself to release deeper into the pose.
- Focus on keeping your neck relaxed and your shoulders away from your ears. Avoid straining or pulling yourself forcefully into the stretch. The aim is to find a gentle stretch without discomfort.
- Hold the pose for 30 seconds to 1 minute or as long as feels comfortable for you. With regular practice, you can gradually increase the duration.
- To come out of the pose, slowly inhale and lift your torso back up, maintaining the length of your spine.
Corpse Pose (Savasana)
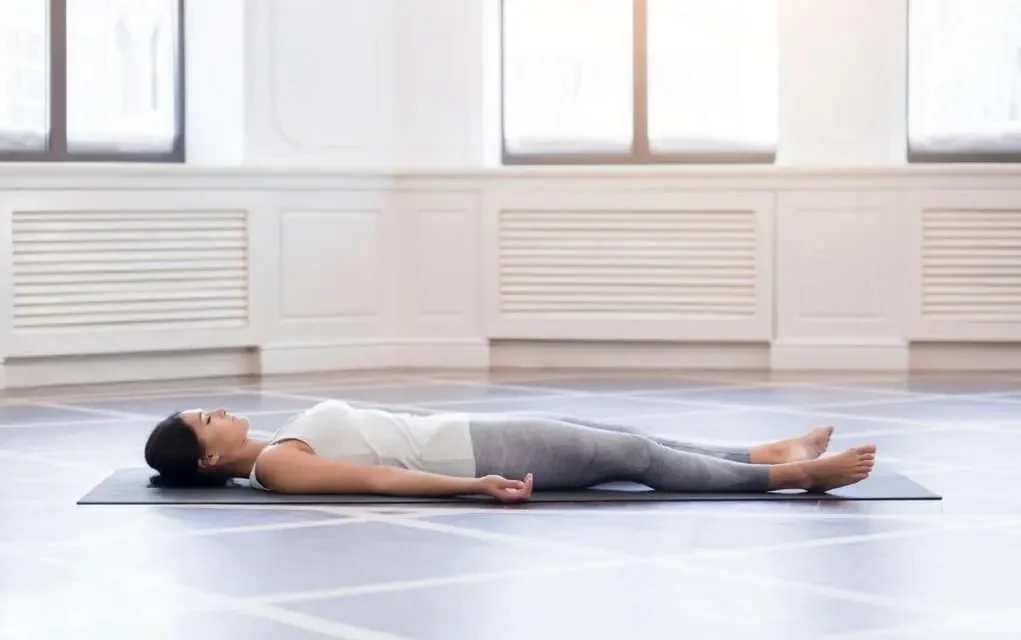
The Corpse Pose, also known as Savasana, is a deeply relaxing and restorative yoga pose that is often practiced at the end of a yoga session. Savasana offers numerous benefits for the body and mind. Let’s explore the benefits and instructions for practicing this pose.
Benefits
- Deep Relaxation.
- Stress Reduction.
- Restoration and Rejuvenation.
- Body Awareness.
Instructions
- Find a quiet and comfortable space where you can lie down flat on your back.
- Use a yoga mat or a soft blanket to provide some cushioning.
- Lie down with your legs extended comfortably, slightly apart, and your arms resting alongside your body, palms facing upwards.
- Close your eyes and bring your attention to your breath.
- Take a few deep breaths to relax your body and calm your mind.
- Gradually release any tension you may be holding in your body.
- Starting from your toes, consciously relax each part of your body, moving upwards to your ankles, calves, knees, thighs, hips, abdomen, chest, shoulders, arms, and finally, your face and head.
- Allow your entire body to become heavy and sink into the floor beneath you. Surrender to gravity and let go of any effort or control.
- Remain in Savasana for a minimum of 5 to 10 minutes or longer if you have the time. Use this time to focus on your breath, letting it flow naturally without any force or manipulation.
- When you are ready to come out of the pose, begin by slowly wiggling your fingers and toes, gently awakening your body. Stretch your arms overhead and take a full-body stretch to reawaken your muscles.
- Roll onto your right side, using your arm as a pillow, and take a few moments to rest in a fetal position.
- Finally, use your hands to gently push yourself up to a seated position, taking your time to transition mindfully.
Modified Boat Pose (Ardha Navasana)
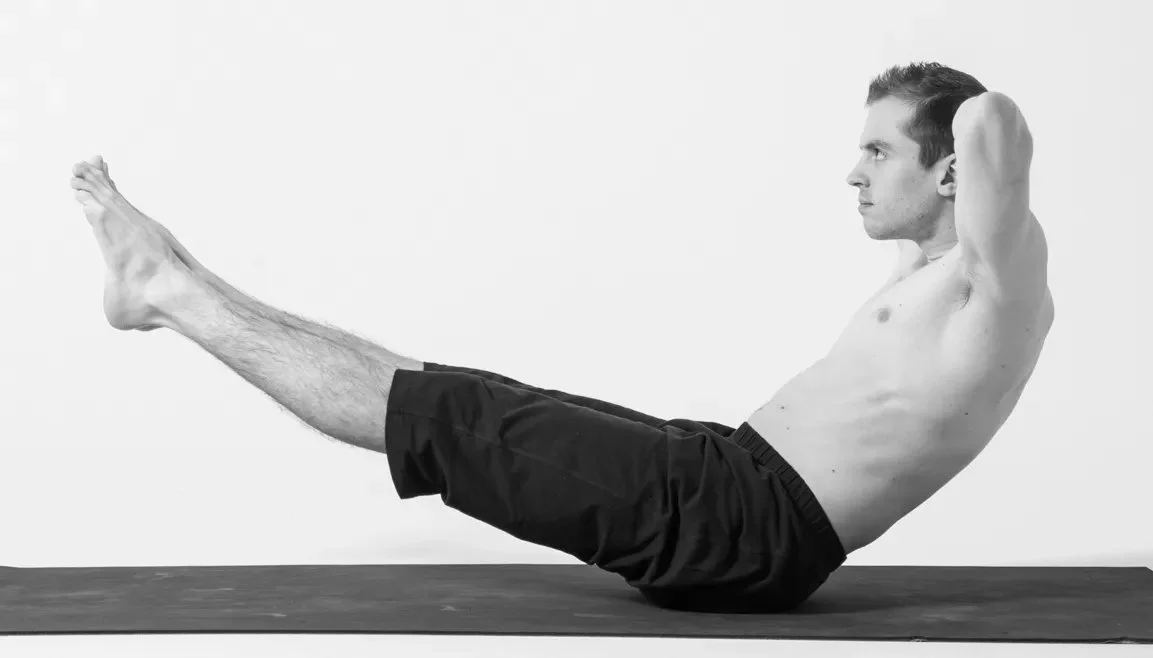
The Modified Boat Pose, also known as Ardha Navasana, is a modified version of the traditional Boat Pose. It is a challenging yet effective yoga pose that offers several benefits for the body and core strength. Let’s explore the benefits and instructions for practicing this pose.
Benefits
- Core Strengthening.
- Improved Digestion.
- Spinal Flexibility.
- Increased Stamina.
Instructions
- Start by sitting on a yoga mat with your knees bent and your feet flat on the floor.
- Keep your hands resting on the mat beside your hips, fingers pointing forward.
- Lean back slightly, engaging your core muscles.
- Lift one foot off the ground, straightening the leg and balancing on the other foot.
- Slowly lift the other foot off the ground, straightening the leg as well.
- Keep your torso and legs forming a V shape.
- Find your balance and focus on keeping your spine straight and your chest lifted.
- Engage your abdominal muscles to support your lower back.
- Extend your arms forward, parallel to the ground, with your palms facing each other. Maintain a relaxed and steady breath.
- Hold the pose for 10 to 20 seconds initially, gradually increasing the duration as you build strength and stability.
- To release the pose, gently lower your feet back to the ground and return to a seated position with your knees bent.
Conclusion | Yoga Poses For Beginners
In conclusion, practicing these 10 beginner-friendly yoga poses in 2024 can offer a variety of physical and mental benefits. Start your yoga poses journey with these poses and enjoy the positive impact they can have on your well-being.
Read Also Our Latest Articles
- Creative Drawing Ideas for Beginners
- 15+ Best Trendy Graphic Hoodies for Men & Women
- 35 World’s Famous Photographers
- 17 Best Selfie Poses to Entertain Your Social Media
FAQs | Best Yoga Poses
What Is The Most Common Yoga Poses?
Downward-facing dog is the most common yoga pose.
Which Yoga Is Best For Exercise?
Power Yoga is best for exercise.


