




How To Do Photo Manipulation in Photoshop
How to Do Photo Manipulation in Photoshop is a step-by-step guide to creating stunning digital artwork by combining multiple images into one seamless composition. Whether you’re a beginner or an experienced designer, Photoshop offers powerful tools like layers, masks, blending modes, and adjustment layers to transform ordinary photos into creative masterpieces. In this tutorial, you’ll learn the essential techniques, best practices, and tips to create professional-quality photo manipulations.
How Can You Plan Photo Manipulation?
Turning your ideas into photo manipulations is a creative process. It involves planning, image selection, and using software like Adobe Photoshop or GIMP to bring your vision to life. Here’s a step-by-step guide to help you turn your ideas into stunning photo manipulations:
Conceptualize Your Idea
Start by clearly defining your concept or idea. What story or message do you want to convey? What mood or emotion are you trying to evoke? Having a well-formed notion is the foundation of your manipulation.
Gather Inspiration
Collect visual references, mood boards, and images that inspire your concept. These can be photographs, illustrations, paintings, or other manipulated images that align with your vision.
Sketch Your Concept
Create rough sketches to visualize your concept. These sketches will help you plan your manipulation’s composition, elements, and overall flow. Even if you’re not an artist, simple drawings can be beneficial.
Select or Capture Images
Decide whether you’ll use existing photos or capture new ones. If you’re shooting your images, focus on lighting, perspective, and composition to ensure they match your concept. But if you want to existing photos, you can get those from the stock photo websites.
You have to find the right set of photos that you want to manipulate. You can get the photos from Envato Elements, Freepik, or Pexels. These websites offer free stock photos. So, you can use them for your project.
Plan Your Composition
Arrange the selected images to create a composition. Consider factors like balance, focal points, and the visual flow within the frame. If needed, perform essential image adjustments like cropping, straightening, and color correction. Thus, you can make them suitable for manipulation.
Remember, turning ideas into image manipulations often involves experimentation and creativity. Be open to new techniques, and don’t be discouraged by initial challenges. You can bring your ideas to life through photo manipulation with practice.
Quick Tips for Image Manipulation
Image manipulation is a never-ending process. It depends on what you want and what skills you have to execute the plan. In this article, you will get a practical example of photo manipulation. Yet, you must learn a few important things to execute the plan. Here are some quick tips to start the manipulation of your photos:
Select Right The Image Editing Program
Choosing the right image editing program is a critical step. You should choose the software on which you are good at editing. We will be using Adobe Photoshop for this tutorial. You can select GIMP, Photoshop, Illustrator, or other programs also.
Learn About the Tools
Photoshop offers several image editing tools. The experienced editors have solid skills with those tools. You should understand that the more mechanisms you know, the more creative photos you can generate. Here are some of the essential tools that you must know:
- Selection Tools
- The Brush/Eraser Tool
- Layer Masks
- Clipping Masks
- Layer Blend Modes
- Adjustment Layer
Work Non-Destructively
Use adjustment layers and layer masks to make changes. They allow image adjustments without permanently altering the original image. This allows for easy adjustments later on. Also, learn how to use selection tools like the lasso, pen tool, and magic wand for precise selections and cutouts.
Use Layer Blending Modes
Experimenting with blending modes allows the creation of various effects. Thus, you can enhance the interaction between layers. Match the lighting and shadows of added elements to the base image. This is the primary method of creating a convincing composite.
Create Realistic Shadows and Highlights
Realistic shadows and highlights can make a manipulation authentic. Use soft brushes and adjust opacity for a more natural look. Also, Zoom in and pay attention to details, like edges and transitions. So, you can make manipulation look seamless. Moreover, Photoshop and other software offer various filters and effects. Don’t hesitate to experiment with them to achieve unique results.
Photo Manipulation Using Photoshop: Practical
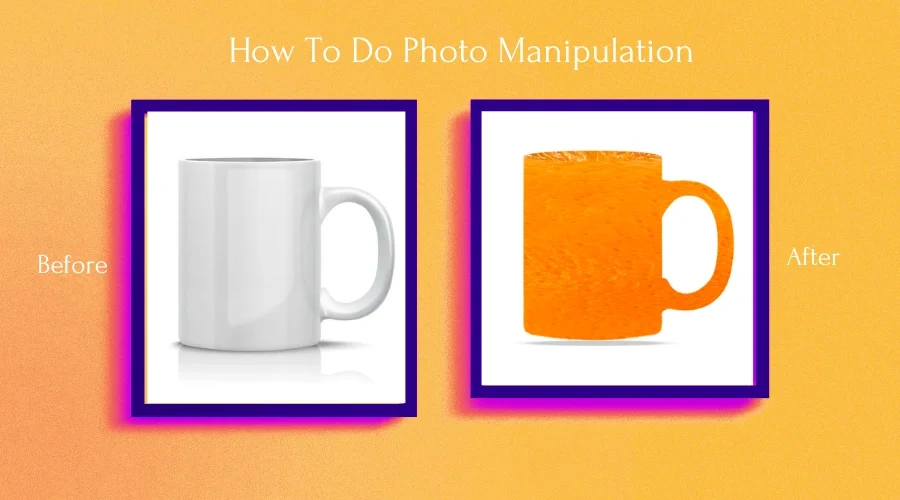
This is an example of image manipulation. Here, I will use a photo of the white cup, a photo of the orange, and another picture of the orange slice let’s start.
Step 1
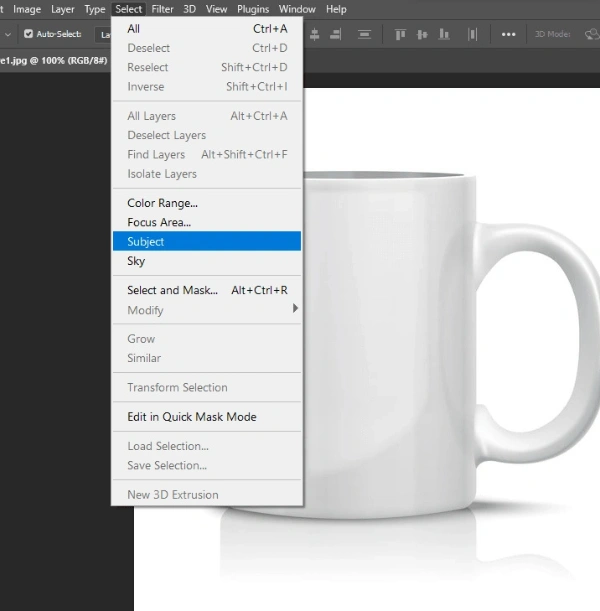

Launch Photoshop. Then, open the image of the cup. Select the subject. There are different ways of selecting the topic. The easy way is to use the “Select” tab from the top bar of Photoshop. Then click “subjcet”. The process may take a few seconds, but the cup will be selected perfectly.
You can also add or subtract the selection path. Click a selection from the toolbar. You will get an option to add or delete a selection on the top bar. Also, by holding the Shift key, you can add selection. By keeping the Alt key, you can delete the selection.
Step 2
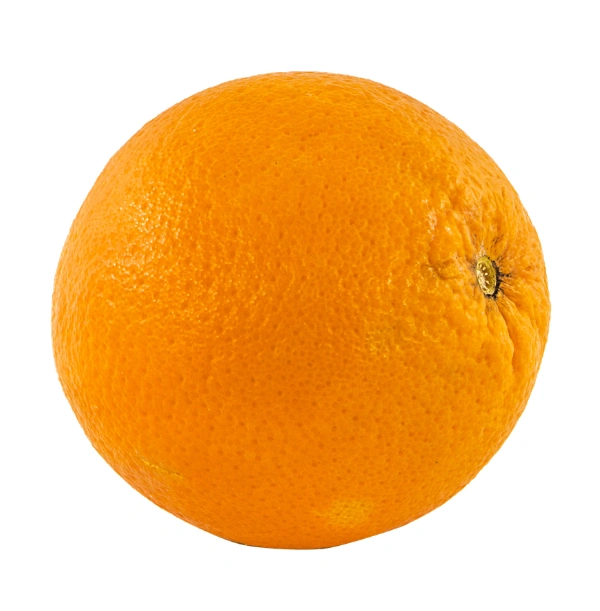
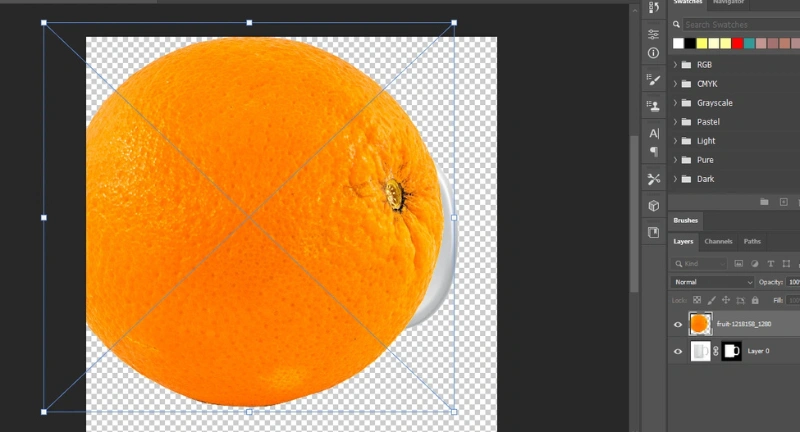
Import the following image. Simply drag and drop the idea. Then, change the layer name to Orange. Double-click on the Orange layer to make it a smart object. Take a new layer. Name it background. Click Solid Color from the adjustment layer icon.
Step 3
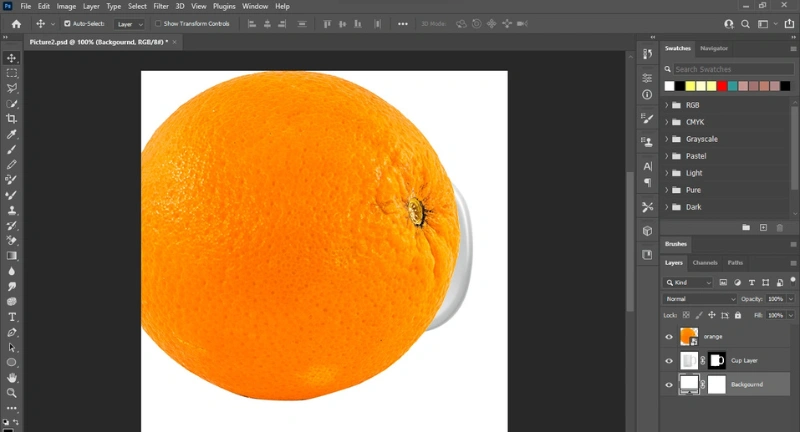
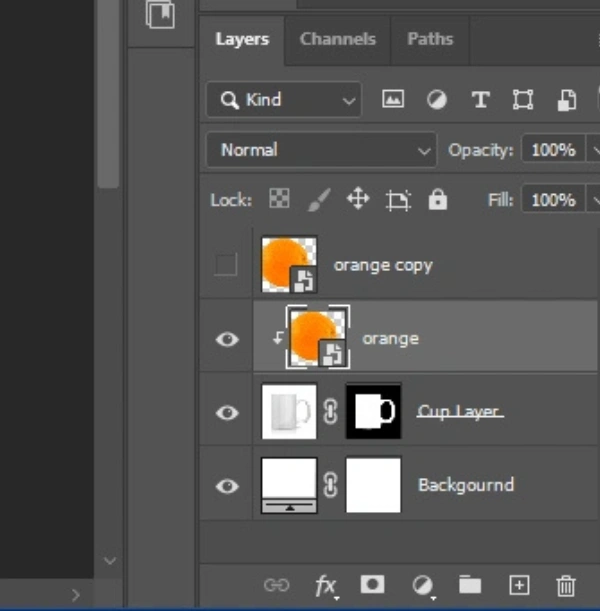
Choose white color as the background layer. Copy the orange layer by clicking. Ctrl+J and hide it.
Step 4
Clip the orange layer to the cup layer by holding the alt key and clicking on the cup layer as the arrow appears. Hold Ctrl and click T to transform the orange layer on the cup freely. Then, select the Wrap tool by clicking the mouse. Thus, you can perfectly place the orange on the cup.
Step 5
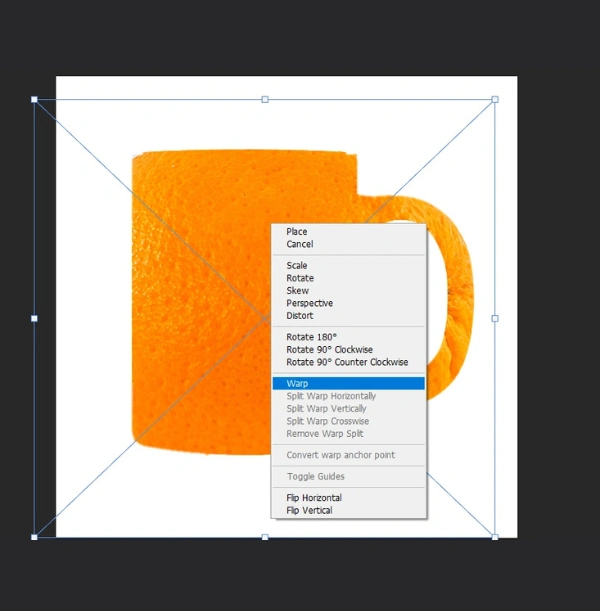
Hold the alt key while you are using the Transform tool. Then, drag the orange to create a copy of the layer. Add a mask to the new layer by clicking the Add mask icon. Use Ctrl+I to change the color of the mask to black. So, it will hide the new orange layer. Now, grab the brush tool from the tool panel. Make sure the foreground color is white while you use the brush tool.
Step 6
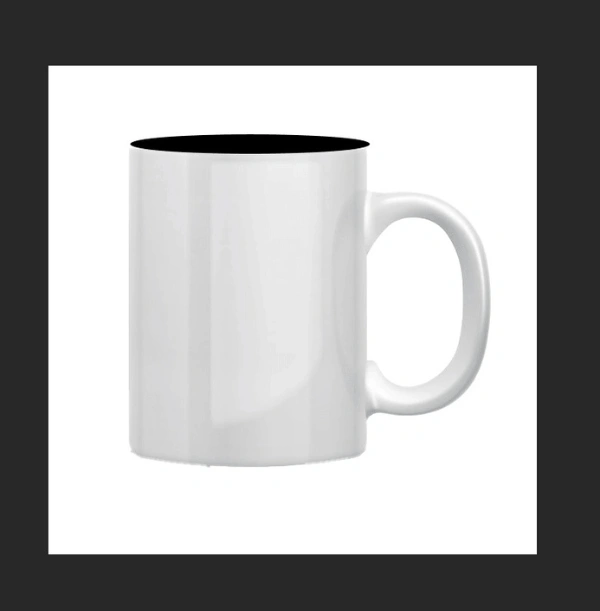
Hide the Orange layer. Take a new layer and name it Ellipse. Now, choose the ellipse tool from the tool panel. Draw an ellipse for the container part of the cup. Use the Transform tool to place the ellipse perfectly. Import the Orange slice image and name the layer Orange slice. Clip the orange slice layer to the ellipse layer by holding the Alt key.
Step 7
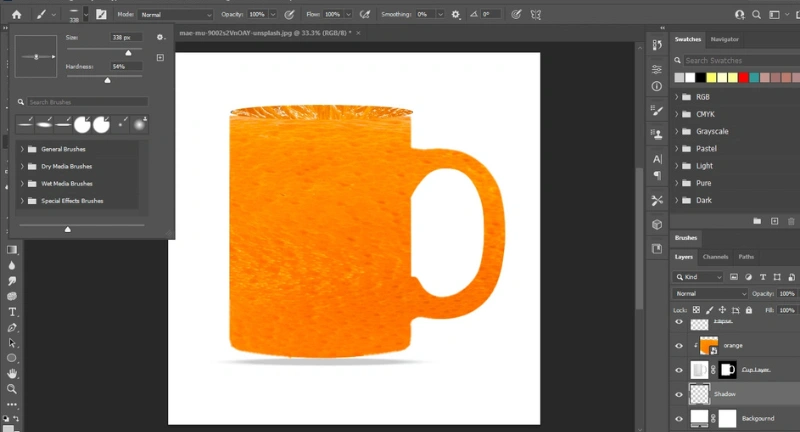
Now, let’s create a shadow. Take a new layer and name it Shadow. Take the brush tool. And shape it according to requirements.
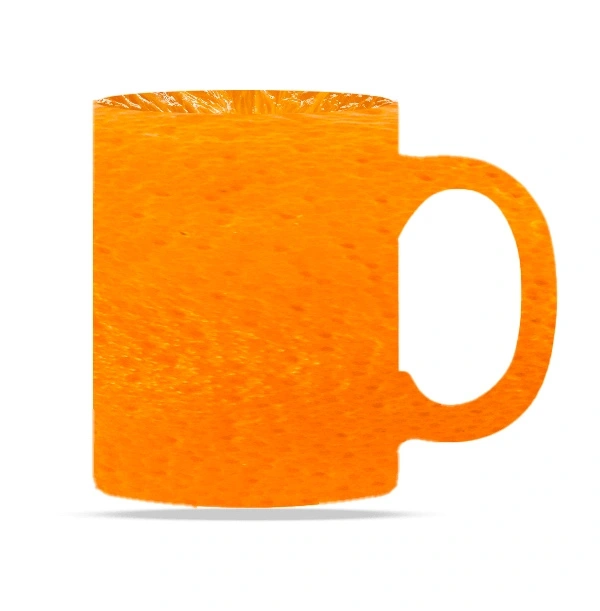
The Final Image
Final Thoughts
Photo manipulation takes practice, creativity, and patience. As a beginner, keep experimenting with different tools and techniques to improve your skills. With consistent practice, you’ll be able to create professional-quality edits. If you need high-quality results or want to save time, consider working with a professional image editing service like Graphics Cycle for expert photo manipulation.
FAQ
What Software is Commonly Used for Photo Manipulation?
Adobe Photoshop is the most widely useful software for photo manipulation. Other popular options include GIMP (GNU Image Manipulation Program), Adobe Lightroom, and Corel PaintShop Pro.
Is Photo Manipulation Ethical?
Photo manipulation can be ethical or unethical, depending on its purpose. It is ethical when used for artistic expression and creative purposes. However, manipulating photos to mislead viewers, such as in journalism or advertising, is considered unethical.
How Can I Improve My Photo Manipulation Skills?
To improve your photo manipulation skills, you can:
- Take online courses or tutorials.
- Practice regularly on personal projects.
- Study the work of experienced photo manipulators.
- Experiment with new techniques and tools.
- Seek feedback from peers or mentors.