




How to Make a Transparent Background (Easy Guide)
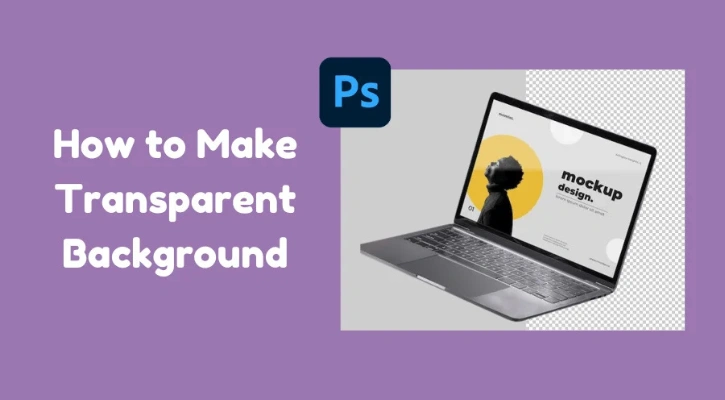
A transparent background removes everything behind your subject, leaving only the object or person visible. It is widely used for product photography, logos, graphics, and eCommerce images because it creates a clean, professional look and makes images easy to place on any background.
In Adobe Photoshop, you can create a transparent background using tools like Remove Background, Select Subject, or the Pen Tool, then save the image as a PNG or another format that supports transparency. This guide will walk you through the process step by step.
How to Make A Transparent Background in Photoshop?
Background removal is a go-to option for e-commerce photography. It allows the creation of effective marketing material. So, businesses can reach their customers with better representations. As a result, it increases sales. Here is how you can make a transparent background in Photoshop:.
Add A Background Image in Photoshop
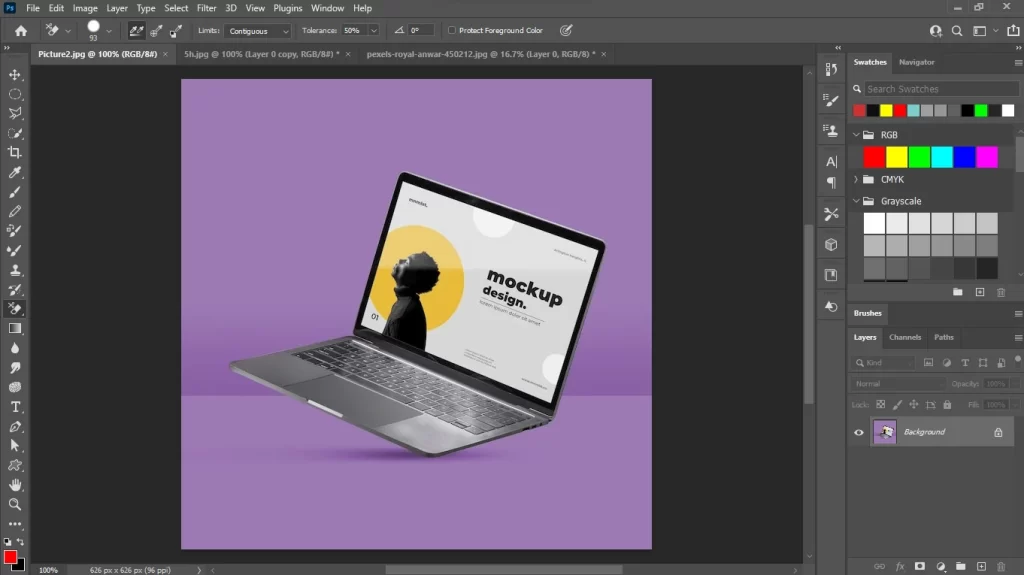
This is the first step of removing the background from an image. Launch Photoshop and then click on File to open the image. Thus, you can add background images in Photoshop.
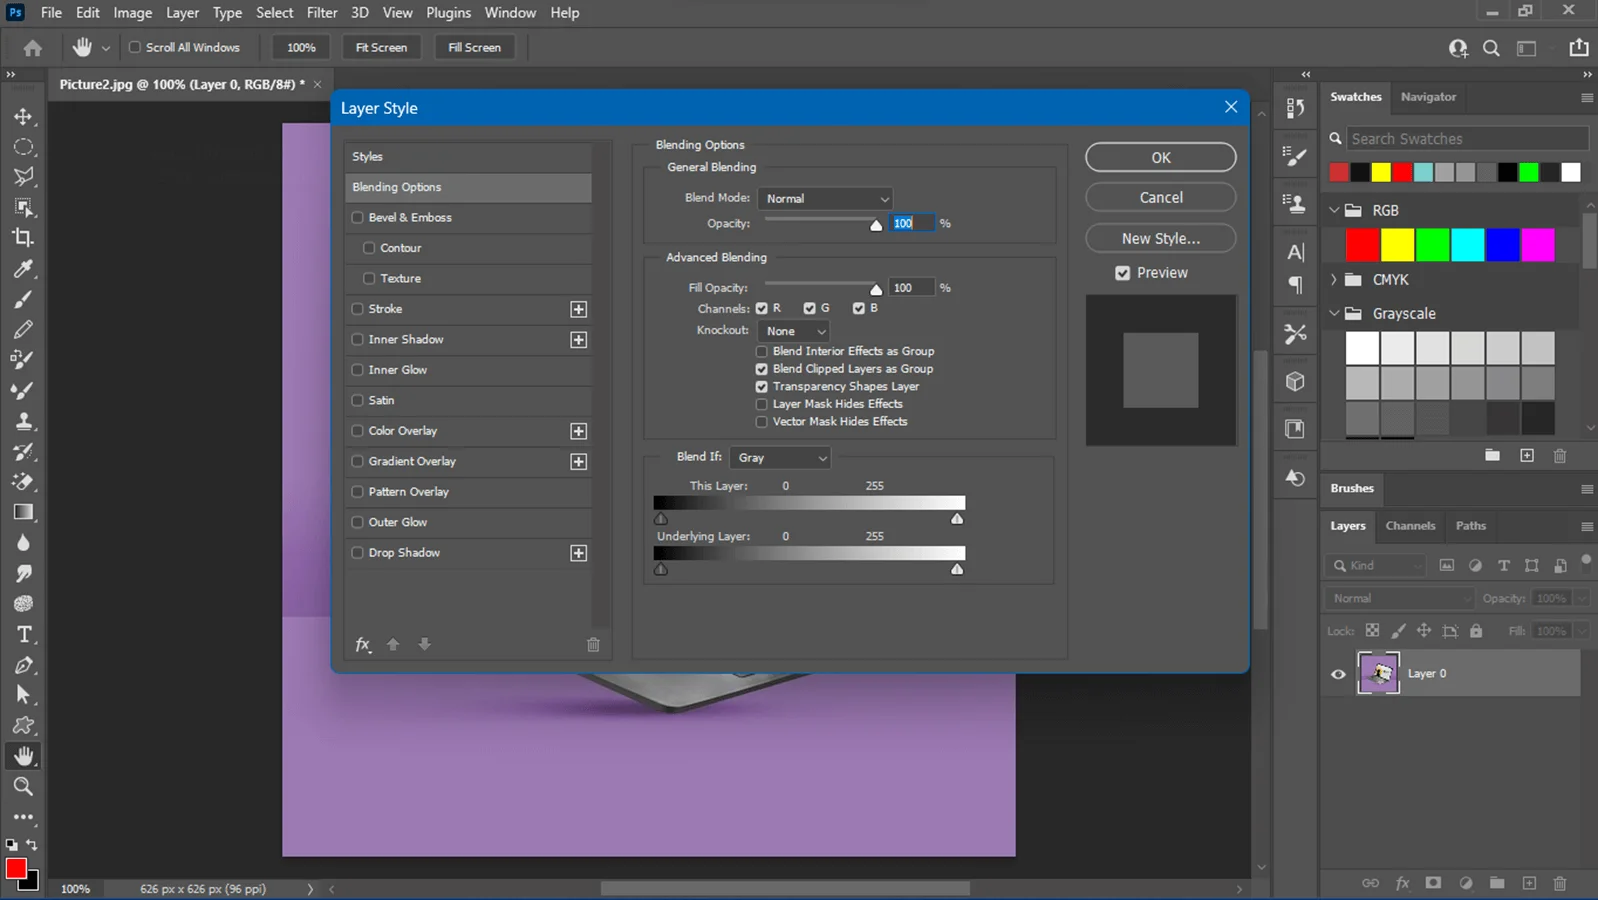
You will get the background image on a new layer in your Photoshop document. Using the Transform tool (ctrl+t for Windows), you can drag and drop the background image layer. You can also adjust the layer’s opacity using the Opacity slider in the Layers panel. Now we will start to replace the background.
Select The Subject Using A Selection Tool
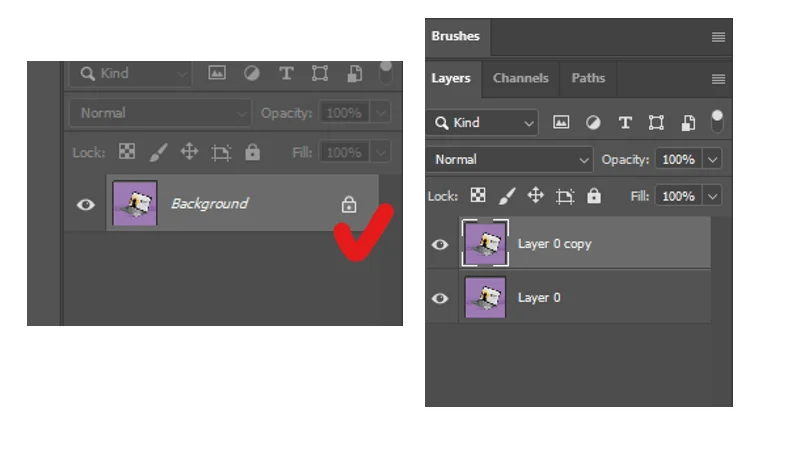
Now, you have to select the subject from the background layer. So, double-click on the lock icon of the background layer in the layers panel. Make a duplicate layer of the layers panel by pressing ctrl+j. So, your original image will remain unaffected.
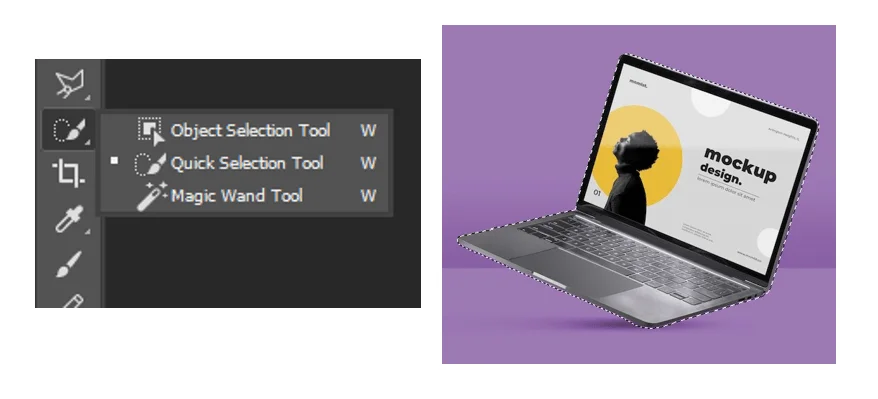
Select a Photoshop image selection tool from the toolbar. Here, you will find different image selection tools like the lasso, polygonal, quick selection, object selection, magic wand, and Photoshop pen tools.
The experts love to use pen tools to make a selection for a Photoshop transparent background. You will have complete control over the device, so you can select the object precisely using this tool. However, the Photoshop AI is so improved now. You will get a perfect selection using the other selection tools.
That’s why we will use the Object Selection Tool for this tutorial. Select the tool from the toolbar. Then, drag the rectangle box around the object. Photoshop AI will automatically select the background image.
Take The Selected Subject To A New Layer
You can directly copy it and place it on a new transparent layer. Also, press ctrl+j to take the subject to the new transparent layer. Here, you can fill a new layer with a suitable color to change the background. Or, leave the file as a transparent background.
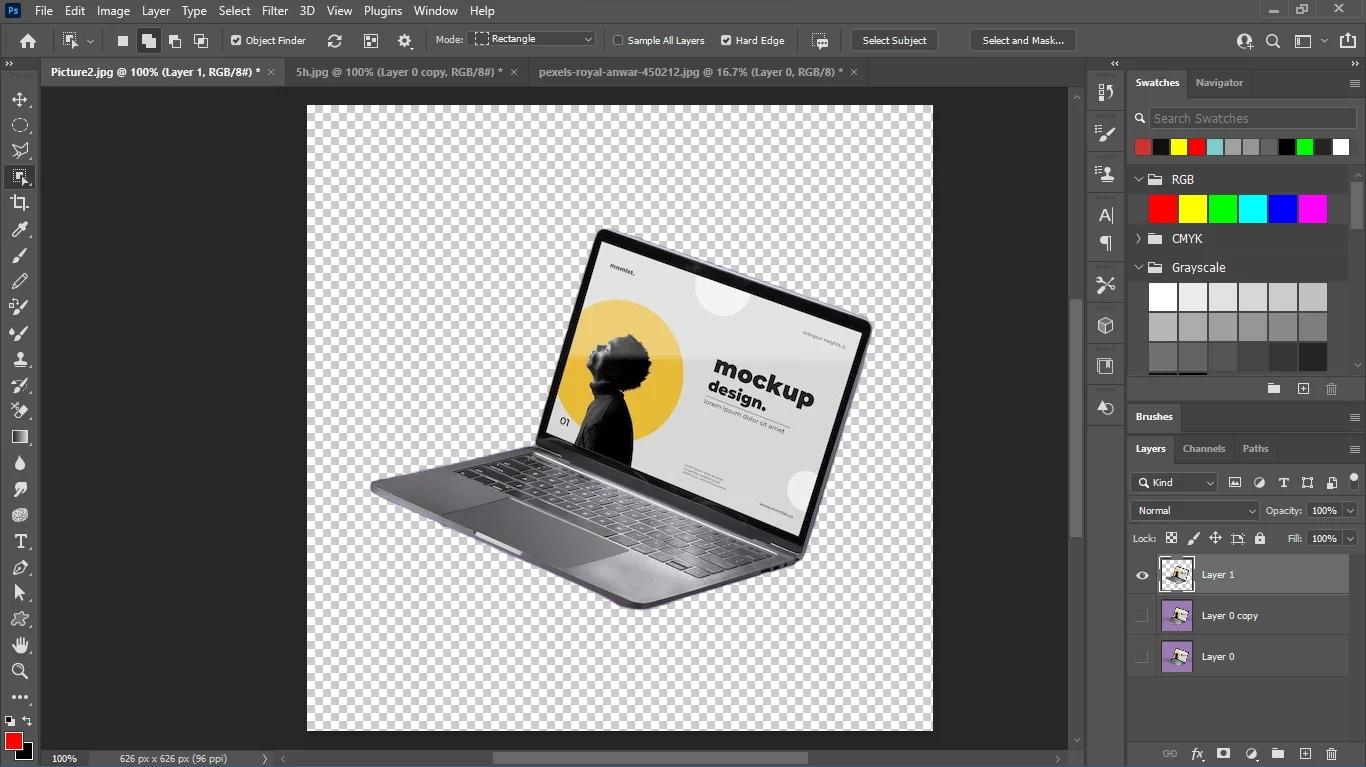
Save As A PNG Format File
Delete the background layer and navigate to File>Expeort> Quick Export as PNG. Thus, you can save the file as a transparent background.
Transparent Background Using Background Eraser in Photoshop
The background eraser of Photoshop is another amazing tool to create a transparent background. The process is simple and easy, but you need patience to achieve the result. Create a duplicate layer of the background layer so that it remains unaffected. You can find it in the toolbar on the left of the screen. Adjust the tool setting, such as the brush size, hardness, and opacity.
Start erasing the background by dragging the eraser tool over the image. Finally, refine the subject’s edges and export the file in the PNG format. Thus, you can use a background eraser for a Photoshop transparent background.

Transparent Background in Photoshop By Applying Clipping Path
This is the professional way to create a transparent background photo in Photoshop. Professional photo editors earn a lot of money by providing this service. However many of us think that creating a clipping path is a hard task and you need professional skills to create a perfect clipping path. But all you need is to practice the following steps. So, open your image in Photoshop, and let’s start.
Step 1: Convert The Background Image To A Layered File
If your image opens as a background layer (common with JPEGs), you’ll need to convert it. Right-click on the layers panel. Then choose “Convert to Layer” from the option.
Step 2: Create A Clipping Path
You can use different Photoshop tools to create a clipping path. However, professional editors use the pen tool. Now click on the “Window” button from the option bar in Photoshop and select “Navigator.”
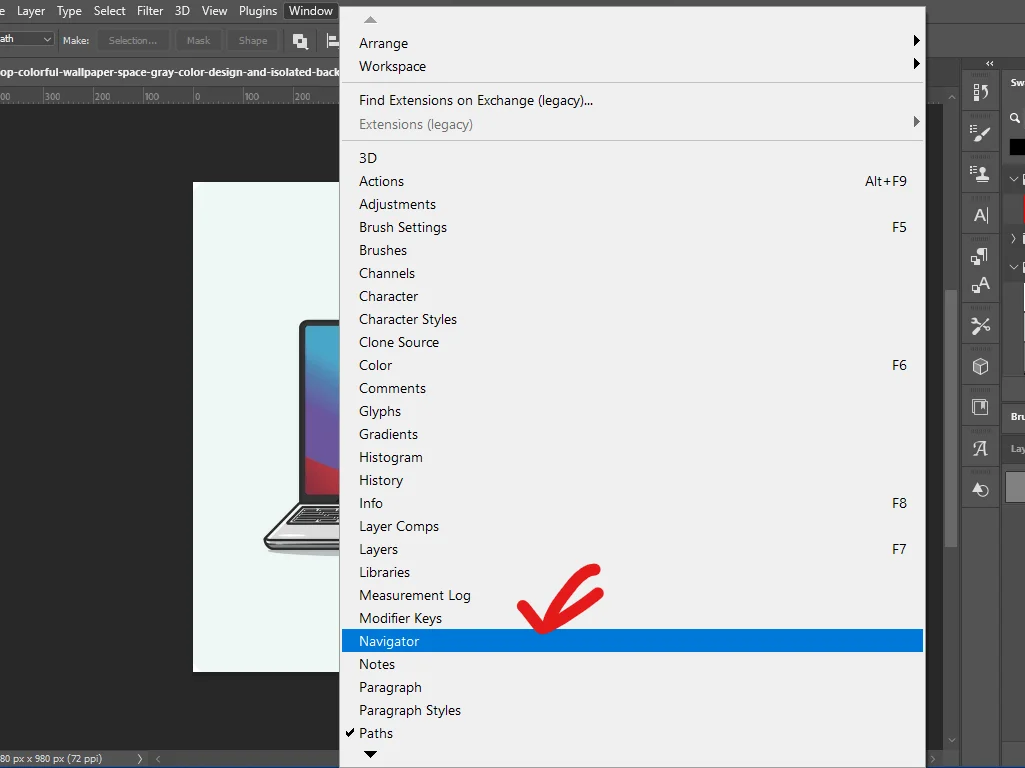
Zoom in 300% by holding the ctrl and “+” buttons on your keyboard. And to zoom out the photo hold ctrl and press “-” from the keyboard. You can confirm the zoom size from the navigator window. Now create a path layer by clicking on the add button (“+” sign).
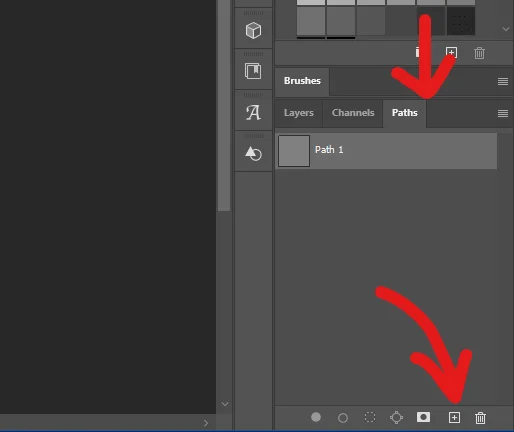
Click on the three dots of the path panel and select Clipping path. Click on the three dots of the path panel and select Clipping path. A new dialogue box will appear. Make sure the flatness box is blanked and hit OK.
After that, select the pen tool from the Photoshop toolbar. Before start drawing the path, make sure the “path” is selected from the pen tool optionbar. And make sure the “exclude overlapping shapes” is selected from the path operation option. Then check the “rubber band” from the “start additional path and path options”. Make sure the auto-add and delete options are checked.
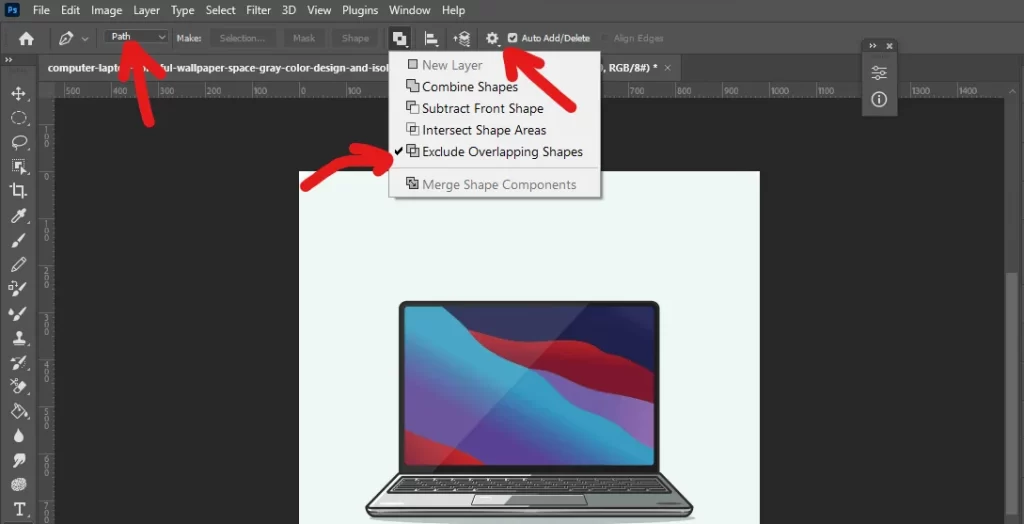
Click around the edges of the object you want to isolate, creating anchor points. Hold Shift while clicking to create straight lines. Patiently draw the path.
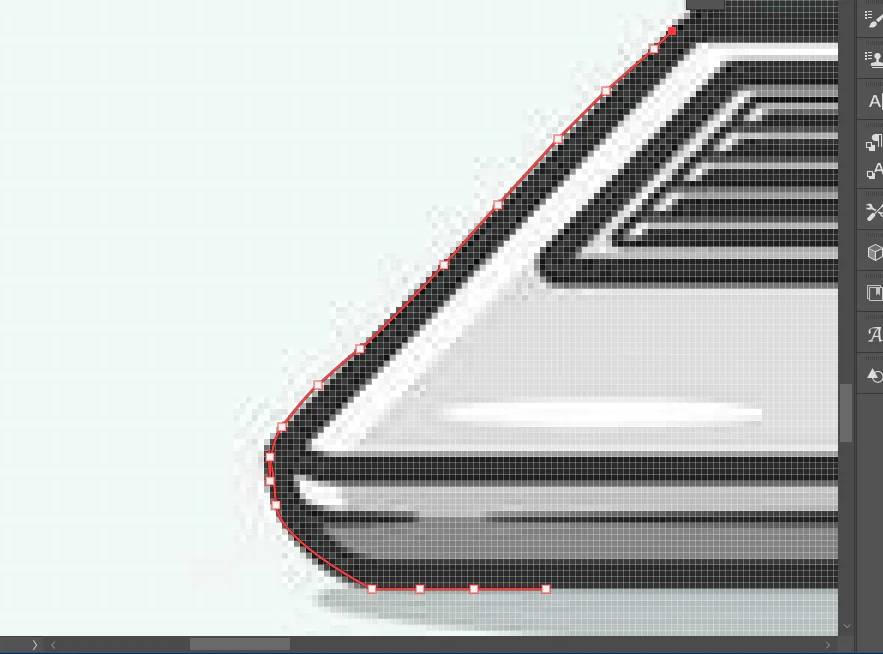
Once you’ve traced the object, click the topmost anchor point to form a closed path.
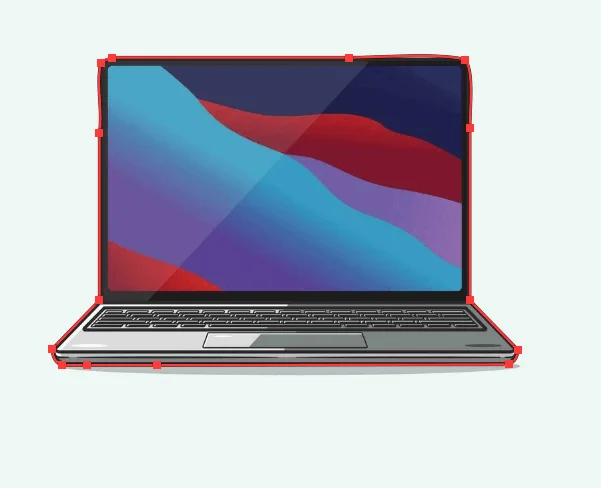
With the path active, right-click inside the path and choose “Make Selection.” Alternatively, press Ctrl+Enter (Windows) or Command+Enter (Mac). This creates a selection around the object based on your clipping path.
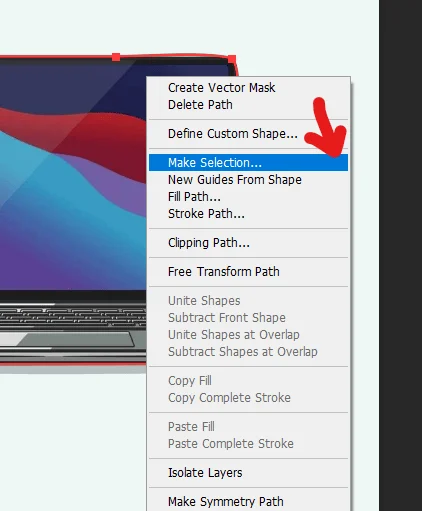
You can change the feather radius. We have chosen 0.5 for this image.
Step 3: Add a Layer Mask
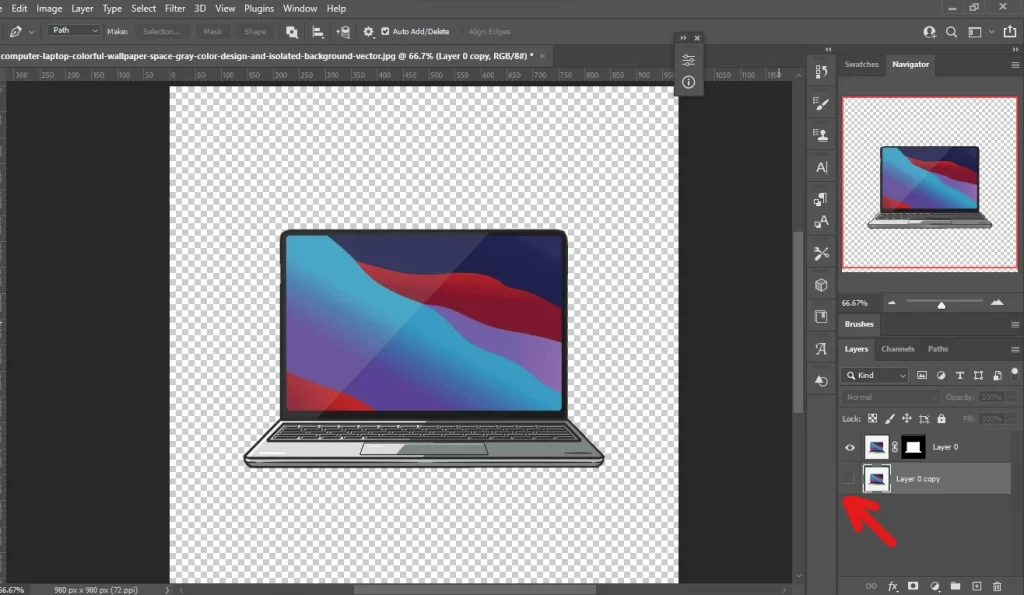
After that make a duplicate layer of Layer 0. In the Layers panel, click the “Add Layer Mask” button (rectangle with a minus sign). Then delete the original layer. If you want to keep it then off the layer eye. Thus your transparent background photo is created using the Photoshop clipping path.
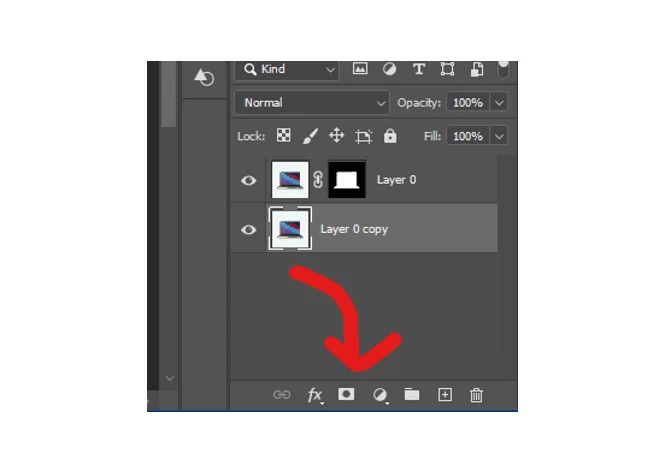
However, it may seem so time-consuming for a single image. But you will get professional-level photos with this method. Meanwhile, you can automate the process for batch photo editing. It saves time and allows you to edit a large number of photos with a few clicks.
How to Make A Transparent Background in Paint?
You can also use MS Paint to make the background transparent. Here is how to make a transparent background in paint.
Step 1: Open the image in Paint by navigating File>Open
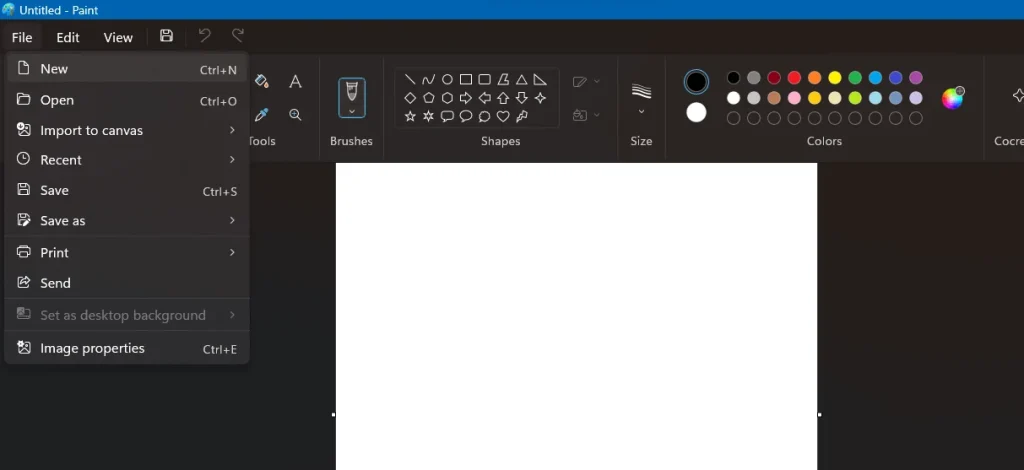
Step 2: Now click the Selection on the left corner of the bar. Then, from the drop-down menu, select Transform Selection.
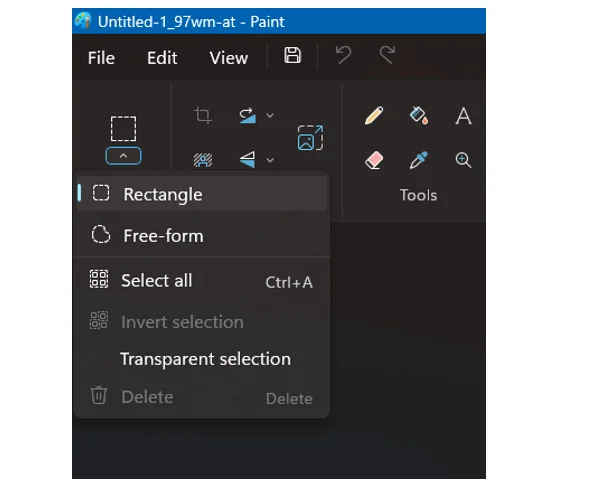
Step 3: Again, click on Selection. This time, select free-form. Now trace around the area you want to preserve.
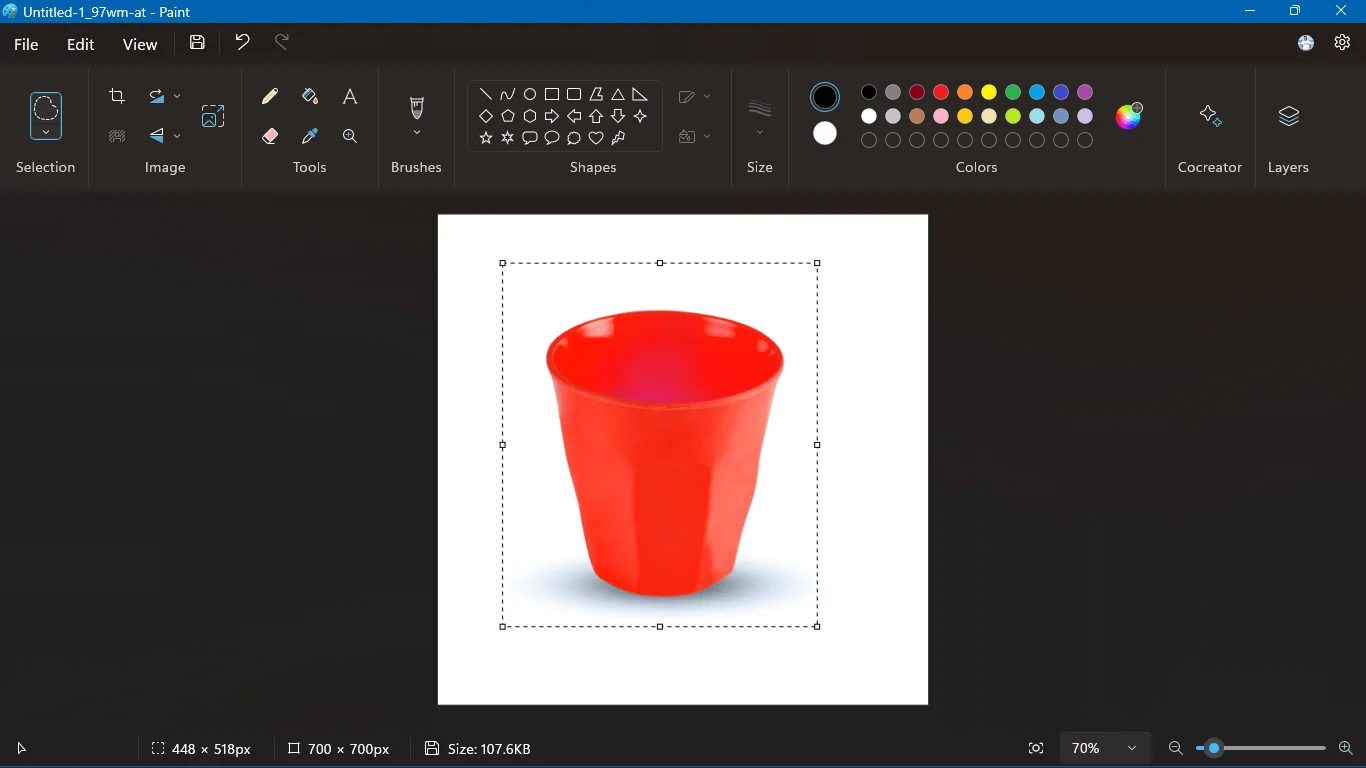
Step 4: Right-click on the rectangle area and cut the selected portion.
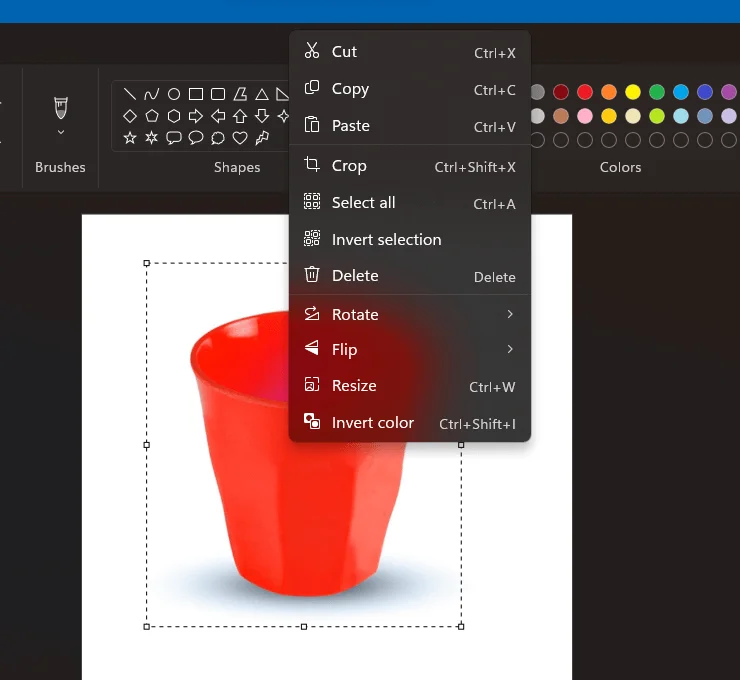
Step 5: Open a new page or image in Paint. Paste the cutout portion. Then, save the new image as a PNG in paint.
Why Do You Need to Create A Transparent Background Photo?
A transparent background photo offers several advantages. That’s why the demand for this service is so high. Even professional photos have the most clients on the background removal services.
- Increased Focus on the Subject: This is one of the main reasons for removing the background of an image. Thus you can have the most focus on your main subject.
- Versatility in Design: A transparent background allows you to place the image on any colored background. This flexibility allows you to manipulate the images and create mockups, website designs, or collages.
- Professional Look: Transparent background photos help you to bring a professional look to the raw photos. Clean, transparent backgrounds give a professional and polished feel to your designs.
- File Size Benefits: Transparent backgrounds can sometimes lead to smaller file sizes compared to images with solid backgrounds. This can be advantageous for web applications where fast loading times are important.
Best Free Apps To Remove The Background for iOS & Android
There are several programs available for background removal. You can use them for IOS and Android mobiles. Here are the top 3 apps that provide amazing background removal features.
Picsart

Picsart is one of the most popular free photo editing apps for Android and iOS. It offers both automatic and manual background removal tools, making it easy to create transparent backgrounds with just a few taps. Besides removing backgrounds, Picsart lets you replace them with solid colors or custom images. It also includes powerful photo and video editing features, making it a great all-in-one app for content creators and beginners.
PhotoLayers
The PhotoLayers is an easy-to-use software for a beginner. However, the accuracy can be a question for complex photos. Still, you will get almost precisely cutout pieces. This program also helps the professionals to unleash their creativity. By manipulating several transparent background photos, you can create exclusive designs. So, PhotoLayers provides an instant background removal feature with exclusive image editing tools.
PixCut
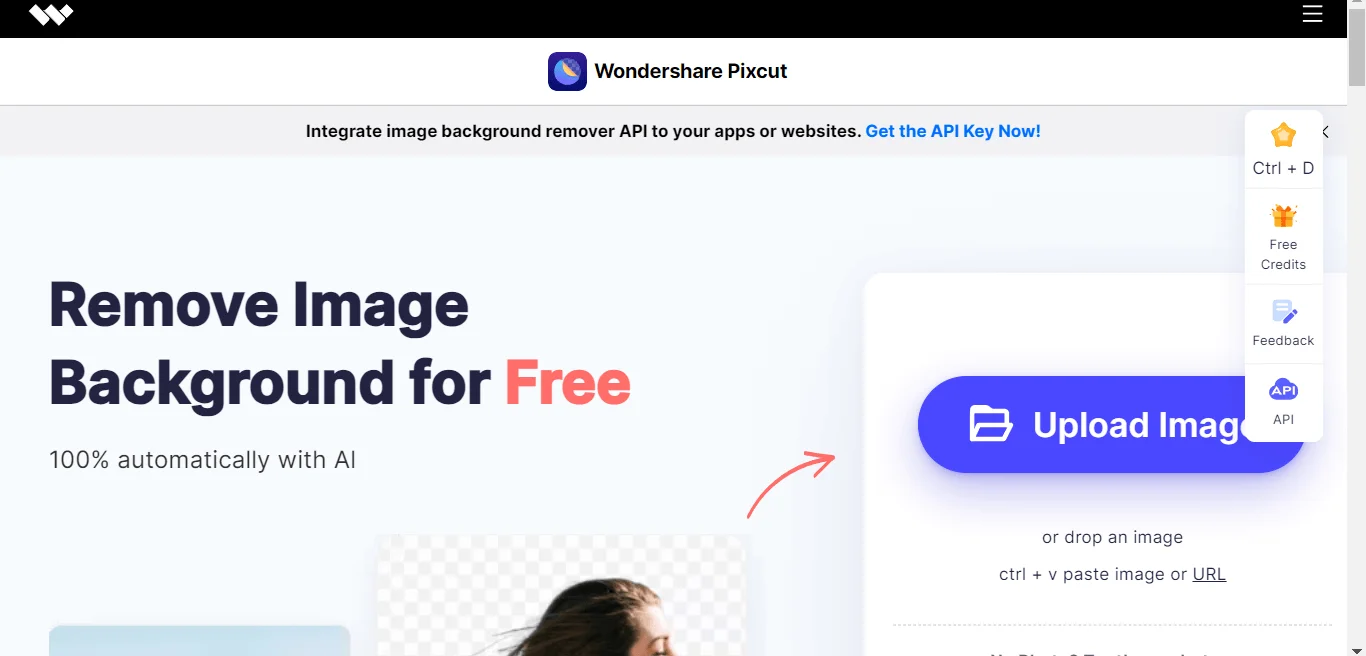
PixCut is a fast and beginner-friendly background remover available for Android, iOS, and desktop. Its AI-powered tool can remove backgrounds in seconds, even from complex images. In addition to background removal, PixCut supports bulk image processing, watermark removal, and other basic editing features, making it a convenient choice for both personal and business use.
RemoveBg

RemoveBg is my favorite program to remove the background from photos. You can use it online and remove the background with a few taps. You will get the transparent background photos in the PNG file format. So, the images will take up almost no space on your device. However, iOS users cannot download remove.bg on mobile devices. They can still use the website version.
FAQ | How To Make A Transparent Background
How To Do Color Correction in Photoshop?
There are different ways to adjust colors in Photoshop. You can change the white balance, exposure, contrast, etc. Also, you can use Photoshop curves to make quick adjustments. However, image masking is the best way for professional color correction.
How To Add A New Background in Photoshop?
Open your transparent background photo in Photoshop. Then open the background image. Then position the transparent background photo on that new background.
Final Thoughts | Transparent Background in Photoshop
A transparent background photo is a must. But you should know the tools well enough to create a transparent background. This article encompasses the easiest process to get rid of the messy background. You can use Photoshop for professional photos. However, you need a lot of practice to get the perfect photo.
Moreover, you can use the MS Paint and other image editing tools. These tools allow you to remove the background with a few clicks. So, use the tool that fits your requirements best. You can also hire an expert photo editor like Clipping World. They are experienced and have done plenty of successful projects.