




How to Use Liquify Photoshop Filter Tool
The Liquify Filter is one of Photoshop’s most powerful photo editing tools. It lets you reshape, retouch, and adjust parts of an image by pushing, pulling, expanding, or shrinking pixels. Photographers and designers often use it for portrait retouching, body reshaping, and creative photo manipulation.
In this step-by-step guide, you’ll learn how to use the Liquify Filter in Photoshop, understand its essential tools, and apply them with practical examples to create professional-quality edits.
Liquify Photoshop Tool
| Tool | Shortcut | Use |
|---|---|---|
| Forward Warp | W | Push or pull pixels. |
| Reconstruct | R | Restore edited areas. |
| Smooth | E | Smooth rough edges. |
| Twirl Clockwise | C | Rotate pixels clockwise. |
| Pucker | S | Pull pixels inward. |
| Bloat | B | Expand pixels outward. |
| Push Left | O | Push pixels left or right. |
| Freeze Mask | F | Protect selected areas. |
| Thaw Mask | D | Unfreeze protected areas. |
| Face Tool | A | Adjust facial features. |
| Hand | H | Move around the image. |
| Zoom | Z | Zoom in or out. |
What is a Liquified Filter?
The liquify Photoshop filter is a powerful feather of Photoshop. With the liquify filter you can push, pull, rotate, reflect, pucker, and bloat any area of an image. The distortions can be subtle or drastic which you will create.
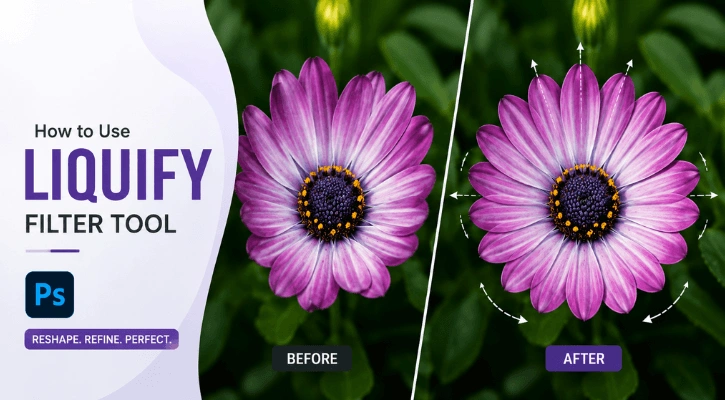
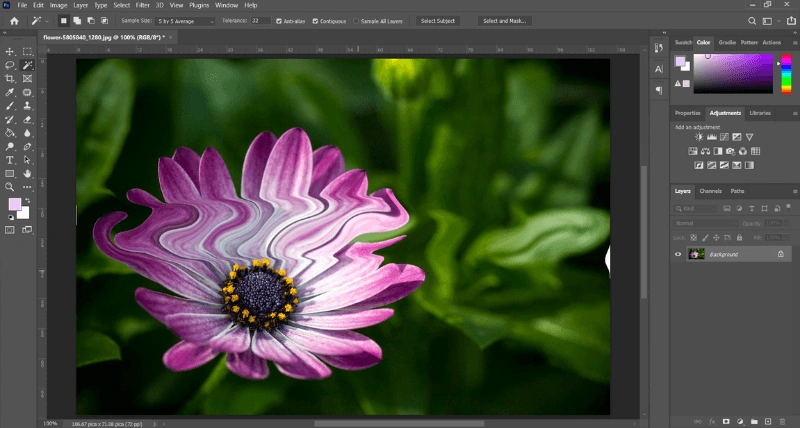
The liquified Photoshop filter in Photoshop is very useful for the artistic effects on the background or the creation of artistic design. A bust use of Photoshop liquify filter brush is demonstrated in the photos above.
You will find the ‘Liquify Photoshop filter’ in the Main menu, go to ‘Filter’ and click on ‘Liquify’ A new window will open with the ‘Liquify brushes’ and options. The liquify Photoshop filter can be applied to 8 bits per channel or 16 bits per channel images.
Magnify and Navigate in the Preview Image
The new window will open with a preview photo panel, which will show a live demonstration of your editing. After opening the preview window, the first thing you should do is magnify your images and navigate. Adjusting the photo subject to fit the preview window will help you to perfectly apply the Photoshop liquify filter.
Magnify
To magnify select the zoom tool in the Liquify dialog box, and click on the preview image to zoom in. You can also hold down ‘Alt’ (Windows) or Option (Mac), and click or drag in the preview image to zoom In/Out. Also, you can specify a magnification level in the Zoom text box at the bottom of the dialog box.
Navigate
To navigate the photo select the hand tool in the Liquify dialog box, and drag in the preview image. Alternatively, hold down the spacebar with any tool selected, and drag in the preview image.
Liquify Photoshop Distortion Tools
‘Adobe Photoshop’ adds various tools and brushes to the toolbar of the liquify filter in Photoshop. You can perfectly edit your photo with these brushes. For giving a perfect look to the subject face, or making an artistic design Photoshop liquify filter’ brushes are used randomly.
Forward Wrap Tool (W)
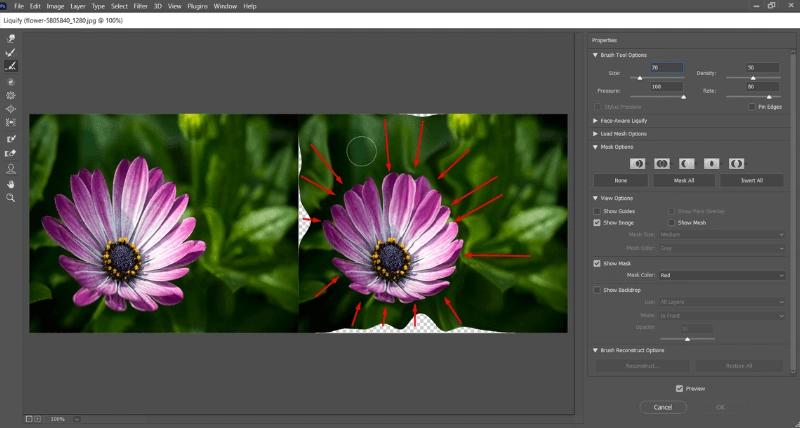
This Brush of liquify filter in Photoshop is used to push pixels forward. Select the Forward warp tool from the Tool dialog box at the left side of the Liquify Photoshop filter window. To destroy the texture of the pixels in a photo or pull, push, and drag the pixels of the photos. You can select this brush from the toolbar or also can select this brush by hotkey. Simply press the ‘W’ key on your keyboard and drag it to the desired areas.
Reconstruct Tool (R)
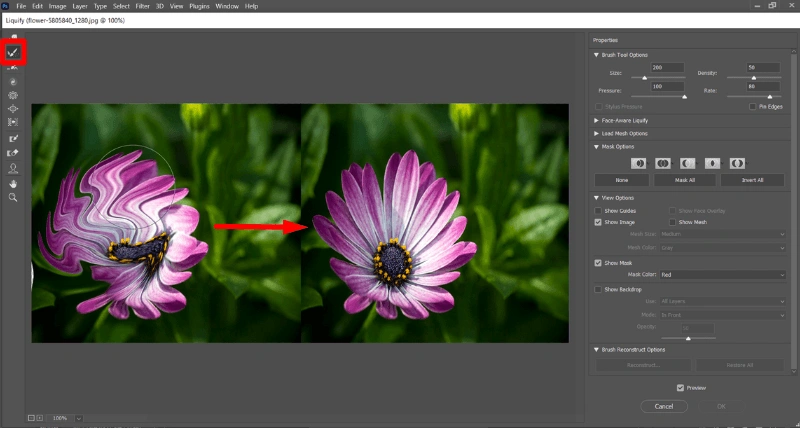
The Reconstruct Tool of ‘liquify photoshop filter’ is used to reverse the distortion that has already been added to the photos. Select the reconstruct tool hold down the mouse button and drag to reconstruct the pixels that were distorted. You can also select the Reconstruct tool by pressing the ‘R’ key on your keyboard.
Smooth Tool (E)
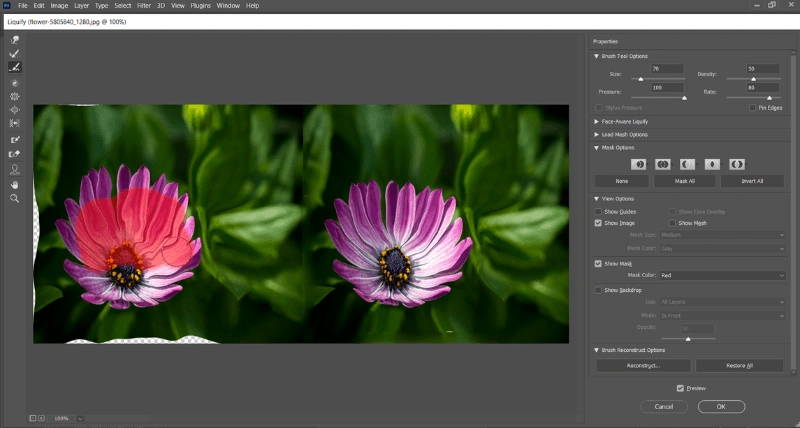
The ‘liquify photoshop filter’s Smooth tool’ is for Soomth the texture of the pixels. You can use this ‘liquify Photoshop filter in Photoshop to smooth tool to remove any rough area like blemishes on the skin. Sometimes this tool does to give good results for the original photos. You will find an effective result when you use this tool in an area where you used another brush or filter before the use of this tool.
Twirl Clockwise Tool (C)
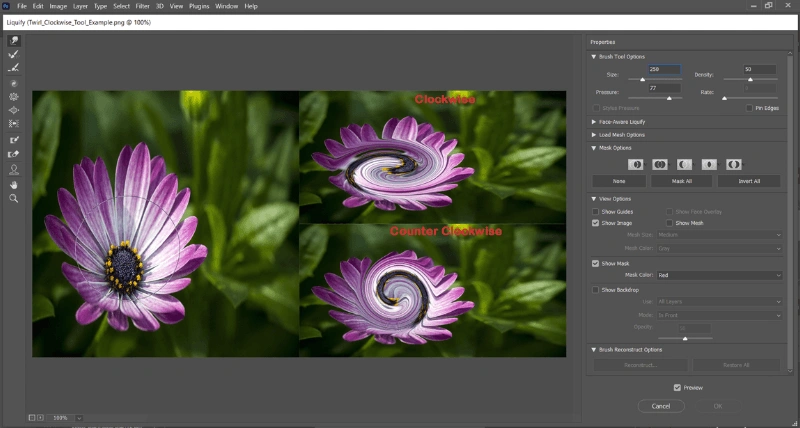
At the beginning of the article photos of roses are shown are distorted by using the Twirl clockwise tools. You should see various like these photos on the internet. These edits are done by using this ‘Lisuify filter’ brush. You also can make various artistic designs by using this liquified filter brush.
To twirl pixels clockwise adjust the size of the Twirl Clockwise tool brush then click and hold or drag. You can also twirl pixels counterclockwise by holding down ‘Alt’ (window) or ‘Option’ (Mac OS) by holding down the mouse button or dragging. The hotkey for selecting the ‘Twirl Clockwise Tool’ is ‘C’ on the keyboard.
Pucker Tool (S)
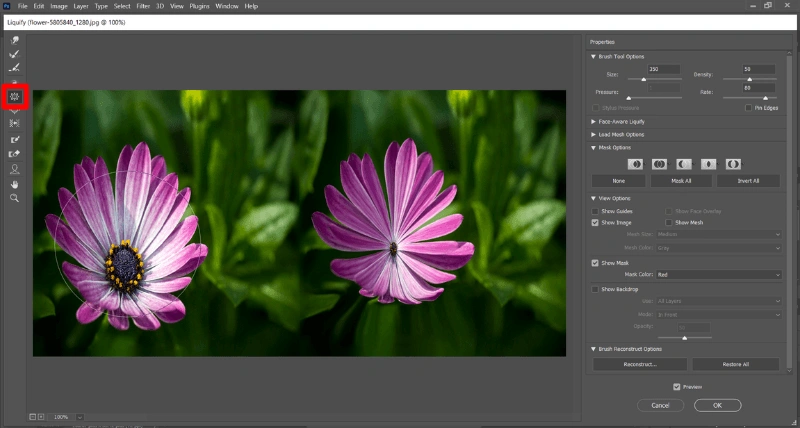
The ‘Pucker Tool’ is one of the most used tools of the liquify Photoshop filter in Photoshop. You can change one’s fat body to a slim one. The Liquify Filter Pucker Tool moves pixels toward the center of the brush area as you hold down the mouse button or drag. The hotkey for the Pucker Tool is ‘S’ on your keyboard.
Bloat Tool (B)
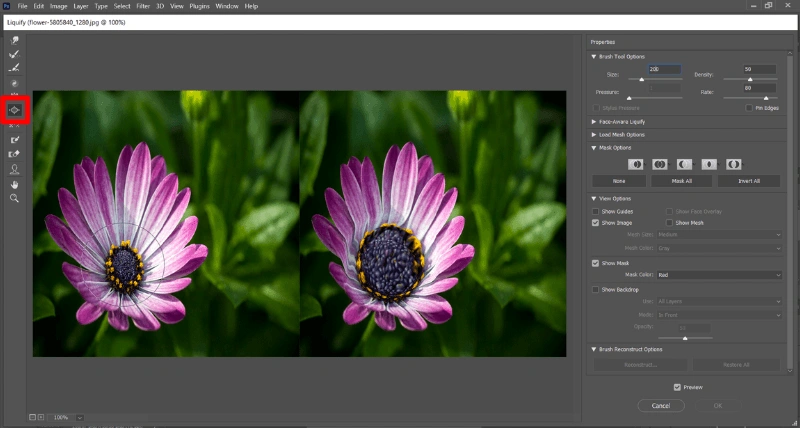
If you know the ‘liquify photoshop filter Pucker Tool’ Then this Bloat Tool will be easier to use for you. The ‘Bloat Tool’ works just like the opposite of the ‘Pucker Tool’. The ‘liquify Photoshop filter Bloat Tool’ moves pixels away from the center of the brush area when you hold down the mouse button or drag. You can also select the ‘Bloat Tool’ by pressing the ‘B’ key on your keyboard.
Push Left Tool (O)
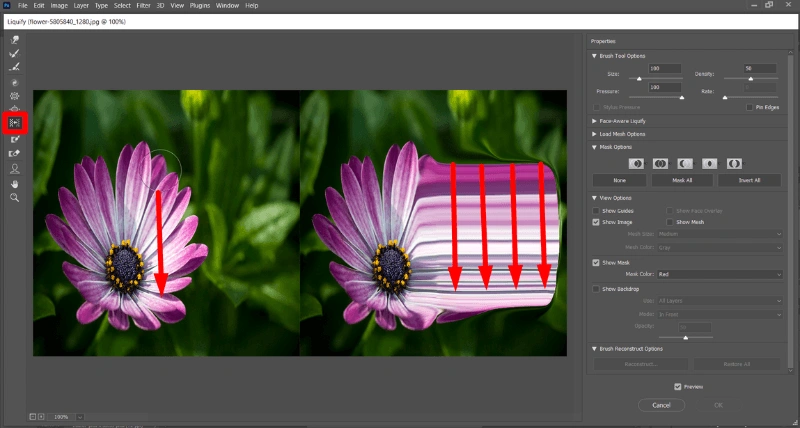
The use of this Liquify filter brush is implied by its name. The ‘Push Left Tool’ moves pixels to the left when you hold down the mouse button and drag the tool straight up. You can also use this tool to move the pixels to the right by dragging the tool straight down. You can also drag clockwise or counterclockwise to increase or decrease an object’s size. The Hotkey of the ‘liquify photoshop filter Push Left Tool’ is the ‘O’ key on your keyboard.
Hand Tool (H)
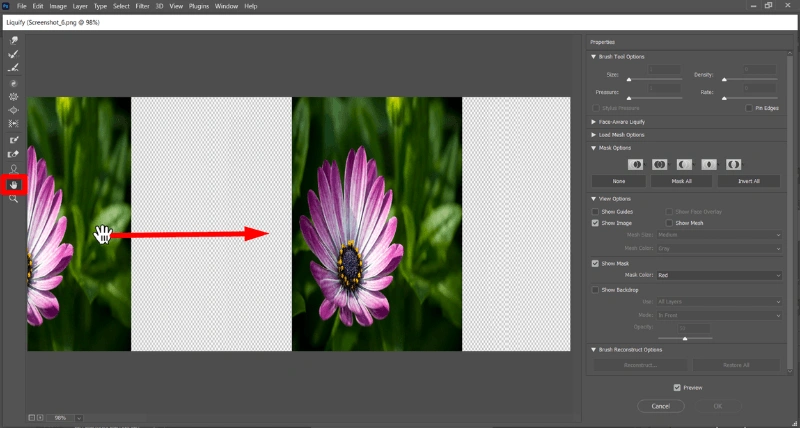
As we discussed earlier the ‘Hand Tool’ is used to adjust the position of photos on the review panel. You can hold the image and move in any direction to view the desired area of the photos in the preview section. Select this tool from the ‘liquify photoshop filter’ window toolbar.
You can also use the ‘liquify photoshop filter Hand Tool’ at any time no matter which Tool or brush is selected at the ‘liquify photoshop filter’ window toolbar. To use the ‘liquify photoshop filter hand tool’ at any time press and hold the spacebar on your keyboard. Or you can select the ‘Hand Tool’ by pressing the ‘H’ key on your keyboard.
Zoom Tool (Z)
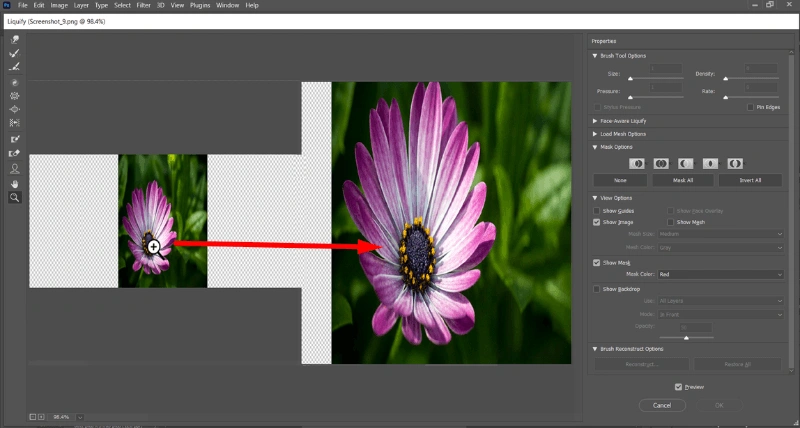
The Zoom Tool is used to zoom in and out on a photo. The ‘Zoom Tool’ is positioned at the bottom of the ‘liquify Photoshop filter toolbar’. You can also select the ‘Zoom Tool’ by pressing the ‘Z’ key on your keyboard. To zoom in on the preview photo on the ‘Liquify Filter’ Window select the zoom tool and click on the area you want to zoom in.
Using Liquify Freeze Mask Tool And Thaw Mask Tool
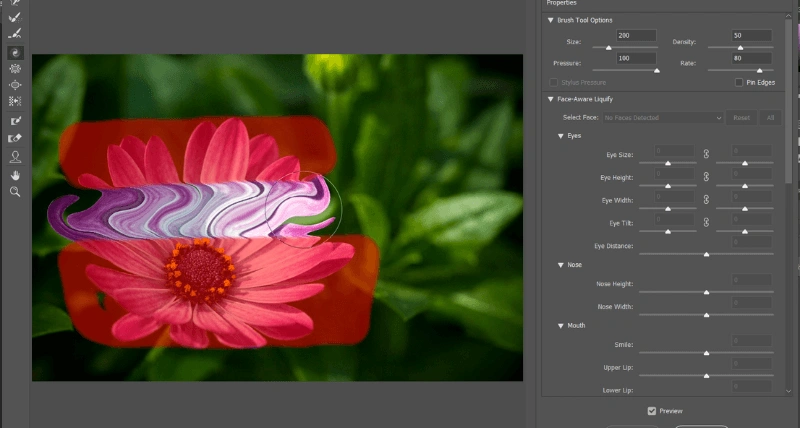
You can freeze areas that don’t want to modify with the ‘liquify photoshop filter Freese mask Tool’. And the ‘thaw frozen tool’ thaw frozen area to make them editable again. As the ‘Pucker Tool’ and ‘Bloat Tool’, the ‘Freese mask Tool’ and the ‘Thaw mask Tool’ are opposite of each other.
Freezing Areas
The Freeze Mask Tool (F) lets you protect specific parts of an image while applying the Liquify Filter. Paint over the area you want to preserve, and it will remain unchanged during editing. Press F to quickly select the tool.
As you paint, Photoshop displays a colored overlay to indicate the frozen area. This overlay is only a guide and won’t appear in the final image. Hold Shift while dragging to create a straight mask between two points. You can also use the Mask Options to freeze, invert, or manage masked areas using existing selections, masks, or transparency.
Thaw Areas
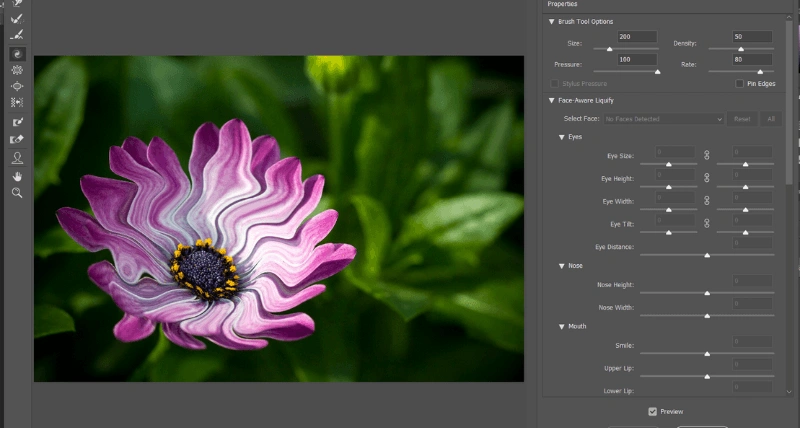
Use the Thaw Mask Tool (D) to remove protection from previously frozen areas. Simply paint over the frozen region to make it editable again, or hold Shift while dragging to thaw in a straight line. To remove all frozen areas at once, click None in the Mask Options panel. To reverse the frozen and editable areas, click Invert All.
Liquify Face With The Face Tool
The ‘liquify Photoshop filter Face Tool’ was introduced in the ‘Adobe Photoshop’ CC2015.5 release. The Liquify Photoshop filter features advanced face-aware functionality that automatically identifies faces. ‘Adobe Photoshop’ makes its Face Tool very advanced and user-friendly. It can recognize Eyes, noses, mouths, and other facial features. Which makes it easy for you to adjust them.
The liquify Photoshop filter’s ‘Face Tool’ is great for retouching portrait photos. You can use Face-Aware Liquify as a smart filter for non-destructive editing. Now we are focusing on applying different “Face Tool” settings in a photo.
Eye Settings
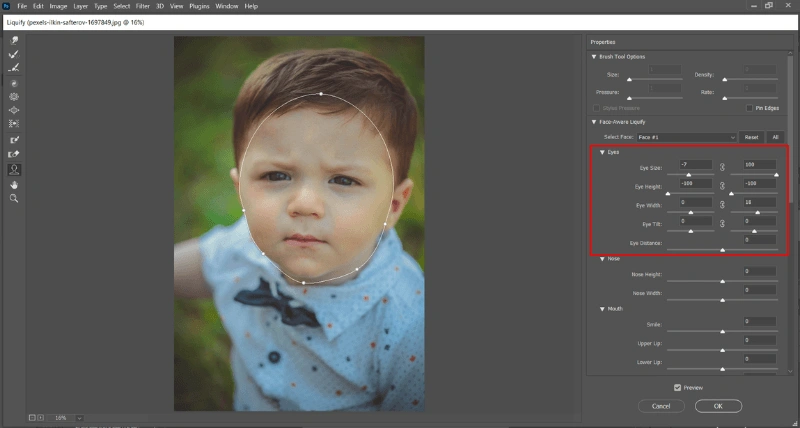
The ‘Adove Photoshop’ will provide individual slider options for each eye. You can edit eyes one by one on the ‘Eyes’ editing plane on the new Liquid y Photoshop window. Move the slider options for the left and right eyes to apply independent/asymmetrical effects to the eyes.
The preview panel will show the editing result live. If you are satisfied with the result then you can edit other parts you want to edit. You can also edit both eyes together. Click the link icon present in the middle of the sliders. This option will help to apply symmetrical effects to the eyes.
Nose Settings
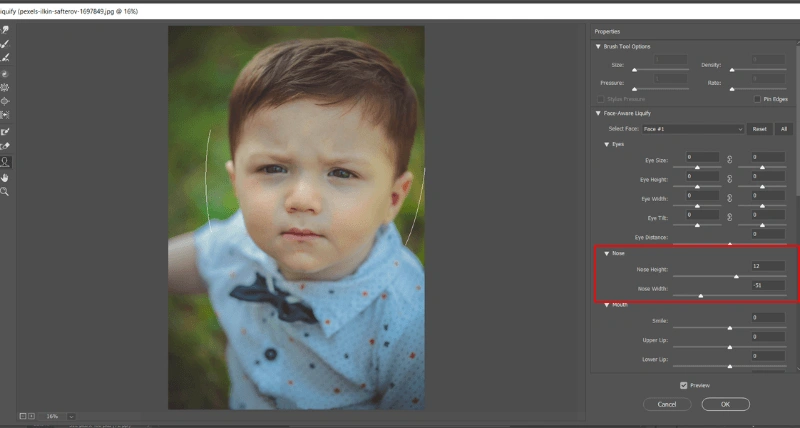
Edit nose height and width with the Liquify Photoshop tool. You can edit the nose on the live preview panel or use sliders to increase or decrease the nose height and width.
Mouth Settings
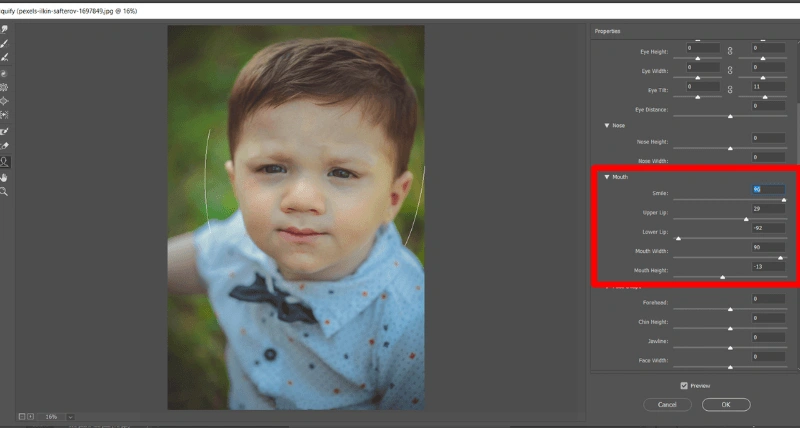
Now you can make smiling someone even in the photos too. The Adobe Photoshop AI works stunningly on the Liquify Photoshop Face tools. Making a sad face into a happy face is easy with Photoshop Liquify tools. You can also change the size of the lips and mouth in a liquified Photoshop window.
Face Shape Settings
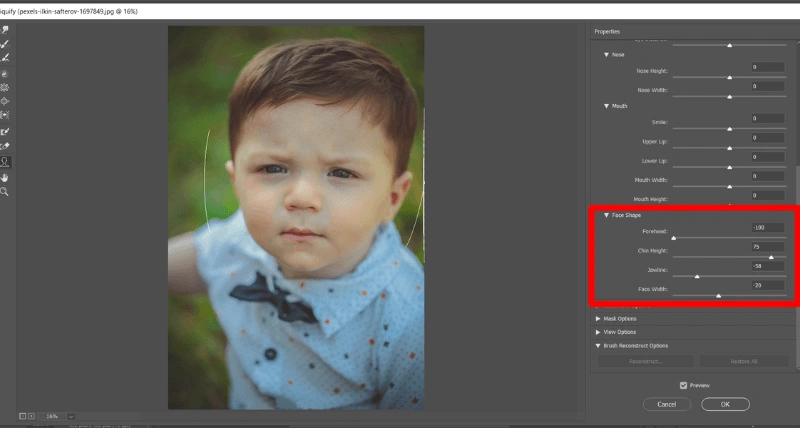
Change the face shape at the ‘Face Shape‘ panel in the Liquify Photoshop window. You can change Chin height, Jawline, face width, and Forehead. Use the slider on the Face Shape panel on the left side of the liquify photoshop window. You can also edit at the previews photo panel.
In Summary
Every tool on the Photoshop Liquify toolbar is unique and has its use to edit your photos. It will be better to know the use of individual tools and brushes separately. Don’t try to learn which part of the image edit with which tool. Every photo has a different texture of pixels. Selecting a perfect tool for editing is very important.
So we think our article will help you to learn the liquify tools and their uses. If you are reading this article to learn how to use liquify tools in Photoshop you should practice too. if you read many articles about a topic you can know very details but if you want to develop skills in a feature you have to practice.
FAQ
Where do I find the liquify Tool in Photoshop?
The Liquify tools place the main menu on the top of the screen. Click on ‘Filter’ on the main menu, a drop-down menu will appear. From the drop-down menu select Lquify. You can also use a shortcut on your keyboard. Press ‘Crt’ (win) or Command (Mac) + Shift + X on your keyboard together.
What does the Liquify Tool do?
The Liquify Tool is a transform tool that allows you to modify pixel layers by pushing and pulling the layers in the direction. With the liquify Photoshop filter you can push, pull, rotate, reflect, pucker, and bloat any area of a photo or an individual part of the photo. You can liquify only one layer at a time.
How to flip in Photoshop?
Sele the layer you want to flip. Press ‘Ctrl’ + ‘T’ (win), or ‘Command’ + ‘T’ (Mac). Then right-click on the activated area and choose Flip Horizontally or Flip Vertically.